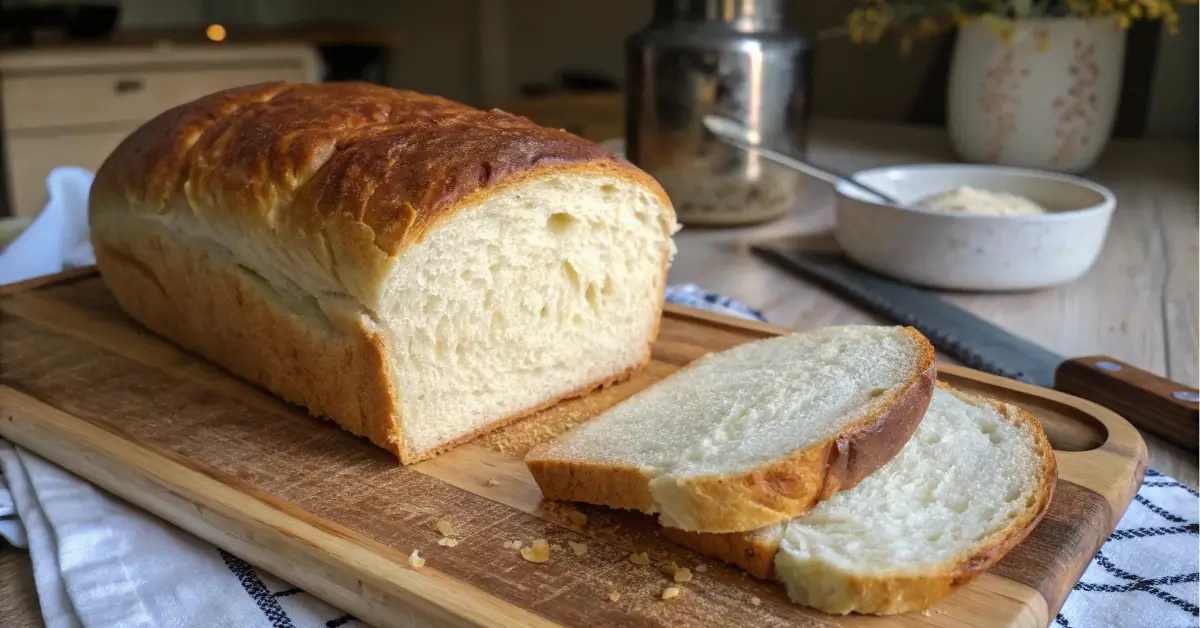
Making soft sourdough sandwich bread at home is more than just a baking project—it’s a satisfying way to create loaves that are tender, flavorful, and healthier than store-bought options. If you’ve been frustrated with tough crusts or chewy centers, you’re not alone. Getting that perfect soft texture with a golden, sandwich-ready slice can be tricky, especially when working with sourdough. This guide will walk you through everything you need to know to make soft sourdough sandwich bread with confidence.
From ingredients and tools to step-by-step instructions, proofing tips, and serving ideas, this guide is designed to help both beginner and experienced bakers master the art of baking soft sourdough bread in a loaf pan. Discover great ideas like how to make sourdough in a loaf pan at home, and by the time you finish this post, you’ll have a go-to recipe for all your sandwich and toast cravings.
Let’s dive into what sets this bread apart and why it should become a staple in your kitchen.
What Makes Soft Sourdough Sandwich Bread Unique
The Difference Between Sourdough and Regular Sandwich Bread
Sourdough bread is naturally leavened, which means it rises using wild yeast and lactic acid bacteria instead of commercial yeast. This process gives it its signature tangy flavor and improved digestibility. However, when it comes to sandwich bread, most people expect a soft, fluffy interior—something traditional crusty sourdough doesn’t typically deliver.
Soft sourdough sandwich bread strikes a balance between artisan baking and classic comfort. It uses the natural fermentation of sourdough while incorporating enriched ingredients like milk, butter, and honey to create a tender crumb and delicate crust. The result? A loaf that’s hearty yet soft, slightly tangy but incredibly kid-friendly.
| Bread Type | Leavening Agent | Texture | Ideal Use |
|---|---|---|---|
| Classic Sourdough | Wild yeast (starter) | Crusty, chewy | Toast, rustic meals |
| Sandwich Sourdough | Wild yeast (starter) | Soft, fluffy | Sandwiches, breakfast toast |
Looking for inspiration? Try our classic Southern banana wafer pudding for dessert after your sandwich meal!
Why Soft Texture Matters in Sandwich Breads
When it comes to sandwiches, texture is everything. Soft bread means it won’t overpower the fillings—it gently holds meats, veggies, or spreads without tearing apart. It also toasts up beautifully without turning hard or brittle.
A softer crumb also tends to be more enjoyable for kids or older adults who may struggle with hard crusts. Whether you’re packing lunches or making morning toast, having soft sourdough sandwich bread on hand means versatile meals with better flavor and texture.
Plus, sourdough’s natural fermentation breaks down gluten and phytic acid, making it easier on the gut than many conventional white breads. So not only are you getting better texture—you’re baking in better health.
Don’t miss our jello cake recipe for an easy, colorful treat to pair with your sandwich-based lunches!
Ingredients for the Perfect Soft Sourdough Sandwich Bread
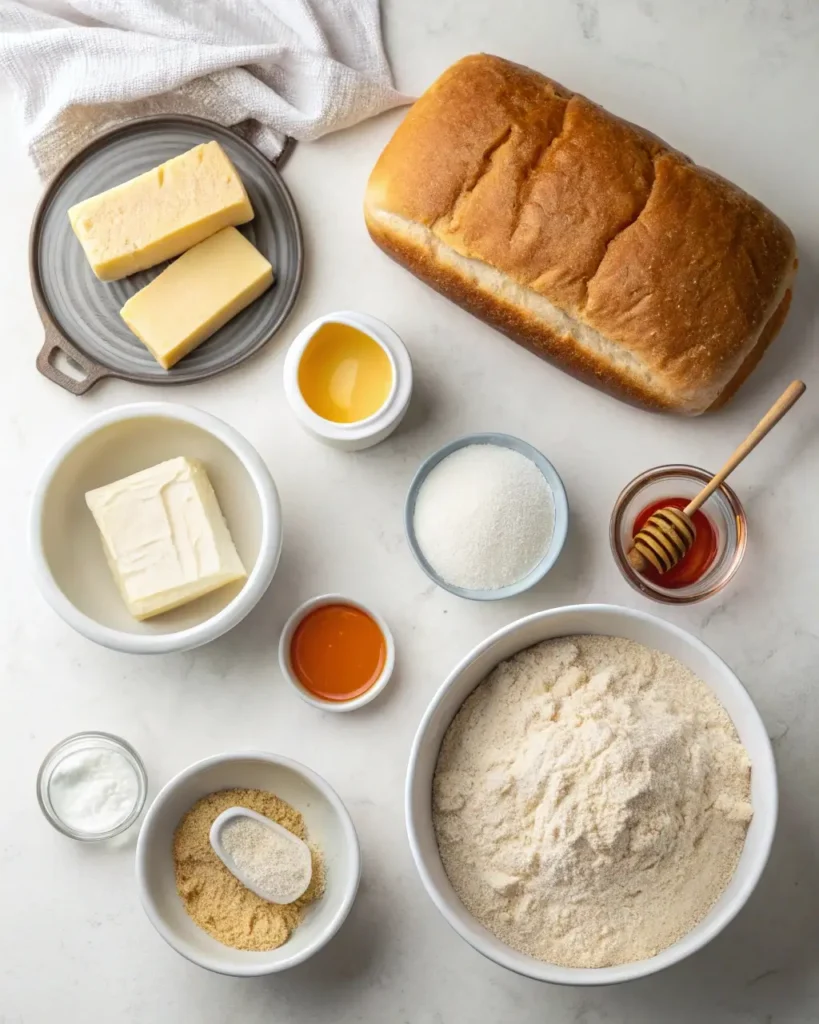
Creating a soft, flavorful sourdough loaf starts with high-quality ingredients. While sourdough bread traditionally uses just flour, water, salt, and a starter, the sandwich version includes a few additions that enrich the dough and enhance softness. Let’s break down exactly what you need to get bakery-level results right in your home kitchen.
Essential Pantry Ingredients and Why They Matter
To make soft sourdough sandwich bread, you’ll need the following base ingredients. Each one plays a specific role in shaping the bread’s final flavor, softness, and structure.
1. All-Purpose or Bread Flour
Bread flour contains more protein (gluten) than all-purpose flour, which gives the loaf its chew and structure. However, a mix of both can balance strength with tenderness—ideal for soft sourdough bread.
2. Milk or Milk Powder
Dairy adds richness and helps soften the crumb. Whole milk, evaporated milk, or even powdered milk are great additions. This creates that pillowy texture sandwich bread is known for.
3. Butter or Oil
Fat is key for tenderness. Melted butter brings flavor and softness, while neutral oils like sunflower or avocado make the dough more elastic and moist.
4. Honey or Sugar
A little sweetness supports yeast activity and gives the loaf a mild, comforting flavor. Honey also adds a touch of acidity, which works harmoniously with sourdough’s tang.
5. Salt
Don’t skip the salt—it balances flavors and regulates fermentation. Use fine sea salt or kosher salt for even distribution.
6. Active Sourdough Starter
The heart of your bread. Your starter should be bubbly, doubled in volume within 4-6 hours of feeding, and smell slightly fruity. This is the natural leavening agent that gives the bread rise and complex flavor.
| Ingredient | Role in Bread | Tip for Best Results |
|---|---|---|
| Bread Flour | Structure and strength | Mix with all-purpose for softness |
| Milk | Adds richness, softens texture | Warm milk improves dough hydration |
| Butter/Oil | Tenderizes the crumb | Add after autolyse for better texture |
| Honey | Feeds starter, enhances flavor | Balance with sourdough tang |
| Salt | Enhances taste, controls yeast | Mix after initial fermentation phase |
Choosing the Right Flour and Natural Starter for Soft Texture
The kind of flour you use can make or break the softness of your sourdough loaf.
- White Bread Flour is higher in protein and ideal for strong structure, which is useful when enriched ingredients (milk, butter) are added.
- All-Purpose Flour lowers the chewiness, making the loaf more tender and suitable for sandwiches.
- King Arthur Flour or Bob’s Red Mill Unbleached Flour are highly recommended for consistency and high quality.
Want a fun twist? Some bakers swap 10–15% of the flour with spelt or white whole wheat for added nutrition without sacrificing softness.
About Starters:
If you haven’t made one yet, start with a mixture of flour and water and feed it daily for 5–7 days. You can also use a rye starter or milk-fed starter for more flavor complexity and extra softness.
Check out The Best Cookies and Cream Protein Cookies while your dough is proofing—they make the perfect snack pairing!
Tools and Equipment You’ll Need to Bake This Bread
You don’t need a professional kitchen to bake incredible soft sourdough sandwich bread. With the right tools—and a few baker’s secrets—you can get bakery-quality results in your own oven. Whether you’re a beginner or already baking weekly, these tools will help you nail the perfect rise, crumb, and golden crust every time.
Loaf Pans, Thermometers, and Other Must-Haves
1. Loaf Pan (8.5 x 4.5 inches)
This is essential for shaping the dough into that familiar sandwich bread form. A nonstick metal pan works great, but you can also use ceramic or glass—just know the baking time may vary slightly.
Tip: Want softer crusts? Cover your loaf loosely with foil during the last 10 minutes of baking.
2. Kitchen Scale
Precision is key in sourdough baking. Measuring flour and water by weight ensures consistent hydration and results every time.
3. Digital Thermometer
Sourdough bread is done baking when the internal temp hits 190°F to 200°F. A quick-read thermometer ensures your loaf is perfectly baked—no more guessing.
4. Dough Scraper or Bench Knife
This helps with shaping and cleaning your work surface. It’s one of the cheapest tools that makes a massive difference in your dough handling.
5. Mixing Bowls with Covers
Proofing your dough in covered bowls keeps it from drying out and helps control temperature. Use glass or stainless steel bowls for easy observation and clean-up.
6. Silicone Brush (Optional)
Brushing the top of the loaf with melted butter right after baking softens the crust and adds flavor. Game-changer for sandwich-style softness.
| Tool | Purpose | Recommendation |
|---|---|---|
| Loaf Pan | Shape the dough evenly | USA Pan or OXO nonstick pans |
| Thermometer | Ensure proper doneness (190°F-200°F) | ThermoPro or Taylor Instant |
| Kitchen Scale | Accurate flour-to-water ratio | Escali or Ozeri |
| Bench Scraper | Easy shaping and cleanup | Stainless steel preferred |
| Proofing Bowl | Ferment dough evenly | Covered glass mixing bowls |
Tips for a Home Baker-Friendly Sourdough Setup
Not everyone has a dedicated baking space—and that’s totally fine. Here are smart hacks and setup ideas for baking soft sourdough sandwich bread in any home kitchen.
- Use Your Oven Light for Proofing: Keep your dough warm by turning on the oven light and placing your bowl inside. It creates a slightly warm proofing chamber (~75°F–78°F).
- Steam Without a Dutch Oven: Add a metal baking tray on the bottom rack while preheating your oven. Pour in hot water when you put in the loaf pan—this creates steam that mimics a bakery oven and keeps your crust soft.
- No Stand Mixer? No Problem. You can knead by hand using stretch-and-fold techniques every 30 minutes during bulk fermentation. It builds strength gently and evenly.
- Flour a Towel Instead of Using a Banneton: If you don’t have a proofing basket, line a bowl with a floured kitchen towel. It works just as well for shaping the dough during cold proof.
Don’t miss our Beef Short Ribs Oven Baked Recipe for a savory dinner idea to enjoy with your fresh sourdough sandwiches.
Step-by-Step Recipe: How to Make Soft Sourdough Sandwich Bread
Ready to bake the softest, fluffiest sourdough sandwich bread you’ve ever had? Here’s a foolproof, beginner-friendly recipe that balances sourdough tang with the pillowy texture of classic sandwich loaves. We’ll walk you through every step from starter to slicing.
Creating and Maintaining Your Starter
If you don’t already have an active sourdough starter, start here. Otherwise, skip to the dough mixing step below.
Day 1 to 5 Starter Feeding (If Needed):
| Day | Time | Instructions |
|---|---|---|
| 1 | Morning | Mix 1/2 cup flour + 1/4 cup water in a jar. Let sit uncovered. |
| 2-5 | Daily AM | Discard half, feed with same amounts. Stir. Cover loosely. |
By Day 5, your starter should double in size 4-6 hours after feeding and smell mildly tangy.
Soft Sourdough Sandwich Bread Recipe
YIELD: 1 loaf
PAN SIZE: 8.5 x 4.5 inches
BAKE TIME: 35–40 minutes
TOTAL TIME: ~24 hours (includes fermentation & proofing)
Ingredients:
- 1/2 cup (115g) active sourdough starter (100% hydration)
- 1 cup (240g) warm whole milk
- 2 3/4 cups (330g) bread flour (or a 50/50 mix with AP flour)
- 2 tbsp (30g) unsalted butter, softened
- 1 tbsp (20g) honey or sugar
- 1 tsp (6g) fine sea salt
Step 1: Mix the Dough
- In a large bowl, combine warm milk, sourdough starter, and honey.
- Stir in the flour until a shaggy dough forms.
- Let rest for 30 minutes (autolyse stage).
- Add salt and softened butter. Knead until dough is smooth and elastic (about 8 minutes by hand or 5 in a stand mixer).
Step 2: Bulk Fermentation (First Rise)
- Place the dough in a greased bowl. Cover and let rise for 4 to 6 hours at room temperature (72°F–75°F).
- Every hour, perform stretch and folds (4 total) to build strength without over-kneading.
Pro Tip: The dough should increase by about 60%–75%, not necessarily double. This gentle rise supports a soft crumb later.
Step 3: Shape the Loaf
- Lightly flour a clean surface. Gently deflate the dough and shape it into a rectangle.
- Roll tightly from one short end like a jelly roll.
- Pinch the seam closed and tuck the ends under.
- Place in a greased loaf pan.
Step 4: Final Proof (Second Rise)
- Cover loosely with plastic or a towel.
- Let rise for 3 to 4 hours at room temperature or refrigerate overnight (8–12 hours) for a slower, more complex flavor.
Proofing Tip: The dough should rise just above the pan’s edge when ready. A gentle poke should slowly spring back halfway.
Step 5: Bake the Loaf
- Preheat oven to 375°F (190°C). Place a tray of hot water in the bottom of the oven for steam.
- Bake for 35–40 minutes until the top is golden and internal temp is 190°F–200°F.
- Brush the hot loaf with butter for a softer crust (optional).
Step 6: Cool and Slice
- Remove the loaf from the pan after 10 minutes.
- Let it cool completely on a wire rack before slicing to lock in softness.
| Step | Description | Time | Key Tip |
|---|---|---|---|
| 1 | Mix & Autolyse | 40 min | Don’t skip resting before salt |
| 2 | Bulk Fermentation | 4–6 hrs | Use stretch and folds for texture |
| 3 | Shape & Pan | 15 min | Keep seam side down in pan |
| 4 | Final Proof | 4 hrs+ | Overnight fridge proof = flavor |
| 5 | Bake | 35–40 min | Use butter after baking for crust |
| 6 | Cool | 1 hour | Prevents gummy texture inside |
Want to explore more flavorful, soft-textured recipes? Don’t miss our Easy Chicken & Cabbage Recipe Ideas for a perfect lunch to enjoy with your fresh sourdough bread.

Fermentation and Proofing – Secrets for Softness
When it comes to baking truly soft sourdough sandwich bread, the techniques you use during fermentation and proofing can make or break your loaf. These stages are where gluten structure develops, gases form, and flavor intensifies. Get these steps right, and you’ll be rewarded with a light, airy texture and deep, complex taste—every single time.
How Fermentation Time Impacts Texture
Fermentation is the process where wild yeast and bacteria in your starter feed on sugars in the dough, producing gas (carbon dioxide), acids, and flavor compounds. This process does more than make your bread rise—it dramatically affects the softness and digestibility of your bread.
Short Fermentation (4–6 hours at room temp):
- Yields a more mild flavor.
- Encourages a tender, soft texture.
- Ideal if you want a slightly sweet sandwich-style loaf.
Long Fermentation (cold proofing for 12–18 hours):
- Builds deeper flavor and more sourness.
- Allows natural gluten development for better structure.
- May yield slightly chewier results—but can still be soft if enriched.
Pro Tip: You can combine both methods. Try fermenting at room temp for 4–5 hours, then placing the dough in the fridge overnight. This balances softness with flavor.
| Fermentation Style | Time | Texture Result | Flavor Profile |
|---|---|---|---|
| Short, Warm | 4–6 hours | Extra soft, fluffy | Mild, slightly sweet |
| Long, Cold (Retarded) | 12–18 hours | Structured, chewy-soft | Tangy, complex |
| Combo (Warm + Cold) | 6 + 12 hrs | Best of both worlds | Balanced, slightly sour |
Warm vs Cold Proofing: What’s Best for Sandwich Bread?
Proofing is the final rise before baking. This is where dough expands to its full potential, forming a smooth, even crumb.
Warm Proof (3–5 hours at 75°F–80°F):
- Faster results.
- Promotes a soft, bouncy crumb ideal for sandwiches.
- Keep dough covered to prevent drying.
Cold Proof (Overnight at 38°F–42°F):
- Allows flavor to develop slowly.
- Easier to handle and score (if needed).
- Great if you want to bake fresh in the morning.
If your goal is soft sourdough sandwich bread with a fluffy texture and mild flavor, warm proofing at room temperature is often the most reliable method—especially if using milk and butter, which support a tender crumb.
Common Proofing Mistakes to Avoid
- Underproofing:
Your bread may bake dense or split awkwardly. The dough should rise to just above the pan rim and pass the “poke test.” - Overproofing:
Results in a collapsed loaf or overly sour flavor. Avoid letting dough double in size. 80% rise is ideal for sandwich loaves. - Dry Surface:
Always cover your dough with plastic wrap or a damp towel during proofing. Drying skin causes crust formation and ruins oven spring.
Looking for more tips on flavor-packed ideas? Discover great ideas like smoked cream cheese seasoning for savory dishes while your dough is rising.
Pro Tip: Use a Windowpane Test
Before shaping, stretch a small piece of dough between your fingers. If it forms a thin, see-through membrane without tearing, your gluten structure is developed and ready for shaping and final proofing.
Baking Tips for Soft, Golden Sourdough Loaves
You’ve mixed, fermented, and proofed your dough like a pro. Now it’s time to bake! This final step plays a huge role in determining the crust, crumb, and overall softness of your sourdough sandwich bread. A few temperature tweaks, steam tricks, and finishing touches can elevate your loaf from good to bakery-quality.
Ideal Oven Temperature and Steam Techniques
Most soft sourdough sandwich bread recipes bake best at 375°F (190°C) for 35–40 minutes. This temperature is hot enough to ensure a well-risen loaf and golden crust, but not so hot that it hardens the exterior before the inside is fully cooked.
Use Steam to Soften the Crust
Unlike crusty artisan boules, sandwich bread benefits from a moist baking environment. Steam slows down crust formation, allowing the loaf to expand more and remain tender.
How to create steam in a regular oven:
- Place a metal baking tray on the lowest rack while the oven preheats.
- Just before loading your loaf pan, pour 1–2 cups of boiling water into the tray.
- Quickly close the oven door to trap the steam.
This easy method mimics the effects of a steam-injected professional oven and gives your loaf that soft, bakery-style crust perfect for slicing.
Bonus Tip: Use a baking stone or steel under the loaf pan if you have one—it helps distribute heat evenly and creates a better bottom crust.
How to Tell When It’s Perfectly Baked
Don’t rely only on time! Here are three foolproof ways to know your loaf is fully baked:
- Internal Temperature:
Use a digital thermometer—your loaf is done when it reaches 190°F to 200°F internally. - Tap Test:
Tap the bottom of the loaf (once it’s out of the pan). It should sound hollow. - Crust Color:
Look for a light golden brown crust. You don’t want it too dark or crunchy for sandwich bread.
How to Keep the Crust Soft After Baking
One of the best tricks for keeping your sourdough loaf soft is brushing it with melted butter immediately after baking. Not only does it add flavor, but it also prevents the crust from firming up as it cools.
Other post-bake softness boosters:
- Cover with a clean towel while cooling to trap residual steam.
- Avoid slicing too soon. Wait at least an hour before slicing to prevent a gummy interior.
Check out 25 Healthy Chicken Breast Recipes for a sandwich filler that pairs beautifully with your warm, soft homemade bread.
Common Baking Issues & Fixes
| Problem | Likely Cause | Solution |
|---|---|---|
| Crust too hard | Oven too hot or no steam | Lower temp to 375°F and add steam tray |
| Gummy interior | Underbaked or sliced too early | Bake until 190°F and cool completely |
| Pale color | Underbaked or sugar too low | Add 1 tsp honey and extend bake by 5 mins |
| Flat loaf | Overproofed or weak gluten | Watch final rise closely and fold dough |
Storing and Freezing Your Sourdough Sandwich Bread
You’ve just baked the perfect soft sourdough sandwich bread—now let’s keep it that way. Proper storage is key to preserving the loaf’s moisture, texture, and flavor. And if you want to bake ahead for busy weeks, freezing is your best friend. Here’s exactly how to do both without sacrificing softness.
How to Store to Keep the Bread Soft Longer
Unlike store-bought sandwich bread full of preservatives, homemade sourdough needs a little care when it comes to storage. The good news? Sourdough’s natural acidity helps extend shelf life more than typical yeast bread.
Room Temperature Storage (Up to 4 Days)
- Wrap in a clean kitchen towel or beeswax wrap. This keeps the crust from drying out while letting the bread breathe. Avoid plastic unless it’s for short-term use.
- Place in a bread box or paper bag. This helps regulate moisture without trapping too much humidity.
- Avoid the fridge. Refrigeration speeds up staling and will make your bread go dry and crumbly.
Slice as Needed
Whole loaves stay fresher longer. If you don’t plan to use the entire loaf right away, slice only what you need to keep the rest moist.
Freezing Sourdough Loaves Without Losing Texture
Freezing sourdough sandwich bread is the best way to preserve its softness and taste for weeks. Here’s how to do it right.
Option 1: Freeze the Whole Loaf
- Let the loaf cool completely after baking.
- Wrap tightly in plastic wrap, then foil, or place in a freezer-safe bag.
- Label with date and freeze for up to 3 months.
To thaw: Place the wrapped loaf on the counter for a few hours or overnight. Reheat at 300°F for 10 minutes if you want it warm and fresh again.
Option 2: Freeze in Slices
- Slice the loaf once fully cooled.
- Lay slices on a baking sheet and freeze for 1 hour (flash freeze).
- Transfer frozen slices to a zip-lock freezer bag.
To thaw: Just pop slices directly into the toaster or leave at room temperature for 10–15 minutes. This method is perfect for daily sandwiches or toast.
| Storage Method | Duration | Best For | Pro Tip |
|---|---|---|---|
| Room Temp, Wrapped | 3–4 days | Daily sandwiches or toast | Use beeswax wrap for breathability |
| Freezer, Whole Loaf | Up to 3 mo. | Make-ahead planning | Double wrap to prevent freezer burn |
| Freezer, Sliced | Up to 3 mo. | Quick breakfasts, kids’ lunches | Flash freeze before bagging |
Bonus Tip: Reheat slices in a toaster or skillet with a bit of butter for a fresh-from-the-oven feel—even weeks after baking!
Don’t miss our Easy & Delicious Chicken Cabbage Recipes for a sandwich filler that pairs perfectly with frozen-thawed sourdough slices.
Serving Suggestions & Recipe Pairings
You’ve baked the perfect loaf of soft sourdough sandwich bread—now it’s time to enjoy it! This bread is incredibly versatile and works for every meal of the day. Whether you’re crafting a stacked deli sandwich, a toasted breakfast bite, or a gourmet grilled cheese, this loaf delivers.
Let’s look at some creative, crowd-pleasing ways to serve and enjoy your homemade sourdough.
Best Sandwich Ideas Using This Bread
Sourdough sandwich bread has the structure to hold hearty fillings, yet it’s soft enough to melt in your mouth. Try these combinations for next-level sandwiches:
1. Classic Turkey & Avocado Club
- Sourdough slices toasted lightly
- Oven-roasted turkey breast
- Creamy avocado slices
- Crisp lettuce and tomato
- A smear of aioli or mayo
2. Grilled Veggie & Hummus Delight
- Warm sourdough layered with grilled zucchini, bell peppers, and eggplant
- Thick spread of garlic hummus
- Arugula and a dash of lemon juice
3. Breakfast Egg & Cheese Melt
- Toasted sourdough with a runny fried egg
- Sharp cheddar or gouda
- Crispy bacon or sautéed spinach
4. Tuna Melt
- Open-face style with a scoop of tuna salad
- Sourdough broiled with cheese until bubbly and golden
| Sandwich Type | Pairing Notes |
|---|---|
| Turkey & Avocado Club | Protein-packed, works for meal prep |
| Veggie & Hummus | Vegan-friendly, light but filling |
| Egg & Cheese Melt | Ideal for busy breakfasts |
| Tuna Melt | Hearty comfort food for chilly days |
Looking for inspiration? Try our Banana Wafer Pudding as a nostalgic dessert to follow your savory sandwich.
Creative Toast and Breakfast Ideas
This bread makes breakfast shine. Its slightly tangy flavor pairs beautifully with both sweet and savory toppings. Toast it up, dress it down—however you serve it, it’s delicious.
Avocado Toast with a Twist
- Spread ripe avocado on sourdough toast
- Top with feta, chili flakes, and a soft-boiled egg
Cinnamon Sugar Toast
- Butter your slices generously
- Sprinkle with cinnamon and sugar
- Toast until golden and bubbling
French Toast Upgrade
- Dip sourdough slices in a mixture of eggs, milk, and cinnamon
- Fry until golden
- Serve with berries and maple syrup
Sourdough PB&J
- Toasted slices with natural peanut butter and raspberry jam
- Add sliced bananas for an energy-packed snack
Perfect Pairings for Any Time of Day
Sourdough bread also complements soups, salads, and even light pastas. Here are some pairings to consider:
| Dish | Pair With Sourdough Bread as… |
|---|---|
| Tomato Basil Soup | Toasted sourdough wedges for dipping |
| Chicken Caesar Salad | Croutons made from cubed sourdough |
| Creamy Pasta Alfredo | Garlic sourdough toast on the side |
| Roasted Veggie Platter | Sourdough brushed with herbed olive oil |
Don’t miss our Jello Cake Recipe for a fun, vibrant dessert to cap off a sourdough-centered meal.

Troubleshooting & Pro Tips for Consistent Results
Even experienced bakers occasionally run into challenges with sourdough. But don’t worry—most issues with soft sourdough sandwich bread are fixable with a few tweaks. This section breaks down the most common problems and offers pro tips to help you troubleshoot and refine your technique.
Common Mistakes When Baking Sourdough Sandwich Bread
Let’s look at some typical sourdough issues and what causes them:
1. Dense or Gummy Loaf
- Cause: Underproofing, low hydration, or slicing too early.
- Fix: Make sure your dough has risen at least 60–75% during bulk fermentation and proof. Allow your loaf to cool fully (1 hour minimum) before slicing.
2. Overproofed Dough
- Cause: Letting dough rise too long, especially in a warm environment.
- Fix: Use the poke test: if a gentle poke doesn’t bounce back at all, it’s overproofed. Reduce proof time or chill the dough to slow fermentation.
3. Crumb Too Tight (Not Airy)
- Cause: Not enough gluten development or underhydration.
- Fix: Use a high-protein bread flour, incorporate stretch-and-folds, and aim for at least 70% hydration in the dough.
4. Crust Too Hard or Dry
- Cause: Baking without steam, too high oven temp, or skipping post-bake butter.
- Fix: Add steam to your oven, bake at 375°F, and brush melted butter on top immediately after baking.
5. Flat or Collapsed Loaf
- Cause: Overproofing or weak dough shaping.
- Fix: Build dough strength during fermentation, shape tightly, and avoid letting the final proof go too far.
Expert Tips for Consistently Soft Loaves
- Use Milk and Butter in the Dough
Enriched ingredients create a softer crumb and help keep your bread fresh longer. - Master the Bulk Fermentation Stage
The dough should feel pillowy, elastic, and increase by about 60–75%. Under- or over-proofed dough won’t bake up soft. - Avoid Rushing Cooling
Slicing hot bread may lead to a gummy interior. Always cool for at least 1 hour before cutting. - Slice with a Serrated Bread Knife
Protect that soft crumb! A sharp serrated knife makes clean slices without crushing the loaf. - Use a Digital Thermometer
Internal temp between 190°F and 200°F ensures your bread is fully baked without drying out. - Keep a Baking Journal
Track rise times, flour types, hydration, and baking conditions. This helps you replicate success and adjust when needed.
Check out our Sourdough in Loaf Pan Guide for more helpful advice on shaping and pan baking techniques.
Frequently Asked Questions (FAQs)
How do you make sourdough sandwich bread softer?
To make sourdough sandwich bread softer, enrich your dough with ingredients like milk, butter, and a small amount of sugar or honey. These additions tenderize the crumb and help retain moisture. Also, bake at a lower temperature (around 375°F) with steam in the oven and brush the crust with melted butter immediately after baking to lock in softness.
Can I use whole wheat flour for soft sourdough sandwich bread?
Yes, you can substitute part of the white flour with whole wheat—usually 20–30%—without losing softness. Whole wheat adds a nutty flavor and boosts nutrition, but be sure to increase hydration slightly and consider adding more butter or milk to maintain a tender texture.
How long should I proof sourdough sandwich bread?
Proofing time depends on temperature, but typically ranges from 3–5 hours at room temperature. You can also cold proof the shaped loaf overnight (8–12 hours) in the refrigerator for deeper flavor. The dough should rise just above the loaf pan and pass the poke test before baking.
Why is my sourdough sandwich bread dense and chewy?
A dense and chewy loaf often results from underproofing, using too little hydration, or insufficient gluten development. Ensure your dough has a smooth, elastic texture before final shaping, and let it rise adequately during both bulk fermentation and proofing.
Can you make sourdough sandwich bread without a Dutch oven?
Absolutely. Soft sourdough sandwich bread is typically baked in a standard loaf pan, not a Dutch oven. For steam, place a tray of hot water on the lower oven rack during baking to create a humid environment. This keeps the crust tender and helps with oven spring.
Is sourdough sandwich bread healthier than regular white bread?
Yes. Sourdough bread is naturally fermented, making it easier to digest and often lower on the glycemic index compared to regular white bread. It also retains more nutrients due to the breakdown of phytic acid during fermentation. When combined with whole ingredients like milk, butter, or whole wheat flour, it’s both flavorful and nourishing.
Conclusion: Master the Art of Soft Sourdough Sandwich Bread
Soft sourdough sandwich bread brings together the best of both worlds—the deep flavor of wild fermentation and the pillowy softness of classic sandwich loaves. Whether you’re crafting a savory turkey melt, a loaded veggie toast, or simply slathering a warm slice with butter, this bread transforms every bite into a comfort-filled experience.
By using enriched ingredients, mastering fermentation and proofing, and following precise baking techniques, you can achieve bakery-quality softness right from your kitchen. Plus, with smart storage and freezing tips, your loaf stays fresh and delicious for days—or weeks.
Want more comfort food classics to pair with your bread? Don’t miss our Easy Salmon Patties Recipe—they’re flavorful, freezer-friendly, and perfect for sandwich nights.
PrintSoft Sourdough Sandwich Bread: The Best Homemade Recipe for Fluffy & Flavorful Loaves

This soft sourdough sandwich bread is fluffy, tender, and naturally fermented for flavor and gut health. A bakery-style loaf that’s perfect for toast, sandwiches, and meal prep.
- Prep Time: 30 minutes
- Cook Time: 35–40 minutes
- Total Time: 24 hours (includes fermentation and proofing)
- Yield: 1 loaf (about 12 slices)
- Category: Bread
- Method: Baking
- Cuisine: American
- Diet: Vegetarian
Ingredients
- 1/2 cup (115g) active sourdough starter (100% hydration)
- 1 cup (240g) warm whole milk
- 2 3/4 cups (330g) bread flour (or a 50/50 mix with all-purpose flour)
- 2 tbsp (30g) unsalted butter, softened
- 1 tbsp (20g) honey or sugar
- 1 tsp (6g) fine sea salt
Instructions
- In a large bowl, mix warm milk, sourdough starter, and honey.
- Add flour and stir until a shaggy dough forms. Rest for 30 minutes.
- Add salt and softened butter. Knead until smooth and elastic.
- Place dough in a greased bowl. Cover and ferment at room temp for 4–6 hours, stretching and folding every hour.
- Shape into a loaf and place into a greased 8.5×4.5-inch pan.
- Cover and let proof at room temp for 3–5 hours, or overnight in the fridge.
- Preheat oven to 375°F. Place a tray of boiling water in the bottom rack for steam.
- Bake the loaf for 35–40 minutes or until golden and internal temp is 190°F–200°F.
- Brush with melted butter and cool for 1 hour before slicing.
Notes
- Use high-protein bread flour for better rise and structure
- For deeper flavor, use the cold-proof method (refrigerate shaped dough overnight)
- Optional: Add 1 tbsp milk powder to enrich the dough even more
- This recipe works well with 20% whole wheat flour substitution