Looking for a sourdough sandwich loaf recipe that gives you that dreamy balance of soft texture, tangy flavor, and sliceable perfection? You’re in the right place. Unlike rustic artisan sourdough with a crunchy crust and open crumb, a sourdough sandwich loaf is all about softness, structure, and smooth slicing—ideal for everything from grilled cheese to stacked deli sandwiches.
In this complete guide, you’ll learn the difference between sandwich-style and traditional sourdough bread, what ingredients and tools make the magic happen, and how to master the step-by-step baking process with ease. Whether you’re new to sourdough or looking to level up, this article brings you foolproof techniques, delicious variations, pro troubleshooting tips, and storage advice that’ll keep your loaf fresher for longer.
Discover great ideas like this in our guide to perfect homemade sourdough in a loaf pan.
Understanding the Sourdough Sandwich Loaf Recipe
What Makes a Sourdough Sandwich Loaf Different from Artisan Sourdough?
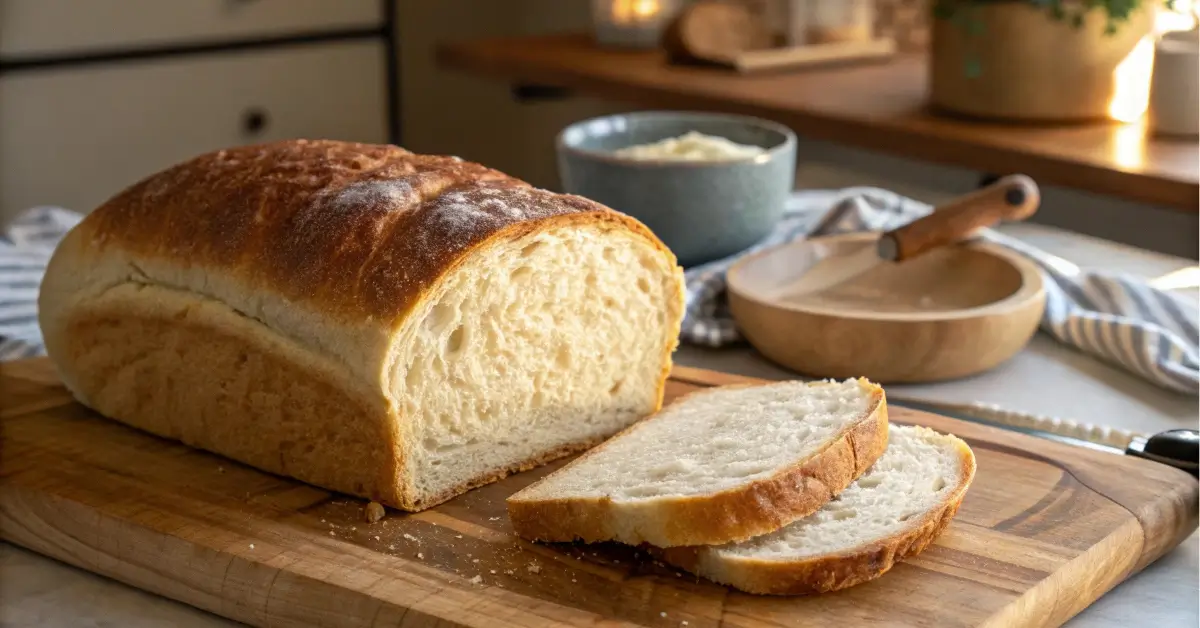
When most people hear “sourdough,” they think of crusty artisan rounds with big holes and chewy texture. But the sourdough sandwich loaf flips that idea. It’s soft, evenly structured, and baked in a loaf pan—perfect for slicing. The tangy flavor remains, but the crust is tender, and the crumb is tight, making it more versatile for everyday meals.
The key differences?
| Feature | Artisan Sourdough | Sandwich Loaf Style |
|---|---|---|
| Shape | Round (boule or batard) | Rectangular loaf pan |
| Texture | Open, chewy crumb | Soft, uniform crumb |
| Crust | Thick, crackly | Soft or lightly crispy |
| Use | Tearing, dipping, plating | Slicing, sandwiches, toasts |
This recipe is tailored to home bakers looking for a loaf that’s just as flavorful as the classic sourdough—but way more practical for daily use.
Benefits of Baking a Soft-Textured, Sliceable Sourdough Loaf at Home
Besides the unbeatable flavor, baking your own sourdough sandwich loaf gives you total control over ingredients, fermentation, and nutrition. Here’s why this recipe is worth your time:
- Healthier: Skip the additives in store-bought sandwich bread
- Customizable: Adjust hydration, grains, and flour to your liking
- Cost-effective: Bake two loaves for the price of one bakery loaf
- Better for sandwiches: No more crumbly slices or torn fillings
Plus, if you’re feeding kids or prepping lunches ahead of time, a soft sourdough loaf is a total game-changer. It holds up beautifully, freezes well, and toasts like a dream.
Don’t miss our chicken cabbage recipes for a light and nutritious filling idea perfect for sourdough sandwiches.
Essential Ingredients for the Best Sourdough Sandwich Loaf Recipe
Choosing the Right Flour: Bread Flour vs. All-Purpose Flour
The flour you choose plays a major role in how your sourdough sandwich loaf turns out. Want a loaf with good rise, tender texture, and just the right chew? Then start with flour that supports gluten development—bread flour is your best bet.
| Flour Type | Protein % | Best For | Texture Outcome |
|---|---|---|---|
| Bread Flour | 12–14% | Chewy, well-structured sandwich loaf | Soft crumb with a sturdy rise |
| All-Purpose Flour | 10–12% | Softer loaves, lower rise | Slightly denser, more tender crumb |
Bread flour’s higher protein content creates more gluten, which gives your loaf that classic sandwich structure—great for slicing and piling on fillings without falling apart.
If you’re going for a softer, more cake-like texture, you can experiment with all-purpose flour or a 50/50 mix. Just keep in mind: you’ll get less oven spring and a slightly flatter top.
Want more texture? Mix in a bit of whole wheat flour or rye flour for a richer, nuttier flavor.
Importance of Sourdough Starter Quality and Hydration
Your sourdough starter is the heart of this recipe. A bubbly, active starter ensures proper rise and fermentation. Here’s what to look for:
- Strong rise within 4–6 hours of feeding
- Sweet, tangy smell (not overly acidic or alcoholic)
- Float test: A spoonful should float in water when ready
Hydration also plays a role. Most sandwich loaf recipes use a starter at 100% hydration (equal parts flour and water). This makes your dough easier to handle, especially when shaping into a loaf pan.
Want to feed your starter right? Stick to a 1:1:1 ratio—equal parts starter, flour, and water by weight. And remember, fresh is best. Don’t use starter that’s been chilling in the fridge for weeks unless you refresh it at least twice.
Check out this shaved beef steak guide for sandwich filling ideas that pair beautifully with your sourdough loaf.
Tools You’ll Need to Bake Sourdough Sandwich Bread
Recommended Loaf Pans, Mixers, and Baking Utensils
While sourdough baking is rustic by nature, having the right gear makes a big difference—especially when aiming for that perfect sourdough sandwich loaf recipe. Here’s a breakdown of tools that set you up for success:
| Tool | Why It’s Important | Recommended Specs |
|---|---|---|
| Loaf Pan | Gives your bread its shape and structure | 9×5” nonstick metal or glass |
| Mixing Bowls | For mixing and bulk fermentation | Glass or ceramic preferred |
| Dough Scraper | Helps with kneading and shaping | Bench scraper with metal blade |
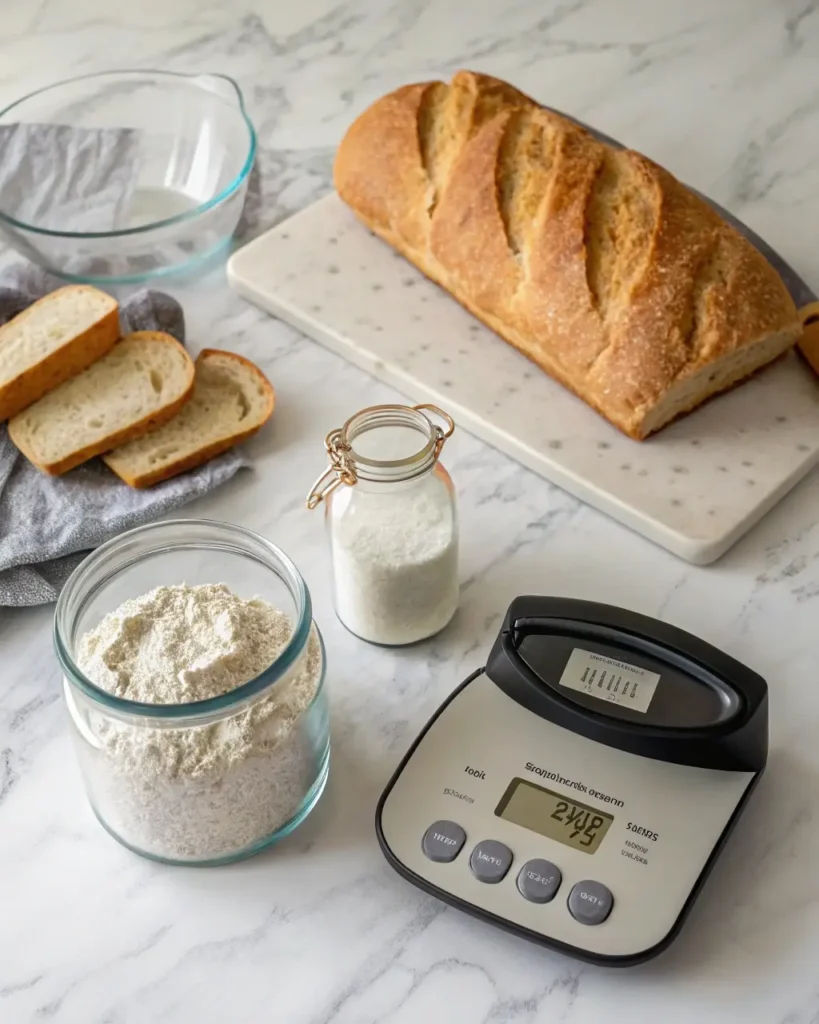
| Digital Scale | Ensures accurate flour, water, and starter ratios | Measures in grams for precision |
| Proofing Container | Helps monitor rise during bulk fermentation | Clear with measurement markers |
| Stand Mixer (optional) | Makes kneading hands-free | Dough hook attachment |
| Lame or Sharp Knife | Used for scoring before baking | Helps control oven spring |
The loaf pan is arguably the most critical tool here. Unlike round artisan loaves that can be baked free-form on a stone, sandwich loaves need structure. A 9×5-inch metal pan offers even heat and nice browning, while a glass pan helps you visually monitor doneness.
And don’t overlook the value of a digital scale. Cups can lie, but grams don’t. Precision matters in sourdough baking—especially when it comes to hydration levels.
Ideal Kitchen Conditions for Fermentation and Proofing
Sourdough fermentation loves consistency. To make your sourdough sandwich loaf recipe foolproof, create the ideal environment:
- Room temperature between 72°F and 78°F is ideal
- Use a proofing box or oven with the light on if your kitchen runs cool
- Cover dough with a damp towel or plastic wrap to prevent drying out
- Avoid drafts or sudden temp changes during final proofing
If you live in a cooler climate or want more consistency, a dough proofer is a worthy investment. But if you’re just getting started, pop your dough in the oven (turned off) with the light on—it mimics a perfect fermentation chamber.
Looking for inspiration? Try these short rib recipes to enjoy alongside a warm slice of sourdough sandwich bread.
Step-by-Step Instructions for a Foolproof Sourdough Sandwich Loaf
Preparing the Starter and Autolyse Process Explained
Before any dough gets mixed, your sourdough starter needs to be active and bubbly. If it’s been stored in the fridge, give it 2–3 feedings over 24–36 hours to get it peaking.
Starter Prep Tips:
- Feed at a 1:1:1 ratio (starter:flour:water by weight)
- Let sit in a warm spot until doubled and bubbly (4–6 hours)
- Use the “float test” – drop a spoonful into water. If it floats, it’s ready
Once your starter is good to go, begin the autolyse process, where flour and water are mixed before adding the starter and salt. This boosts gluten development and improves the dough’s texture.
Basic Autolyse Process:
- In a large bowl, combine:
- 500g bread flour
- 350g water
- Mix by hand until no dry spots remain
- Cover and rest for 30–60 minutes
This rest period jumpstarts the gluten network before kneading, giving you a stronger, stretchier dough without overworking it.
Bulk Fermentation, Shaping, and Final Proofing Tips
After autolyse, it’s time to mix in your starter and salt. Then the dough enters bulk fermentation, where it rises and builds flavor.
Bulk Fermentation (4–5 hours at room temp)
- Add 100g active starter and 10g salt to the autolysed dough
- Mix until fully combined (stretch and fold or knead for 5–7 mins)
- Perform 3–4 stretch-and-folds every 30 minutes
- Cover and let rise until dough increases by 50% and has air bubbles
Once bulk fermentation is complete, it’s time to shape.
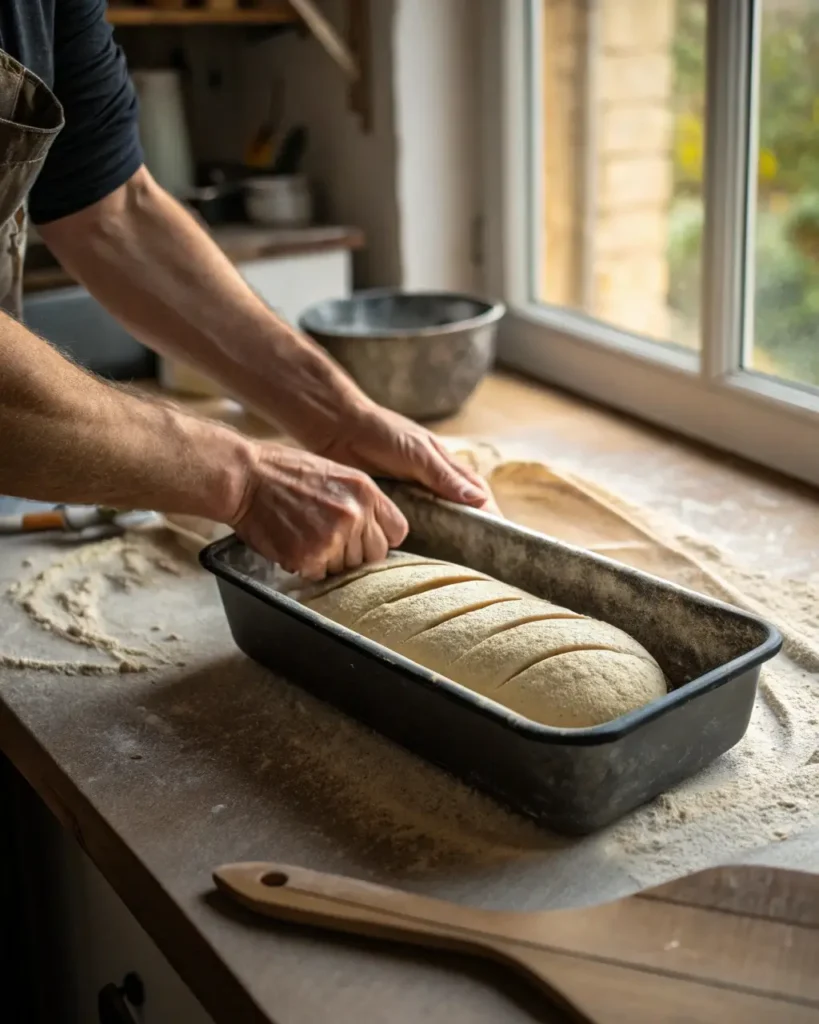
Shaping for a Loaf Pan
- Turn dough onto a lightly floured surface
- Press into a rectangle, then fold like an envelope
- Roll it up tightly and place into a greased 9×5” loaf pan
- Cover with a damp cloth or wrap and proof for 1–2 hours at room temp
OR
Cold-proof overnight in the fridge for extra flavor (8–12 hrs)
The final proof should leave the dough puffy but not over-proofed—aim for it to rise to just under the top of the pan.
Don’t miss our banana wafer pudding recipe for a sweet treat to enjoy after your sourdough masterpiece.
Baking Techniques to Master the Perfect Sandwich Loaf
Scoring, Baking Temperature, and Steam Techniques
So, your dough is proofed and resting in its pan. Now it’s time to bake—but a few final touches make a big difference in the final result of your sourdough sandwich loaf recipe.
Scoring:
Unlike rustic loaves that use decorative scoring, sandwich loaves just need a single, shallow slash down the center. This gives steam a place to escape and helps direct oven spring (rise).
- Use a sharp lame or serrated knife
- Make one clean cut, about ¼ inch deep
- Score just before putting it in the oven
Baking Temperature:
To get a nice rise and even crumb, use a two-stage baking method.
- Preheat oven to 450°F (232°C)
- Place loaf in center of oven and bake for 20 minutes uncovered
- Reduce temp to 400°F (204°C) and bake for another 20–25 minutes
Optional Steam Method:
Steam in the first 10 minutes can improve oven spring and give a silkier crust.
- Place a metal pan on the oven’s bottom rack while preheating
- Pour a cup of hot water into the pan just as the loaf goes in
- Close the oven door quickly to trap the steam
Avoid overbaking—a dry sandwich loaf can lose its soft charm fast. If your crust browns too quickly, cover the top loosely with foil.
Internal Temperature and How to Avoid a Gummy Loaf
Wondering how to tell when your loaf is truly done? The gold standard is using a digital thermometer.
| Bread Doneness Check | Target Temperature |
|---|---|
| Fully baked sourdough | 195–200°F (90–93°C) |
| Slightly chewy inside | 190°F |
Once done, remove the loaf from the pan immediately and cool it on a wire rack for at least 1 hour. Cutting too early can result in a gummy, compressed texture, even if it’s fully baked.
Avoid a gummy loaf by:
- Baking to the correct internal temp
- Allowing full cooling before slicing
- Not under-proofing the final dough
Learn more about pairing this loaf with comforting dishes like our chicken cabbage recipe, which is light, flavorful, and perfect between slices.
How to Store and Freeze Your Sourdough Sandwich Loaf
Storing Fresh Bread Without Losing Moisture
Once you’ve baked the perfect sourdough sandwich loaf, the last thing you want is for it to go stale too fast. Sourdough naturally stays fresher longer than commercial yeast breads, but smart storage makes a difference.
Best Storage Tips:
- Let the loaf cool completely before storing
- Store at room temperature (not the fridge!)
- Use a bread box, paper bag, or wrap in a clean towel
- Avoid airtight containers unless freezing — they trap moisture and cause sogginess
How Long Does It Last?
Properly stored, your sourdough sandwich loaf stays fresh for 4–5 days at room temp. After that, the crust may harden slightly but the interior can still be revived with toasting.
For easy access, slice the loaf once cooled and wrap it loosely in parchment before placing it in a bread bag or reusable beeswax wrap.
Best Practices for Freezing and Reheating Sourdough Loaves
Want to make your sourdough sandwich loaf ahead of time? Good news—this bread freezes beautifully when done right.
Freezing a Whole Loaf:
- Cool the loaf completely
- Wrap tightly in plastic wrap or foil
- Place in a freezer bag
- Freeze for up to 3 months
Freezing in Slices:
- Slice the cooled loaf
- Place parchment paper between slices
- Freeze flat in a zip-top bag
This method lets you pull out one or two slices at a time without thawing the entire loaf—perfect for busy mornings or lunch prep.
Reheating Tips:
- Let slices thaw at room temp for 30 minutes
- Or toast directly from frozen
- To refresh a whole loaf, bake at 350°F for 10–12 minutes
Looking for inspiration? Try this smoky cream cheese recipe as a bold sandwich spread to pair with your thawed sourdough slices.
Creative Variations on the Classic Sourdough Sandwich Loaf Recipe
Whole Wheat, Multigrain, and Herb-Infused Options
Once you’ve mastered the classic sourdough sandwich loaf recipe, the real fun begins—customizing it! You can tweak the texture, boost the nutrition, or enhance the flavor with a few simple ingredient swaps and additions.
Whole Wheat Sourdough Loaf
Swap 25–50% of the bread flour for whole wheat flour. It adds fiber, nutty depth, and a rustic finish. Keep in mind that whole wheat absorbs more water, so slightly increase hydration (add 10–20g more water) if needed.
Multigrain Power Loaf
Add rolled oats, flaxseeds, sunflower seeds, or a store-bought 5-grain mix for crunch and nutrition. Toast seeds lightly before mixing them into the dough during the first stretch and fold for even distribution.
Herb & Garlic Sourdough Loaf
Infuse your sandwich loaf with fresh rosemary, thyme, garlic, or even sun-dried tomatoes. Chop herbs finely and mix them in after autolyse. This works great for savory sandwiches and adds an aromatic twist.
Pro tip: Reduce add-ins to no more than 20% of the flour weight to avoid overloading your dough.
Here’s a quick variation chart for ideas:
| Variation Type | Add-Ins | Best Use |
|---|---|---|
| Whole Wheat | Replace up to 50% flour | Nutty, high-fiber loaf |
| Multigrain | Oats, flax, millet, sunflower seeds | Hearty, nutritious sandwiches |
| Herb & Savory | Garlic, rosemary, chives, sundried tomato | Gourmet grilled sandwiches |
| Sweet Variation | Cinnamon, raisins, honey, cardamom | French toast, breakfast loaf |
Sweet Sandwich Loaf Twists with Cinnamon, Honey, and Raisins
Sourdough isn’t just for savory. With a few pantry staples, your sandwich loaf becomes a sweet, cinnamon-swirled treat.
Cinnamon Raisin Sourdough Loaf
- During shaping, roll the dough into a rectangle
- Sprinkle a mixture of cinnamon, sugar, and soaked raisins
- Roll up jelly-roll style and place in the loaf pan
Honey-Infused Crumb
Replace 15–20g of the water with raw honey during mixing. This gives your crumb a golden hue, mild sweetness, and rich aroma—perfect for toasting and pairing with butter or jam.
These sweet twists are perfect for breakfast or dessert—and they toast like a dream.
Discover more ideas like this in our guide to banana wafer pudding—a nostalgic favorite that’s great alongside cinnamon sourdough.
Common Sourdough Sandwich Loaf Mistakes and Fixes
Troubleshooting Dense, Flat, or Underbaked Loaves
Even seasoned bakers occasionally run into issues with their sourdough sandwich loaf recipe. A loaf can look perfect on the outside but turn out gummy or dense inside. Here’s what might be going wrong—and how to fix it:
| Problem | Common Cause | Quick Fix |
|---|---|---|
| Dense Texture | Under-proofing or weak starter | Let dough rise longer, feed starter more often |
| Flat Loaf | Over-proofing or poor shaping | Shorten proofing time, shape tightly |
| Gummy Interior | Underbaked or sliced too soon | Use thermometer, cool loaf fully |
| Uneven Crumb | Poor mixing or under-kneading | Stretch and fold more during bulk |
| Pale Crust | Low baking temperature | Preheat oven fully, bake at 450°F initially |
| Cracked Sides | Dough dried out during final proof | Cover tightly during proofing |
If your loaf lacks rise, don’t immediately blame the flour. A weak starter or skipping the stretch-and-folds during bulk fermentation can often be the real culprit.
How to Improve Fermentation Timing and Crumb Texture
Fermentation timing is everything in sourdough baking. Rushing it can give you a bland, dense loaf. Waiting too long? You risk over-proofing and collapse.
Fix your timing with these tips:
- Room temperature: Aim for 72–78°F during bulk and final proof
- Use time + visual cues: Dough should rise ~50% during bulk
- Dough feels jiggly and airy? It’s ready for shaping
- Don’t have time? Use cold fermentation to slow things down
For crumb texture, focus on your mixing and folding technique. A good sourdough sandwich loaf should have a tight, even crumb—not large holes like artisan boules. Use strong shaping to build structure and encourage an even rise in the pan.
Don’t miss our guide to cooking shaved beef for the perfect filling to test your loaf’s strength and structure.
Serving Ideas and Sandwich Pairings for Your Sourdough Loaf
Best Fillings for Breakfast, Lunch, and Gourmet Sandwiches
A perfectly baked sourdough sandwich loaf recipe deserves next-level fillings. Thanks to its soft yet sturdy structure, this bread holds up well to just about anything you layer between its slices.
Breakfast Sandwich Pairings:
- Avocado + Egg + Arugula: Classic, hearty, and healthy
- Bacon + Cheddar + Tomato: A toastable twist on a breakfast BLT
- Peanut Butter + Banana + Honey: Sweet, filling, and kid-approved
Lunch Favorites:
- Turkey + Cranberry + Swiss: Savory and slightly tangy combo
- Chicken Salad + Lettuce + Pickles: A deli-style favorite
- Hummus + Roasted Veggies + Feta: Perfect for vegetarians
Gourmet Sandwich Combos:
- Prosciutto + Fig Jam + Brie: Sweet, salty, creamy decadence
- Pulled Pork + Slaw + BBQ Sauce: A Southern-style classic
- Smoked Salmon + Cream Cheese + Dill: Elegant and rich
You can also go simple: toast it and slather with butter, jam, or nut butter. This loaf toasts beautifully, giving you crispy edges and a soft center every time.
Grilled, Toasted, or Fresh? Best Ways to Use Your Loaf
Your sourdough sandwich loaf is one of the most versatile breads you can bake. Here are a few popular (and delicious) ways to use every slice:
| Method | Best For | Pro Tip |
|---|---|---|
| Grilled | Cheese, paninis, melt sandwiches | Use mayo instead of butter for crispier crust |
| Toasted | Breakfast and open-face sandwiches | Top with eggs, smashed avo, or nut butters |
| Fresh | Deli sandwiches, peanut butter & jam | Use same-day slices for best texture |
| French Toast | Weekend breakfast treats | Use sweet variations like cinnamon raisin |
| Croutons/Breadcrumbs | Use up ends or older slices | Dry completely and pulse in a food processor |
This loaf even makes next-day meals a breeze—freeze half and always have a base ready for your next sandwich creation.
Check out our smoked cream cheese recipe for a creamy, smoky spread that pairs beautifully with sourdough.

Frequently Asked Questions – Sourdough Sandwich Loaf Recipe
How do you make sourdough sandwich bread soft?
The secret to a soft sourdough sandwich bread lies in proper hydration, fermentation, and baking techniques. Use bread flour for gluten strength, incorporate a slight amount of fat like butter or olive oil (optional), and avoid overbaking. Also, bake in a loaf pan to help retain moisture and shape. Let the loaf cool completely before slicing to avoid compressing the crumb.
Can I use all-purpose flour in a sourdough sandwich loaf?
Yes, you can use all-purpose flour, especially if you’re aiming for a slightly more tender crumb. However, it contains less protein than bread flour, which may lead to less structure and rise. For the best of both worlds, try a 50/50 mix of bread and all-purpose flours.
How long does sourdough sandwich bread last?
Properly stored at room temperature in a bread box or towel, sourdough sandwich bread stays fresh for 4–5 days. Avoid refrigerating it, as this can dry it out. For longer storage, freeze slices with parchment paper between them and use within 3 months.
What is the best way to shape sourdough for sandwich bread?
To shape your dough for a sandwich loaf:
Flatten the dough gently into a rectangle
Fold each side toward the center like an envelope
Roll it up tightly into a log
Place it seam-side down in a greased loaf pan
This method encourages even crumb structure and a nice oven spring.
Why is my sourdough sandwich bread dense?
A dense loaf usually comes from under-proofing, a weak starter, or insufficient gluten development. Make sure your starter is active and bubbly, use proper folding during bulk fermentation, and allow enough time for final proofing. If your dough hasn’t risen enough before baking, the texture will be tight and heavy.
Is sourdough sandwich bread healthier than white bread?
Absolutely. Sourdough is often easier to digest thanks to the fermentation process, which helps break down gluten and phytic acid. It has a lower glycemic index, supports gut health, and is made with fewer additives compared to most store-bought white bread. Plus, you control every ingredient.
Conclusion: Mastering the Sourdough Sandwich Loaf Recipe at Home
Whether you’re brand new to baking or a seasoned sourdough pro, the sourdough sandwich loaf recipe brings the best of both worlds: tangy, fermented flavor and soft, sliceable texture that fits perfectly into daily life. It’s the kind of bread that feels fancy, but functions beautifully in a lunchbox, breakfast plate, or gourmet sandwich.
With the right ingredients, tools, and techniques—from feeding your starter to shaping and baking—you’ll be able to create a loaf that’s not only delicious but reliable. Plus, the variations and tips shared here make it easy to personalize your bread to match your tastes, dietary needs, and meal plans.
Don’t miss our step-by-step sourdough loaf pan guide for more expert tips on shaping and baking.
So roll up those sleeves, grab your starter, and get ready to make the perfect sourdough sandwich loaf—one slice at a time.
PrintSourdough Sandwich Loaf Recipe

A soft, sliceable sourdough sandwich loaf with classic tangy flavor—perfect for everyday meals, toast, and gourmet sandwiches. This recipe includes step-by-step instructions for the best texture and flavor, with pro tips and storage advice.
- Prep Time: 12 hours
- Cook Time: 45 minutes
- Total Time: 12 hours 45 minutes
- Yield: 1 loaf (12–14 slices)
- Category: Bread
- Method: Baking
- Cuisine: American
- Diet: Vegetarian
Ingredients
- 500g bread flour
- 350g water
- 100g active sourdough starter (at 100% hydration)
- 10g fine sea salt
- (Optional: 1 tbsp olive oil or melted butter for softer crust)
Instructions
- In a large bowl, combine flour and water. Mix until just combined and let rest for 45 minutes (autolyse).
- Add sourdough starter and salt. Mix thoroughly by hand or with a stand mixer.
- Cover and bulk ferment at room temperature (72–78°F) for 4–5 hours, folding the dough every 30 minutes.
- Turn dough onto a floured surface, shape into a log, and place into a greased 9×5” loaf pan.
- Cover and proof at room temperature for 1–2 hours or cold-proof in the fridge overnight (8–12 hrs).
- Preheat oven to 450°F (232°C). Score the top of the dough and bake uncovered for 20 minutes.
- Lower the temperature to 400°F (204°C) and bake for an additional 20–25 minutes.
- Remove loaf from pan immediately and cool on a wire rack for at least 1 hour before slicing.
Notes
- For a whole wheat variation, substitute 25–50% of the bread flour with whole wheat flour
- Add-ins like seeds, herbs, or raisins can be incorporated during bulk fermentation
- Avoid cutting the loaf before it’s fully cooled to prevent gumminess
- Store at room temperature for 4–5 days or freeze in slices for up to 3 months