If you’re tired of juggling multiple kitchen gadgets or making a mess while cooking, it’s time to meet your new kitchen MVP: the Ninja Instant Pot. This all-in-one powerhouse blends the ease of an Instant Pot with the versatility of the Ninja Foodi, letting you pressure cook, air fry, sauté, steam, and more—all in one sleek appliance. Whether you’re a total beginner or a seasoned home chef, this guide is packed with easy, flavorful Ninja Instant Pot recipes, smart cooking tips, and expert insights.
We’ll cover everything from setup to advanced techniques, break down cooking functions, troubleshoot common issues, and even dive into what not to do. Stick around to learn how to get the most out of your Ninja and create delicious meals with minimal cleanup.
Don’t miss our Air Fryer Taquitos: The Perfect Crowd-Pleasing Appetizer for a tasty, quick start to your journey!
Jumo to:
What Is a Ninja Instant Pot and Why It’s Different?
Understanding the Ninja Instant Pot Combo Appliance
The Ninja Instant Pot, often referred to as the Ninja Foodi, is not just another electric pressure cooker. It’s a next-level kitchen device that combines seven to nine cooking functions into a single appliance. You can pressure cook a pot roast in under an hour, then flip the lid and air crisp the top for a golden finish—something traditional Instant Pots can’t do without extra accessories.
This multi-cooker is designed with smart tech, making it intuitive for both quick meals and slow-simmered favorites. It’s ideal for everything from shredded chicken tacos to full Thanksgiving dinners.
Here’s a quick breakdown of what makes the Ninja Instant Pot stand out:
| Feature | Ninja Instant Pot | Traditional Instant Pot |
|---|---|---|
| Air Fry/ Crisp Function | ✅ Built-in | ❌ Needs additional lid |
| Broil/Roast/Bake | ✅ Yes | ❌ Limited |
| Pressure Cook | ✅ Yes | ✅ Yes |
| Dehydrate | ✅ Available in some models | ❌ Not available |
| Combo Cooking | ✅ Seamless transitions | ❌ Manual switching |
Discover great ideas like 25 Healthy Chicken Breast Recipes to test out this multifunctionality.
Ninja Instant Pot vs Traditional Instant Pot: Key Differences
When comparing the Ninja Foodi vs. Instant Pot, the biggest difference lies in versatility. While both allow you to pressure cook, slow cook, and sauté, the Ninja adds premium features like:
- Air Crisp Technology: Fry with little to no oil.
- Crisping Lid: No need for separate accessories to brown or finish meals.
- Ceramic-Coated Inner Pot: Easier cleanup and less sticking.
- Heavier Build: A bit bulkier but more solid in construction.
If your goal is to reduce counter clutter without sacrificing options, Ninja wins hands down.
Still wondering what sets them apart? Here’s a real-world cooking example:
With a Ninja, you can pressure cook chicken thighs and then immediately crisp the skin using the air fry lid—all in one device. With a traditional Instant Pot, you’d need to finish the job in an oven or air fryer.
Check out Crispy Roasted Chickpeas: A Tasty Snack to explore healthy ways to use the Air Crisp function.
Getting Started with Your Ninja Instant Pot
Initial Setup and Safety Tips
Getting your Ninja Instant Pot out of the box and into action takes just a few steps, but it’s important to set it up correctly to avoid problems later. Whether you own a Ninja Foodi Deluxe, Ninja OL series, or the original Foodi model, the first-time setup process is similar across the board.
Here’s how to get started:
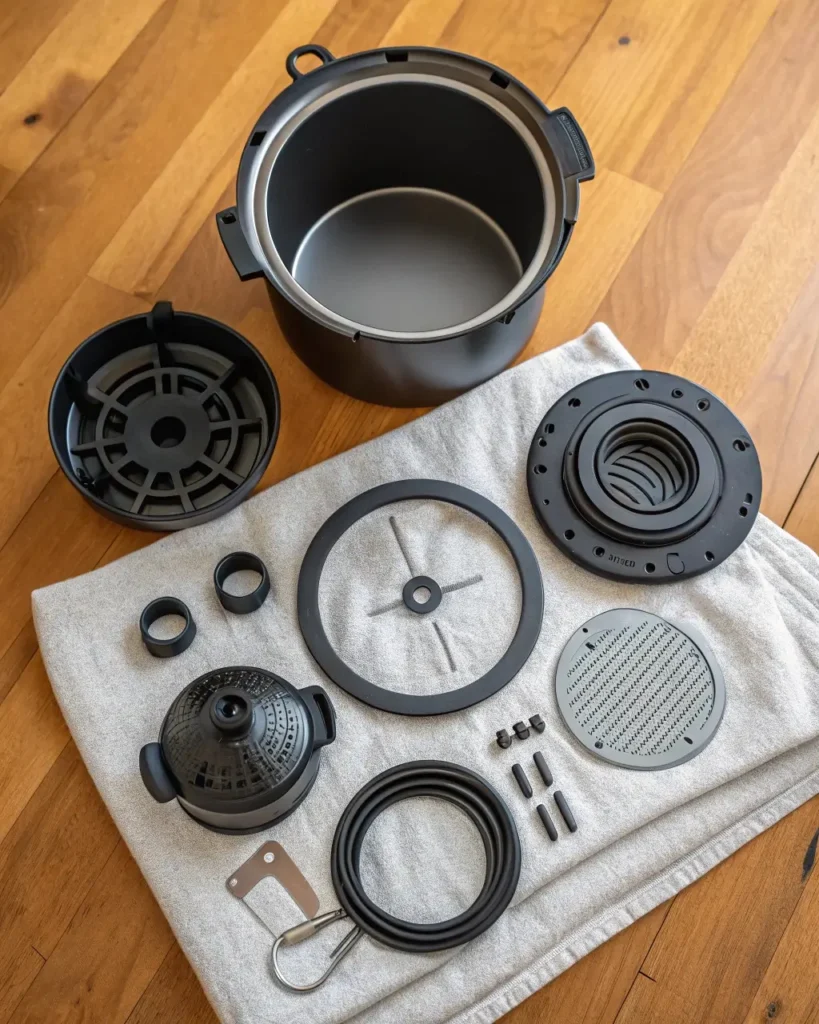
- Unbox Everything: Check the contents. You should have the main base unit, pressure lid, crisping lid (attached), inner cooking pot, condensation cup, reversible rack, and instruction manual.
- Wash All Removable Parts: Wash the inner pot, lid, and accessories in warm soapy water. Rinse and dry thoroughly before use.
- Check the Sealing Ring: The silicone sealing ring under the pressure lid should be snug. A loose ring can cause steam leakage.
- Install Condensation Cup: This tiny plastic piece fits on the back of the unit and catches any excess moisture.
- Perform a Water Test: Run a pressure test with water only. This helps ensure the unit is working properly and familiarizes you with pressure-cooking basics.
Key Safety Tips Before You Start Cooking
- Never force open the lid after pressure cooking. Always wait for the pressure to release naturally or use the quick release.
- Do not overfill the pot. Stick to the fill lines to avoid messes and dangerous pressure buildup.
- Use the right lid for the job. Pressure lid for slow/pressure cook; crisping lid for air fry/bake.
- Keep it ventilated. Ensure the Ninja sits on a heat-safe surface and away from walls or cabinets when venting steam.
Don’t miss our Cookie Butter Protein Powder recipe for a sweet idea after your first savory Ninja meal.
Essential Accessories You Need
Sure, the Ninja Instant Pot is packed with features, but a few affordable accessories can really elevate your cooking game:
| Accessory | Use Case | Why You’ll Love It |
|---|---|---|
| Steamer Basket | Steam veggies or eggs | Avoid soggy results |
| Silicone Mitts | Remove hot pots safely | Better grip, heat-resistant |
| Extra Silicone Rings | Avoid flavor transfer | One for savory, one for sweet |
| Springform Pan | Make cheesecakes or lasagna | Perfect fit in the inner pot |
| Stackable Racks | Cook multiple items at once | Meal prep made easier |
Most of these are dishwasher safe and designed to fit standard 6.5 or 8-quart Ninja Foodi models.
Here’s a Pro Tip: Label your silicone rings. One for savory dishes (like chili), another for sweet (like banana bread). That way, no weird flavor crossovers.
Looking for inspiration? Try our Air Fryer Taquitos: The Perfect Crowd-Pleasing Appetizer—a great first recipe using both pressure and air crisp modes.
7 Cooking Methods You Can Use in a Ninja Foodi
Pressure Cooking, Slow Cooking, and Searing
Pressure Cooking
Arguably the most powerful feature of the Ninja Instant Pot is pressure cooking. It rapidly cooks food using high-pressure steam, locking in flavor and nutrients in a fraction of the time.
When to use it:
- Stews, chili, pulled pork, soups, and tough cuts of meat
- Perfect for busy weeknights when you need dinner fast
Pro Tip: Always add at least 1 cup of liquid to build steam. Use broth for added flavor.
Slow Cooking
This function mimics a traditional Crock-Pot, great for low-and-slow recipes like pot roast or chicken stew.
When to use it:
- Lazy weekend meals or make-ahead dishes
- Recipes that benefit from long, gentle simmering
Important: The Ninja’s ceramic pot heats a little faster than traditional slow cookers, so check doneness a bit earlier than the recipe suggests.
Searing/Sautéing
You don’t need an extra pan for browning meat or aromatics—just hit the Sear/Sauté button.
When to use it:
- Browning meat before pressure cooking
- Toasting spices or sautéing garlic/onions for soups and sauces
This one-pot approach minimizes cleanup and builds richer flavor right from the base.
Air Crisp, Bake/Roast, Broil, and Steam Explained
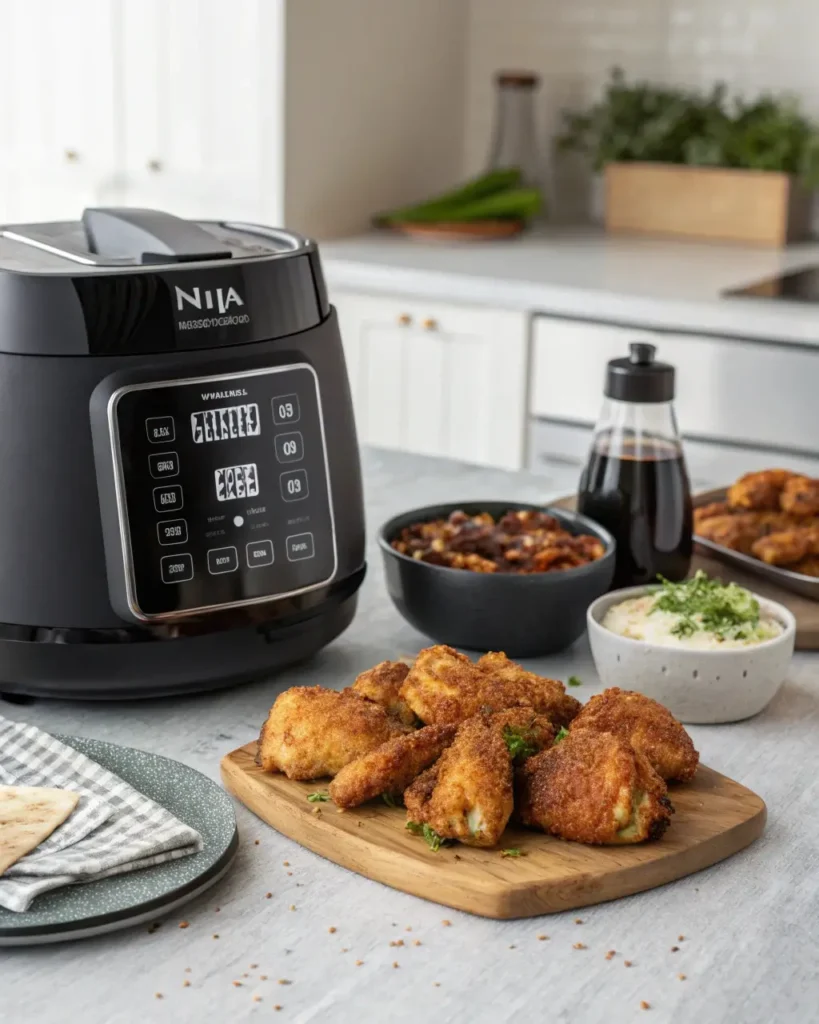
Air Crisp
This setting mimics deep frying—minus the oil. Using convection heat, it crisps the outside of food while keeping the inside moist.
When to use it:
- Wings, fries, chicken thighs, taquitos
- Reheating leftovers without losing texture
Try it with our Crispy Roasted Chickpeas recipe—it’s the perfect healthy snack.
Bake/Roast
This function turns your Ninja into a countertop oven. You can make anything from casseroles to cakes.
When to use it:
- Baking banana bread, casseroles, lasagna
- Roasting veggies or even a whole chicken
No preheating required—just set your temp and go.
Broil
Intensely high heat from the top lid adds the finishing touch, like a bubbly cheese topping or crispy skin.
When to use it:
- Final stage for mac & cheese, chicken parm, or roasted meats
- Great for melting, browning, or caramelizing
Note: Broil is high-intensity and short-duration—don’t walk away while using it.
Steam
This gentle method cooks without fat, ideal for delicate foods or reheating without drying out.
When to use it:
- Steaming broccoli, fish, or dumplings
- Reheating rice or pasta dishes
Quick Tip: Use the included rack or a silicone basket to keep food above the water line.
Here’s a glance at how these functions compare:
| Function | Time Saver | Health Focused | Best For |
|---|---|---|---|
| Pressure Cook | ✅ Fastest | ✅ Yes | Meat, stews, soups |
| Slow Cook | ❌ Slow | ✅ Yes | Roasts, beans, chili |
| Sear/Sauté | ✅ Yes | ❌ Not primary | Browning meat, sauces |
| Air Crisp | ✅ Yes | ✅ Low Oil | Fries, wings, reheating |
| Bake/Roast | ✅ Yes | ✅ Yes | Casseroles, bread, meats |
| Broil | ✅ Fast | ❌ Not really | Final crisp or melt |
| Steam | ✅ Yes | ✅ Most Healthy | Fish, veggies, dumplings |
Now that you know how to master the 7 cooking methods, it’s time to start cooking with confidence.
Best Ninja Instant Pot Recipes for Beginners
Top 5 Quick and Easy Meals to Try First
When you’re just getting started with the Ninja Instant Pot, simplicity is your best friend. These beginner-friendly recipes are not only easy to follow but also incredibly flavorful and efficient. You’ll learn to use multiple cooking functions and gain confidence with every meal.
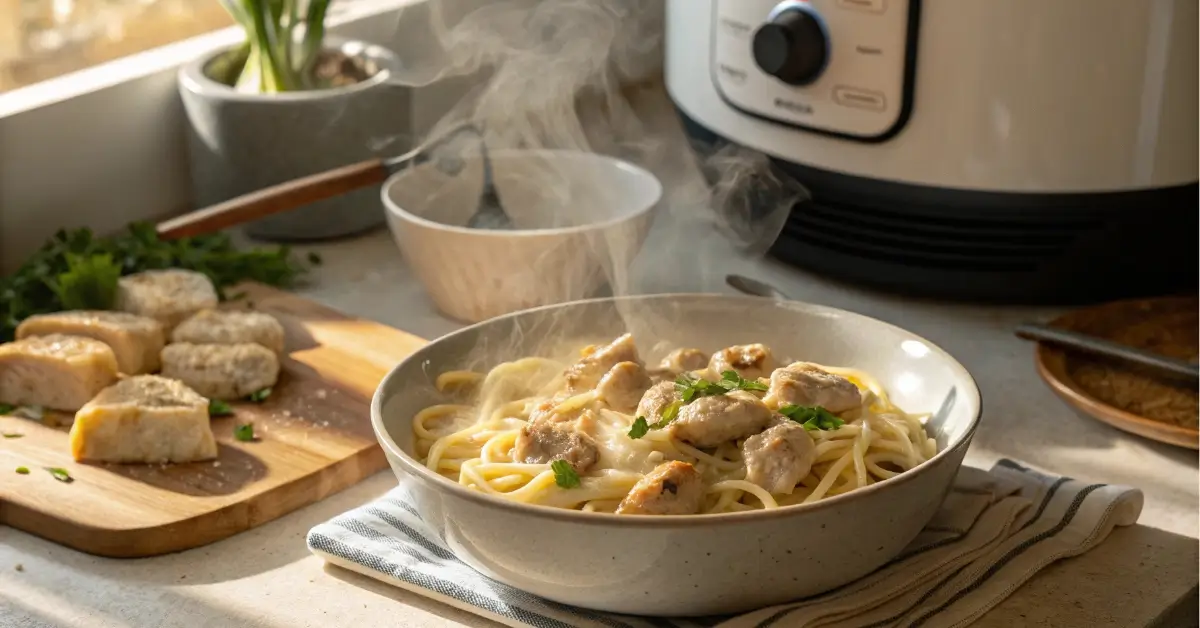
1. Ninja Instant Pot Chicken Alfredo
- Function used: Pressure Cook + Sear
- Prep time: 5 minutes
- Cook time: 10 minutes
- What makes it easy: Dump everything in, pressure cook, then stir in cheese and cream.
2. One-Pot Chili Mac
- Function used: Sauté + Pressure Cook
- Why it’s great: Comfort food made fast. The Ninja cooks pasta and meat at the same time with no boiling water needed.
3. BBQ Pulled Chicken
- Function used: Pressure Cook + Broil
- Flavor boost: Add your favorite barbecue sauce and use broil for a crispy top.
4. Air Fried Salmon Bites
- Function used: Air Crisp
- Quick tip: Marinate the salmon in lemon juice, garlic, and olive oil for 15 minutes before air frying.
5. Stuffed Bell Peppers
- Function used: Pressure Cook + Bake
- Why beginners love it: No need to parboil the peppers—everything softens beautifully under pressure.
Looking for inspiration? Try our Air Fryer Taquitos: The Perfect Crowd-Pleasing Appetizer. They’re crispy, cheesy, and Ninja-approved.
Tips to Nail These Recipes Every Time
Don’t Skip the Sauté Step
When a recipe calls for browning meat or sautéing aromatics, do it right in the pot. This builds flavor and cuts down dishes.
Watch Liquid Ratios
Most recipes need 1 to 1½ cups of liquid to build pressure. Avoid too much or too little to prevent the dreaded “Burn” notice.
Layer Ingredients Wisely
- Bottom layer: Liquids like broth or sauces
- Middle: Pasta, rice, or grains
- Top: Meat or veggies
This method prevents sticking and ensures even cooking.
Use the Right Lid
- Crisping lid for air frying, baking, broiling
- Pressure lid for everything else (steaming, slow cooking, sautéing)
Quick Release vs Natural Release
- Use quick release for veggies and seafood.
- Use natural release for meats and stews to avoid drying them out.
Try your first Ninja Instant Pot recipe tonight and let it boost your confidence in the kitchen. Whether it’s creamy chicken Alfredo or zesty salmon bites, these beginner meals deliver serious flavor with almost no effort.
Advanced Recipes for Foodies Using Ninja Instant Pot
One-Pot Gourmet Meals
Once you’ve mastered the basics, it’s time to flex your culinary creativity. These advanced Ninja Instant Pot recipes combine bold flavors, multiple cooking functions, and layered textures to deliver gourmet-level meals—without dirtying every dish in the house.
1. Coq au Vin (French Chicken Stew)
- Function used: Sear → Pressure Cook → Broil
- Why it’s elevated: Use wine, fresh herbs, and bacon to deepen the flavor. Broil the chicken at the end for a crispy, golden skin.
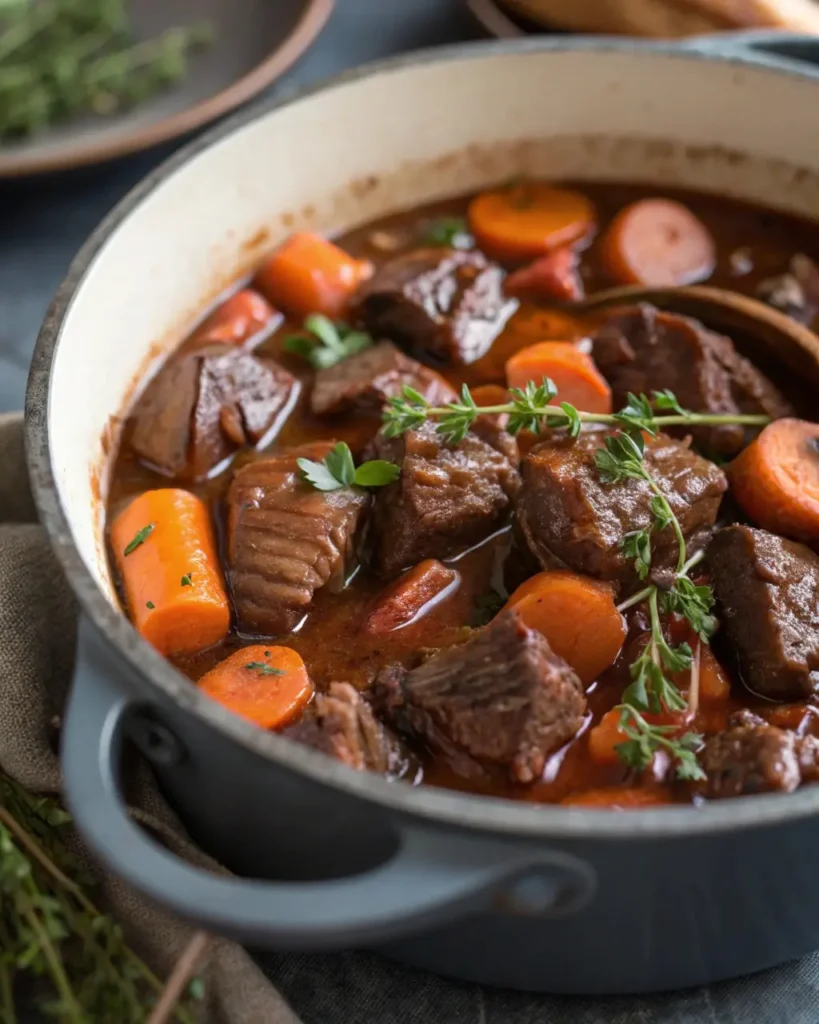
2. Beef Bourguignon
- Method: Sauté → Pressure Cook
- Pro tip: Brown the beef in batches to seal in flavor, and use a touch of tomato paste for added depth.
3. Creamy Mushroom Risotto
- Function used: Sauté → Pressure Cook → Stir
- Why Ninja shines here: Traditional risotto needs constant stirring. In the Ninja, just cook under pressure and stir in parmesan after for a creamy finish.
4. Stuffed Pork Tenderloin with Apples & Cranberries
- Cooking mode: Bake/Roast → Broil
- Elevated trick: Use the reversible rack to keep pork juicy and off the bottom of the pot. Finish with broil for a caramelized glaze.
5. Asian-Style Braised Short Ribs
- Function used: Sear → Pressure Cook → Steam
- Flavor twist: Soy, ginger, garlic, and brown sugar create a sticky-sweet glaze. Steam bok choy afterward using the same liquid.
Multi-Step Cooking for Flavor-Infused Dishes
Using multi-function cooking unlocks flavor complexity you’d normally only get from slow roasting or restaurant-style techniques.
Step-by-Step Example: Crispy Garlic Butter Chicken with Potatoes
- Sauté chicken thighs in butter with garlic and rosemary.
- Pressure Cook with broth and baby potatoes for 6 minutes.
- Air Crisp both for 8 minutes for a crunchy skin and crispy potato edges.
Why does this work? The pressure tenderizes the meat quickly, and the crisping finishes the dish with perfect texture.
Advanced Layering Method for Combo Dishes
Want to cook meat and veggies together without overcooking either? Try this:
| Layer | Item | Mode |
|---|---|---|
| Bottom | Rice with broth | Pressure cook |
| Middle | Marinated chicken on rack | Pressure cook |
| Top | Broccoli in foil packet | Steam after release |
Pro tip: Always add fragile items (like broccoli or seafood) after pressure cooking using the steam function, so they don’t turn to mush.
Ready to explore even more flavor? Don’t miss our 25 Healthy Chicken Breast Recipes for protein-packed ideas that scale from beginner to advanced in minutes.
Smart Meal Prep with Ninja Instant Pot
Weekly Prep Plans Using Your Ninja
The Ninja Instant Pot isn’t just for dinner—it’s a full-blown meal prep machine. With a bit of planning and the right settings, you can prep breakfasts, lunches, dinners, and even snacks for the week—all in a single session.
Here’s a sample 3-Day Ninja Meal Prep Plan to get you started:
| Day | Meal | Recipe | Function Used |
|---|---|---|---|
| Monday | Lunch | Chicken Burrito Bowls | Pressure Cook |
| Monday | Dinner | Honey Garlic Salmon | Air Crisp |
| Tuesday | Lunch | Quinoa + Veggie Bowls | Steam |
| Tuesday | Dinner | Stuffed Peppers | Bake/Roast |
| Wednesday | Lunch | Thai Peanut Noodles | Sauté + Pressure |
| Wednesday | Dinner | Pulled BBQ Pork Sliders | Pressure Cook + Broil |
Batch Cooking Tips:
- Make double batches of soups or stews and freeze half.
- Use stackable pans to cook multiple components at once (like rice and veggies).
- Cook proteins plain, then flavor them differently throughout the week (BBQ chicken one day, taco chicken the next).
Check out Crispy Roasted Chickpeas—they’re easy to batch cook and store as a protein-rich snack or salad topper.
Storage and Reheating Hacks
The beauty of Ninja-cooked meals is that most reheat like a dream, especially using the Air Crisp or Steam function.
Best Storage Practices:
- Use glass containers for easy reheating and portion control.
- Label meals with the date and cooking instructions.
- Freeze in flat bags to save freezer space (especially soups and chili).
How to Reheat in Your Ninja:
- Steam mode: Ideal for rice, pasta, or veggies—restores moisture.
- Air Crisp: Revives crispy textures like taquitos, fries, or chicken.
- Bake/Roast: Great for casseroles or stuffed items.
| Food Type | Reheat Setting | Time |
|---|---|---|
| Rice or Grains | Steam | 3–5 min |
| Chicken or Meat | Air Crisp | 5–8 min |
| Soups or Stews | Sauté (Low) | 4–6 min |
| Casseroles | Bake | 10–12 min |
Looking for inspiration? Try our Cookie Butter Protein Powder recipe as a prep-friendly breakfast or snack booster.
Smart prep with the Ninja Instant Pot lets you cut back on midweek stress and still eat fresh, flavorful meals—without spending hours cooking each day.
What NOT to Cook in a Ninja Instant Pot
Foods That Can Damage the Cooker
While the Ninja Instant Pot is a powerhouse, it isn’t invincible. Certain ingredients and cooking methods can damage internal components or trigger error codes. Let’s keep your machine running smoothly by avoiding these common mistakes.
1. Thick, Creamy Sauces (Before Pressure Cooking)
Cream-based sauces like Alfredo or cheese sauces should never be pressure-cooked directly. They can scorch, causing the dreaded “Burn” error.
Fix: Add dairy or thickening agents after pressure cooking is complete.
2. Instant Oatmeal or Small Grains Without a Trivet
Small, sticky grains like steel-cut oats or quinoa can foam up, clog the pressure valve, and cause a mess.
Fix: Use the pot-in-pot method with a trivet and water underneath to avoid overflow.
3. Too Little Liquid
Every pressure cook function needs at least 1 cup of liquid to build pressure. Without it, the unit can overheat or stop working.
Fix: Always use a measuring cup for liquids, even in one-pot meals.
4. Fried Foods (Deep Frying with Oil)
The Ninja Instant Pot can air fry—not deep fry. Adding a lot of oil and trying to fry French fries like in a deep fryer is dangerous and ineffective.
Fix: Use Air Crisp for a golden crunch with just a spritz of oil.
Recipes That Often Go Wrong
Some dishes just don’t belong in the Ninja, or they require specific technique to get right.
1. Delicate Fish (Under Pressure)
Fish like tilapia or sole can fall apart under pressure, leaving you with fish mush instead of a filet.
Alternative: Use the Steam or Air Crisp setting to cook gently.
2. Cakes Without a Pan
Baking cake batter directly in the inner pot? Just don’t. It’ll stick, overbake around the edges, and stay gooey in the middle.
Fix: Use a springform pan or bundt pan inside the cooking pot.
3. Dry Rubbed Meats Without Liquid
Rubbing meat in spices and skipping liquid results in dry, undercooked food and possibly error codes.
Fix: Always include some broth, wine, or water—even just ½ cup under the trivet.
4. Doughs and Batters
Yeast dough, muffins, or pancake batter can expand uncontrollably and clog valves.
Fix: Bake these in the oven—or use Ninja’s Bake setting with proper pans and racks.
Here’s a quick reference:
| Dish Type | Setting to Avoid | Safer Method |
|---|---|---|
| Creamy sauces | Pressure Cook | Add after pressure release |
| Fish filets | Pressure Cook | Steam or Air Crisp |
| Oatmeal | Direct cook | Pot-in-pot method |
| Cakes | Bare inner pot | Use cake pan or rack |
| Doughs | Pressure Cook | Use Bake setting only |
By steering clear of these mistakes, you’ll protect your machine and get consistently tasty results.
Don’t miss our Air Fryer Taquitos—they’re the perfect crunchy treat designed for the Ninja’s Air Crisp magic.
Troubleshooting Common Issues
Instant Pot Error Codes and What They Mean
The Ninja Instant Pot is smart—but that doesn’t mean it’s immune to hiccups. If your display starts flashing letters or your pot just won’t pressurize, don’t panic. Let’s decode what’s happening and get you back on track.
Common Ninja Error Messages
| Error Code | Meaning | Quick Fix |
|---|---|---|
| WATR | Not enough water detected | Add at least 1 cup of liquid |
| VENT | Steam valve is open | Close the valve to seal |
| LID | Lid not sealed properly | Realign lid and check gasket |
| PRSE | Not enough pressure build-up | Ensure lid is locked, valve sealed |
| HOT | Overheating—usually due to thick sauce | Cancel cooking, stir, add liquid |
Troubleshooting Checklist:
- Check the sealing ring: A loose or damaged ring = no pressure.
- Deglaze the bottom: If you sautéed onions or garlic first, leftover bits can trigger “HOT.”
- Always check the valve: It must be on “Seal” for pressure cook.
- Keep the float valve clean: This tiny part controls pressure release—wipe it regularly.
If your pot seems like it’s taking forever to pressurize, remember that volume matters. A full pot can take 10–15 minutes before the timer starts.
Fixing Undercooked or Burnt Meals
Problem: Food is Undercooked
Common Causes:
- Opened lid too early
- Not enough time under pressure
- Thick cuts of meat weren’t browned before cooking
Fixes:
- Close the lid, add 2–3 more minutes pressure cook
- Let it naturally release for longer next time
Problem: Burn Notice or Overcooked Food
Common Causes:
- Too little liquid
- Tomato-based sauces cooked too soon
- Dairy or thick sauces during pressure phase
Fixes:
- Always stir liquids under thick sauces to prevent sticking
- Use pot-in-pot method for rice, pasta, or delicate items
Check out Crispy Roasted Chickpeas—they’re nearly foolproof and a great confidence-booster if your last meal didn’t go as planned.
Bonus Tip: How to Reset Your Ninja
If your Ninja starts acting weird—buttons unresponsive, strange messages—try a quick soft reset:
- Turn it off and unplug for 5 minutes
- Plug back in and press “Start/Stop”
- Run a water test to recalibrate pressure sensors
These simple resets solve 90% of weird glitches.
Knowing how to handle these bumps in the road will give you total confidence using your Ninja Instant Pot—even during your busiest weeknights.
Cleaning and Maintenance Tips for Long-Term Use
Daily and Deep Cleaning Steps
Just like any high-performance tool, your Ninja Instant Pot needs regular care to perform at its best. Keeping it clean not only helps maintain flavor but also prevents malfunctions.
Daily Cleaning Routine
After every use, do this quick rinse-down:
- Unplug the unit and let it cool completely.
- Remove the inner pot, sealing ring, condensation cup, and pressure lid.
- Wash removable parts with warm soapy water or run them through the dishwasher (except for the base).
- Wipe the base unit and heating element with a damp cloth—never submerge it.
Cleaning the Sealing Ring
This ring absorbs odors fast—like garlic, curry, and BBQ.
To refresh it:
- Soak in a vinegar and lemon bath for 15 minutes.
- Or run a steam cycle with water and lemon slices inside the pot.
Monthly Deep Cleaning Tasks
- Inspect the float valve and pressure release valve. Clean with a pipe cleaner or toothbrush if clogged.
- Remove buildup under the anti-block shield (the metal disk under the lid). Pop it off gently and clean thoroughly.
- Deodorize with baking soda: Mix 1 tablespoon with water and run a steam cycle.
How to Remove Odors and Build-Up
Even with frequent washing, your Ninja might start to hold onto smells or residue. Here’s how to handle it:
To Remove Lingering Odors:
- Run a steam clean cycle with 1 cup water + 1 cup vinegar + lemon peel.
- Store with the lid upside down to let the ring breathe.
For Tough Stains and Food Gunk:
- Sprinkle baking soda directly on stuck food, add warm water, and let soak for 30 minutes.
- For a crusty crisping plate, scrub gently with a paste of baking soda and dish soap using a non-scratch sponge.
| Part | Clean How Often | Cleaning Tip |
|---|---|---|
| Inner pot | After every use | Dishwasher safe |
| Sealing ring | Weekly | Vinegar or lemon soak |
| Pressure lid | Weekly | Wipe and rinse |
| Heating element | Monthly | Wipe with dry cloth |
| Float valve | Monthly | Use a pipe cleaner |
Looking for inspiration? Try our Cookie Butter Protein Powder after a deep clean—it’s sweet, satisfying, and clean-pot approved.
Taking 10 minutes a week to clean and inspect your Ninja Instant Pot keeps it running smooth, prevents odors, and ensures your food always tastes as good as it should.
FAQs About Ninja Instant Pot Recipes
What is the difference between an Instant Pot and a Ninja?
While both the Instant Pot and Ninja Foodi are electric pressure cookers, the Ninja includes built-in air frying, baking, and broiling features. The Instant Pot requires extra accessories for these functions. The Ninja is essentially a multi-cooker + air fryer in one, making it more versatile for recipes like crispy chicken or baked pasta dishes.
Can I put aluminum foil in my Ninja Foodi?
Yes, you can use aluminum foil in your Ninja Foodi, especially when using the Air Crisp, Bake, or Broil functions. It helps prevent sticking and makes for easier cleanup. Just avoid covering the pressure release valve or placing foil tightly against the heating elements.
What are the 7 ways to cook in Ninja Foodi?
The 7 main cooking functions in the Ninja Instant Pot (Foodi models) are:
Pressure Cook
Slow Cook
Sear/Sauté
Steam
Air Crisp
Bake/Roast
Broil
Some models also include Dehydrate and Yogurt settings, making them even more versatile.
How do you use the Instant Pot Ninja?
Start by selecting your desired cooking function, then:
Add ingredients and at least 1 cup of liquid for pressure cooking.
Lock the lid and ensure the pressure valve is set to “Seal.”
Select cooking time and press start.
After cooking, release the pressure (quick or natural).
Use Air Crisp or Broil afterward to crisp up your food if needed.
What can you not put in Ninja Foodi?
Avoid the following in your Ninja Foodi:
Thick dairy-based sauces (before pressure cooking)
Delicate fish under pressure
Instant oatmeal directly in the pot
Large amounts of oil for frying
Yeast-based doughs or batter without proper pans
These items can cause sticking, burning, or pressure malfunctions.
What are the instructions for an Instant Pot?
The basic usage steps are:
Place food and liquid in the inner pot.
Close and lock the pressure lid.
Select a cooking function and adjust the time.
Set the valve to “Seal.”
Once cooking is done, release pressure and serve.
Always refer to your specific Ninja model’s manual for safety and best practices.
Conclusion: Start Cooking Smarter with Ninja Instant Pot Recipes
Whether you’re new to the world of one-pot cooking or a seasoned home chef, the Ninja Instant Pot is built to simplify mealtime and spark creativity. From pressure-cooked pastas to air-fried favorites, it empowers you to cook more with less mess and more flavor.
We’ve covered everything: setup, safety, recipes, functions, what to avoid, and how to keep it clean. Now it’s time to cook boldly.
Looking for more healthy meals? Discover 25 Healthy Chicken Breast Recipes and take your Ninja Instant Pot to the next level.
PrintNinja Instant Pot Recipes: The Ultimate Guide to Easy, Flavorful Meals

Make weeknight dinners stress-free with these beginner-friendly Ninja Instant Pot recipes. From creamy chicken Alfredo to hearty beef chili, these recipes are quick, easy, and packed with flavor. Perfect for busy schedules and guaranteed to delight your taste buds!
- Prep Time: 10 minutes
- Cook Time: 30 minutes
- Total Time: 40 minutes
- Yield: 4 servings per recipe
- Category: Dinner
- Method: Pressure Cooking
- Cuisine: American
- Diet: Gluten Free
Ingredients
For One-Pot Creamy Chicken Alfredo:
- 2 chicken breasts, cubed
- 1 cup heavy cream
- 2 cups chicken broth
- 1 cup grated Parmesan cheese
- 8 oz fettuccine pasta
- 1 tsp garlic powder
- Salt and pepper to taste
For Hearty Beef Chili:
- 1 lb ground beef
- 1 onion, finely chopped
- 1 can kidney beans, drained and rinsed
- 1 can diced tomatoes
- 2 tbsp chili powder
- 1 tsp ground cumin
- Salt and pepper to taste
Instructions
One-Pot Creamy Chicken Alfredo:
- Use the sauté function to brown the chicken cubes with garlic powder for about 5 minutes.
- Add chicken broth, heavy cream, and fettuccine pasta. Ensure pasta is fully submerged.
- Seal the lid and pressure cook on high for 6 minutes.
- Perform a quick release, then stir in Parmesan cheese until the sauce is creamy. Season with salt and pepper and serve.
Hearty Beef Chili:
- Sauté ground beef and onion in the Instant Pot until browned. Drain any excess fat.
- Add kidney beans, diced tomatoes, chili powder, cumin, and a pinch of salt and pepper.
- Seal the lid and set the pressure to high for 10 minutes.
- Let the pressure release naturally for 5 minutes before serving. Add toppings like shredded cheese or sour cream if desired.
Notes
- For Creamy Chicken Alfredo: Ensure the pasta is evenly submerged in the liquid for even cooking.
- For Hearty Beef Chili: You can customize the spiciness by adjusting the chili powder or adding a pinch of cayenne pepper.