Making homemade caramel apples is a fall tradition that brings out the nostalgic charm of carnivals, Halloween parties, and cozy family kitchens. Whether you’re prepping for a harvest celebration or simply craving something sticky-sweet and delicious, learning to make caramel apples at home is easier than you think. With just a few pantry staples, the right apple choice, and a little technique, you’ll have a dessert that tastes like it came from a professional candy maker.
These apples are more than just a fun snack—they’re a seasonal icon. In this ultimate guide, we’ll cover everything you need to create perfect caramel apples at home, including tips to prevent caramel from sliding off, common mistakes to avoid, and ways to store your apples properly.
Looking for inspiration? Try our Sugar-Free Caramel Syrup recipe for a healthier twist on sweet indulgence.
Jump to:
Why You’ll Love This Recipe
The nostalgic charm of homemade caramel apples
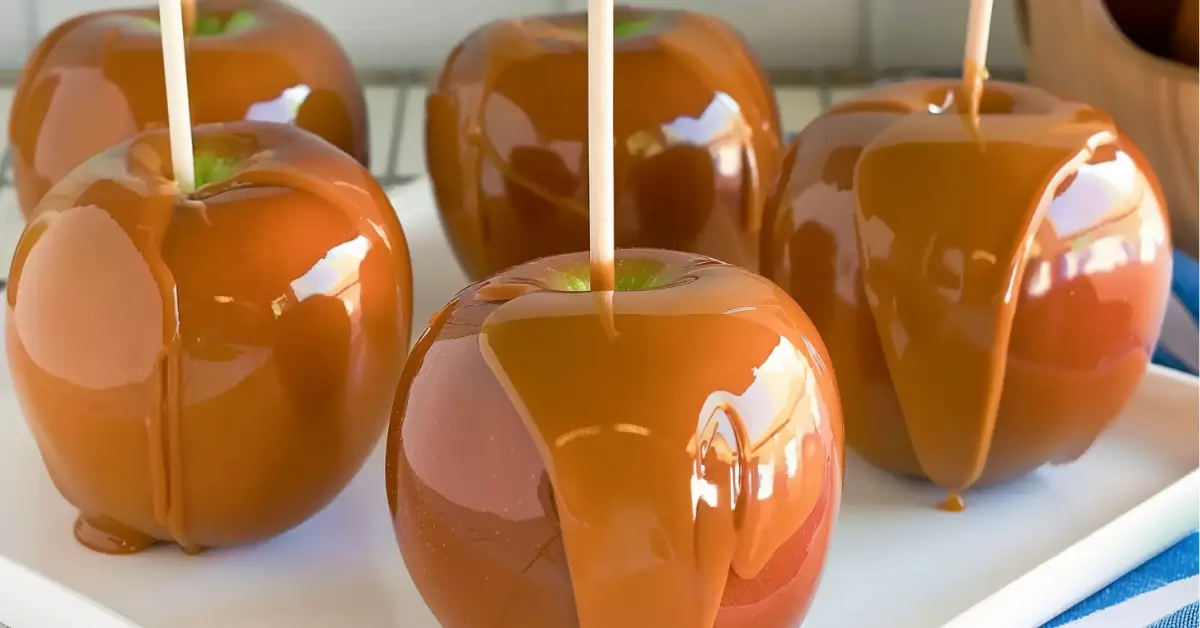
There’s something magical about biting into a crisp apple coated in buttery caramel. It instantly transports you back to county fairs, fall festivals, and cozy October evenings. Making these treats at home lets you relive those moments—minus the long lines and overpriced snacks. Plus, there’s a unique joy in hand-dipping your own apples and watching the caramel set to golden perfection.
Homemade caramel apples also double as delightful DIY gifts. Wrap them in cellophane, tie with a ribbon, and you’ve got a thoughtful autumn present that shows you care. Kids love helping too, which makes this recipe a family-friendly kitchen activity with sweet rewards.
Perfect for holidays, parties, and fun family desserts
These apples are showstoppers. Bring them to Thanksgiving, a Halloween gathering, or a school bake sale, and they’ll vanish faster than you can say “sticky fingers.” The visual appeal—shiny caramel, colorful toppings, and wooden sticks—makes them ideal for party platters or dessert tables.
Want to take it up a notch? Set up a caramel apple bar at your next event with various toppings like crushed Oreos, chopped nuts, mini marshmallows, and melted chocolate. Everyone gets to create their own version of this iconic dessert. It’s interactive, engaging, and of course—delicious.
Preparation and Cooking Time
Total time breakdown: prep, cook, and cool
When you’re making homemade caramel apples, knowing your timeline is half the battle. This dessert is simple, but timing matters to get that smooth, glossy caramel finish that clings perfectly to each apple.
Here’s a quick breakdown of the time commitment:
| Task | Estimated Time |
|---|---|
| Apple prep (washing, drying, skewering) | 10 minutes |
| Caramel cooking | 15–20 minutes |
| Dipping and decorating | 10–15 minutes |
| Cooling and setting | 30–45 minutes |
| Total Time | 1 hour 15 minutes |
This makes homemade caramel apples an ideal dessert to make ahead of time. You can prepare them in the morning, and they’ll be ready to serve by your afternoon party or evening movie night.
The cooling step is essential—rushing it can cause the caramel to slide or pool at the bottom. Be patient, and your results will be picture-perfect.
Time-saving tips for busy home cooks
Don’t have a full hour? Here are some quick tips to shave off prep time without compromising quality:
- Use store-bought caramels: Skip homemade caramel and melt wrapped caramels with a little cream or milk.
- Prep apples the night before: Wash and skewer them ahead of time and store them uncovered in the fridge to dry out the skin.
- Cool apples in the fridge: This helps the caramel set faster and adds a refreshing crunch when biting in.
Many people are surprised how quickly caramel apple recipes come together once you get started. It’s truly a “set it and forget it” dessert once you’ve got them dipped.
Discover great ideas like our Easy Salisbury Steak Recipe if you’re looking to prep dinner while the caramel cools.
Ingredients
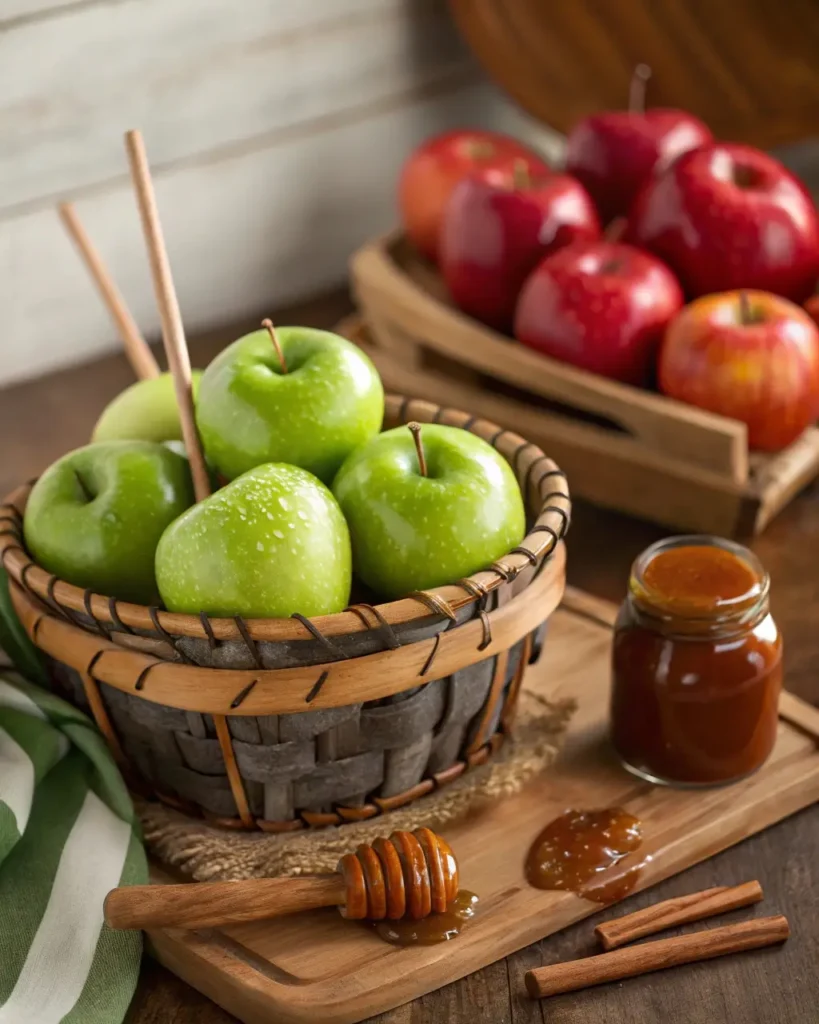
Fresh apples: the best varieties to use for caramel apples
Not all apples are created equal—especially when it comes to making homemade caramel apples. For the caramel to cling properly and complement the apple’s flavor, choose firm, tart, and crisp apples. Here’s a list of the top varieties:
| Apple Type | Flavor Profile | Why It Works Well |
|---|---|---|
| Granny Smith | Tart, firm | Cuts caramel’s sweetness beautifully |
| Honeycrisp | Sweet-tart, crunchy | Popular choice with a satisfying snap |
| Fuji | Very sweet, crisp | Great for those who love sweet-on-sweet |
| Jonagold | Balanced, juicy | Offers a rich apple flavor |
| Pink Lady | Slightly tart | Holds up well under hot caramel |
Avoid soft or waxy apples like Red Delicious. Their texture and skin can cause the caramel coating to slip or melt off.
Before you start dipping, wash apples thoroughly with hot water and a touch of vinegar or lemon juice. This strips the waxy coating that prevents caramel from sticking. Then, dry them completely—any moisture will repel the hot caramel.
Looking for inspiration? Try topping your apples with crushed almonds or chocolate drizzle just like in our Chocolate Crepe Cake for gourmet flair.
How to choose high-quality caramel ingredients
To achieve the silky, golden finish homemade caramel apples are known for, use high-quality ingredients. Whether you’re going the scratch-made route or melting store-bought caramels, here’s what you’ll need:
For Homemade Caramel (from scratch):
- 1 cup heavy cream
- 1 cup light corn syrup
- 2 cups granulated sugar
- ½ cup unsalted butter
- 1 tsp vanilla extract
- Pinch of sea salt (optional)
This combination produces a smooth caramel that firms just enough to hold shape on the apple, without turning brittle.
For Store-Bought Caramel Method:
- 1 (14 oz) bag of caramel candies
- 2 tbsp milk or cream
- ½ tsp vanilla (optional)
Gently melt the candies with milk on low heat for an easy and quick caramel apple recipe. Always stir continuously to avoid burning or lumping.
Tip: For an extra-special finish, add a dash of cinnamon or nutmeg to the caramel.
Step-by-Step Instructions
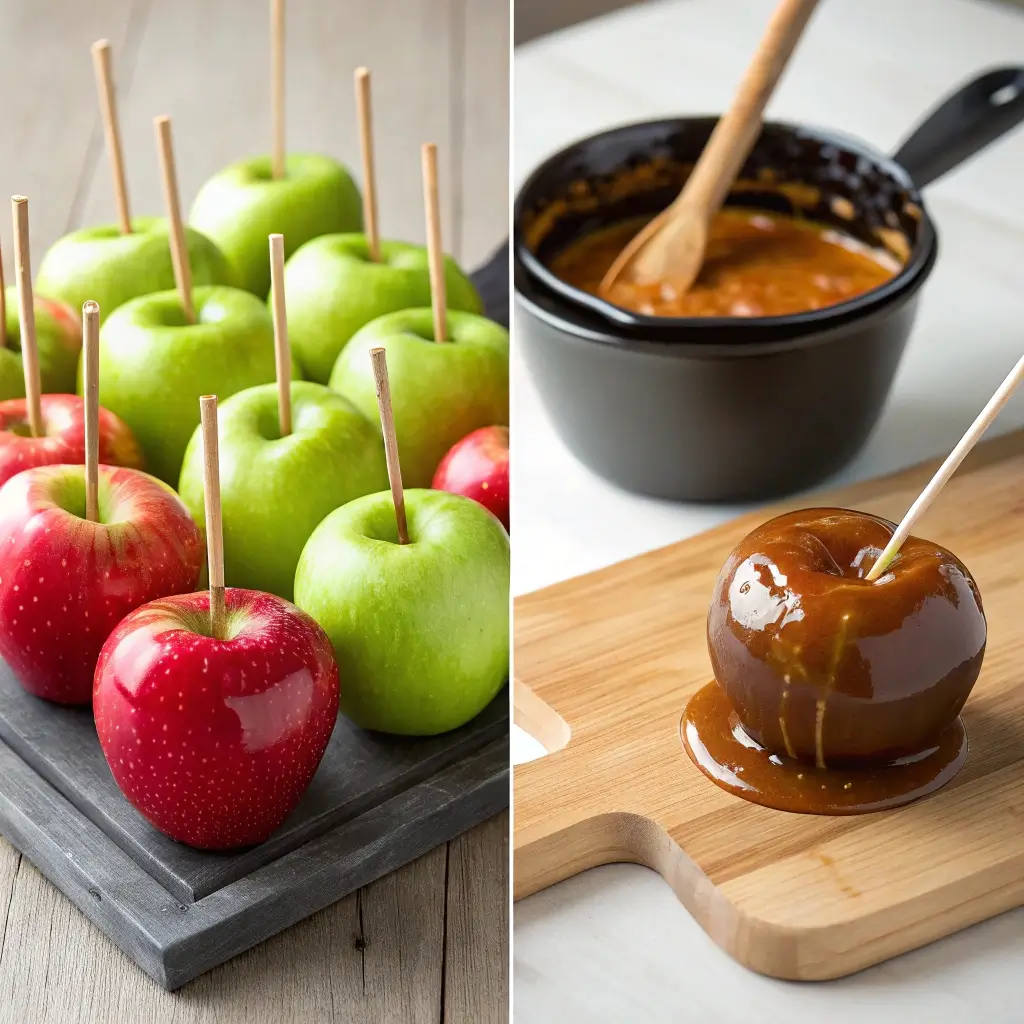
How to clean and prep apples so caramel sticks
One of the most common mistakes in making homemade caramel apples is skipping proper prep. If your apples are too slick or damp, the caramel won’t adhere—it’ll slide off or pool at the base. Follow these quick prep steps:
- Wash the apples thoroughly: Fill a large bowl with hot (not boiling) water and add 2 tablespoons of vinegar or lemon juice. Soak apples for a minute, then scrub gently with a clean cloth or sponge.
- Dry completely: Moisture is the enemy. Let apples air dry for 10–15 minutes or pat them bone-dry with paper towels.
- Remove apple stems: Pull the stems off gently to create a flat spot for the stick.
- Insert wooden sticks: Push craft sticks or candy sticks firmly into the top center of each apple.
Once cleaned and dried, place apples on a parchment-lined baking sheet and refrigerate for 20–30 minutes before dipping. Cold apples help the caramel coating set faster and cling better.
Check out our Banana Bread with Cake Mix to pair with your apples for a full fall dessert spread.
Melting and coating techniques for smooth caramel
This is where the magic happens! Whether you’re making your caramel from scratch or using pre-made candies, consistency is everything.
If Using Homemade Caramel:
- In a heavy-bottomed saucepan, combine sugar, corn syrup, and cream.
- Stir constantly over medium heat until sugar dissolves.
- Add butter and continue stirring until mixture reaches 240°F (soft-ball stage) using a candy thermometer.
- Remove from heat and stir in vanilla.
Let the caramel cool slightly (5–7 minutes). It should be thick but pourable.
If Using Caramel Candies:
- Unwrap candies and place them in a non-stick saucepan with 2 tablespoons of cream or milk.
- Stir on low heat until smooth.
- Let it cool a few minutes before dipping.
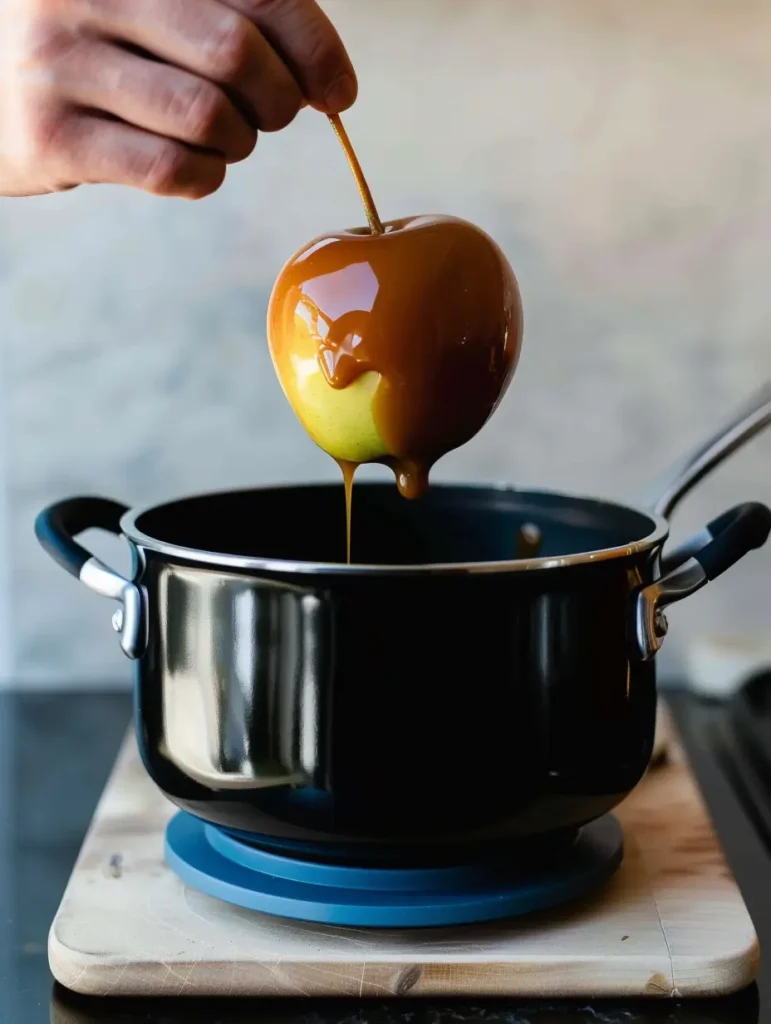
Dipping Apples:
- Holding by the stick, tilt each apple into the caramel, spinning slowly.
- Lift, let excess drip off, and scrape the bottom gently on the pot’s edge.
- Place on parchment or silicone mat to set.
- Optional: While caramel is still tacky, roll apples in crushed nuts, sprinkles, or drizzle with chocolate.
Pro Tip: For easier cleanup, spray parchment paper lightly with non-stick spray before placing apples.
Don’t miss our Creamy Parmesan Italian Sausage Soup for a savory side that balances the sweetness of these apples beautifully.
How to Serve
Serving suggestions and seasonal presentation ideas
Once your homemade caramel apples have set, it’s time to show them off! Presentation goes a long way, especially during the holidays or special events. Whether you’re serving them at a party or gifting them to friends, here are some charming ideas:
- Individual wrapping: Wrap each apple in cellophane, tie with a ribbon or twine, and add a festive tag. It keeps the apple fresh and sticky-free for transport or gifting.
- Fall dessert tray: Pair with cookies, spiced nuts, or pumpkin bars for a cozy fall-themed display.
- Party platter: Slice apples into wedges (coat the cut edge in lemon juice to prevent browning), and serve with toothpicks for easy sharing at large gatherings.
- DIY dipping bar: Set out plain caramel-coated apples and offer toppings like crushed pretzels, graham crackers, mini M&Ms, or shredded coconut for guests to customize their own.
These ideas help turn caramel apple recipes into memorable experiences, not just desserts.
Looking for another festive dessert? Don’t miss our Crepe Cake that’s perfect for fall tablescapes.
Creative toppings and coatings for extra flair
You can elevate your homemade caramel apples from simple to spectacular by playing with toppings. Here’s a list of topping ideas that add flavor, crunch, and style:
| Topping Idea | Description |
|---|---|
| Crushed graham crackers | Adds a pie-like crunch |
| Mini marshmallows | Great for kids and s’mores flavor |
| Sea salt flakes | Contrasts caramel’s sweetness nicely |
| Toasted coconut | Brings a tropical, nutty vibe |
| Candy pieces | Use mini M&Ms, toffee bits, or Skittles |
| Drizzled chocolate | White, dark, or milk for a gourmet feel |
| Crushed Oreos | Crunchy, chocolatey texture |
| Chopped nuts | Almonds, pecans, or peanuts add crunch |
For best results, apply toppings while the caramel is still tacky. Press toppings gently into the surface or roll apples through a shallow bowl of toppings.
Homemade caramel apples become even more magical when they reflect your creativity. Whether you’re making them for Halloween, Thanksgiving, or just because—it’s the little customizations that make them unforgettable.

Additional Tips
How to keep caramel from sliding off apples
One of the most frustrating parts of making homemade caramel apples is watching that perfect caramel drip right off the apple. Here’s how to make it stick every single time:
- Use unwaxed apples: Many store-bought apples are coated in food-grade wax that repels caramel. Scrub apples thoroughly in hot water with vinegar or lemon juice to remove this layer.
- Dry apples completely: Even a small drop of water can cause the caramel to slide. Air-dry for at least 30 minutes or wipe thoroughly with paper towels.
- Chill the apples before dipping: Cold apples help the caramel set faster. After inserting the sticks, place them in the fridge for 20–30 minutes.
- Let the caramel cool slightly before dipping: Hot caramel is too runny and will slide right off. Wait until it thickens slightly—around 180°F—for the perfect coating consistency.
- Lightly rough the apple skin: If you’re still struggling, lightly scuff the apple with sandpaper (yes, clean sandpaper!) to help the caramel grip.
By following these steps, your homemade caramel apples will have that beautiful, even coat that sticks like a charm—no more caramel puddles on the tray.
Learn more about other sticky-sweet recipes like Banana Pudding with Chessman Cookies that also require texture and setting finesse.
Troubleshooting common caramel problems
Caramel-making can feel intimidating, but most mistakes are easy to avoid. Here’s how to fix or prevent the most common issues when making caramel apple recipes:
| Problem | Cause | Solution |
|---|---|---|
| Caramel is too thick | Overcooked or too little liquid | Add a splash of cream, stir gently |
| Caramel is too runny | Undercooked or too much cream | Return to heat and simmer a bit longer |
| Caramel hardens too quickly | Cooled too much before dipping | Rewarm gently over low heat |
| Caramel bubbles or scorches | High heat or no stirring | Keep heat medium-low and stir often |
| Caramel peels off apples | Waxed or wet apples | Clean, dry, and chill apples thoroughly |
Bonus Tip: If your caramel separates or looks oily, it’s likely overheated. Always melt caramel slowly and stir frequently to keep it smooth.
Your homemade caramel apples should be a pleasure to make, not a puzzle to solve. With a little knowledge and a few tricks, even first-timers can master this sweet fall favorite.
Recipe Variation
Salted caramel apples, chocolate-drizzled, and nut-crusted versions
While the classic homemade caramel apples are always a crowd-pleaser, there are tons of ways to upgrade the recipe for added texture, flavor, and flair. Here are some fun and easy variations:
Salted Caramel Apples
Add flaky sea salt immediately after dipping. The salt enhances the sweetness and gives the apples a sophisticated, grown-up twist. These are perfect for dinner parties or wine-pairing desserts.
Chocolate-Drizzled Caramel Apples
Once the caramel has set, melt some white, dark, or milk chocolate. Use a spoon or piping bag to drizzle it over the apples in decorative streaks. Let cool completely for a professional look and added decadence.
Nut-Crusted Caramel Apples
After dipping the apple in caramel, roll it in:
- Chopped peanuts
- Crushed almonds
- Toasted pecans
This adds crunch and richness that balances the sweet, sticky coating beautifully.
Crushed Candy Coating
Crush up your favorite candies—M&Ms, toffee bars, or peppermint sticks—and press them into the still-wet caramel. Great for birthday parties or Halloween night treats.
Discover more nostalgic spins like our Hoe Cake Bread, which pairs well with these creative dessert options.
Kid-friendly or allergy-sensitive adaptations
Making homemade caramel apples safe for everyone is totally doable. Here are a few variations that work well for those with allergies or dietary restrictions:
Nut-Free Option
Avoid nuts and use colorful sprinkles, graham cracker crumbs, or mini marshmallows as toppings. This keeps things fun without the risk of a reaction.
Dairy-Free Caramel
Use coconut milk instead of heavy cream and vegan butter to create a rich dairy-free caramel. Many store-bought caramels also come in dairy-free versions.
Mini Caramel Apples
Use a melon baller to scoop apple balls, skewer with toothpicks, and dip in caramel. These bite-sized treats are perfect for toddlers or portion control at parties.
Sugar-Free Caramel
Use sugar substitutes like erythritol or stevia in your caramel base. Pair this with tart apples for a lower-glycemic dessert that still delivers on flavor.
No matter the dietary need or personal taste, there’s a version of homemade caramel apples that everyone can enjoy.
Freezing and Storage
How to store caramel apples without sticking or sweating
Once you’ve mastered your homemade caramel apples, the next step is keeping them fresh and presentable until it’s time to serve. Proper storage makes all the difference between picture-perfect apples and sticky disasters.
Here are the best ways to store them:
- Room Temperature (Short-Term):
If you plan to eat them within 24 hours, place them on a parchment-lined baking sheet in a cool, dry place. Avoid stacking or wrapping too soon, as this traps moisture and causes sweating. - Refrigerator (Best for 2–3 Days):
Wrap each apple individually in wax paper or store them in an airtight container. Keep them on the middle fridge shelf where temperatures are more stable. Let them sit at room temperature for 10 minutes before serving to soften the caramel slightly. - Avoid Plastic Wrap:
Plastic can cause condensation. Use wax paper or a breathable treat bag tied loosely with a twist tie or ribbon instead. - Store Toppings Separately:
If you’ve added crumbly toppings (graham crackers, nuts, etc.), they may soften in the fridge. For a fresher finish, dip apples in plain caramel and add toppings just before serving.
Looking for a make-ahead option for gifting? Learn more about preserving other homemade treats like Coconut Lime Chicken that require smart storage too.
Can you freeze caramel apples for later?
Technically, yes—but it’s not recommended. Here’s why:
| Concern | What Happens |
|---|---|
| Texture changes | Apples become mushy when thawed |
| Caramel separation | Freezing can cause caramel to crack or weep |
| Topping quality | Crunchy toppings lose texture |
If you must freeze them (like for long-distance shipping), here’s how:
- Wrap each apple tightly in wax paper, then foil.
- Place in a freezer-safe zip bag.
- Freeze for up to 1 month.
- Thaw in the fridge overnight, then let sit at room temp before unwrapping.
Still, fresh is best. The crisp bite and glossy caramel shine are worth enjoying right away. After all, homemade caramel apples are meant to be savored at their sticky-sweet peak!
Special Equipment
Tools you need for caramel apple success
While homemade caramel apples don’t require a full candy-making setup, having the right tools on hand makes the job smoother—and your results more professional. Here’s a list of essential gear:
| Tool | Why You Need It |
|---|---|
| Wooden sticks (craft/candy) | For skewering and easy handling |
| Candy thermometer | Ensures your caramel hits the right temp (240°F) |
| Heavy-bottom saucepan | Prevents scorching while cooking caramel |
| Silicone spatula | For stirring without burning or sticking |
| Baking sheet with parchment | For setting dipped apples cleanly |
| Wax paper or treat bags | For wrapping and storage |
These items are easy to find at grocery stores, online retailers, or kitchen supply shops. If you plan to make caramel apple recipes often, consider buying in bulk for better value.
Looking for inspiration? Try something different with your gear and make Muddy Buddies using many of these same tools—great for parties too!
Optional equipment to make the job easier
Want to take your homemade caramel apples to the next level with less mess and more fun? These optional tools are well worth the investment:
- Caramel apple dipping station: A kit that holds apples upright and includes built-in drip trays for neat setup.
- Rotating cake turntable: Makes decorating or drizzling chocolate easier and more even.
- Apple corer/slicer: If you’re making mini caramel apple slices or kid-friendly versions, this tool saves time.
- Silicone baking mat: Reusable and perfect for cooling dipped apples without sticking or paper residue.
If you’re just starting out, don’t worry—you can make perfect homemade caramel apples with just the basics. But as your love for fall treats grows, upgrading your tools adds polish to your creations and reduces clean-up time.
Frequently Asked Questions
How do you keep caramel from sliding off apples?
Caramel slides off apples mainly due to wax or moisture on the skin. To fix this, wash the apples in hot water with vinegar to remove any wax coating, then dry them completely. Also, let the caramel cool slightly before dipping—this helps it grip better. Using cold apples also allows the caramel to set quickly and cling to the surface.
Why won’t my caramel stick to my apples?
If the apples are waxy, wet, or too warm, the caramel won’t adhere properly. For homemade caramel apples to work, start with clean, dry, and chilled apples. You can even lightly roughen the skin with fine-grit sandpaper to help the caramel bond better. Also, make sure the caramel isn’t too hot—it should be thick but pourable.
How do you caramelize apples?
To caramelize apples, you’ll need a mixture of sugar, corn syrup, butter, and cream cooked to about 240°F (soft-ball stage). Stir constantly to prevent burning. Once the mixture thickens and turns golden brown, dip apples immediately. This is the foundation for homemade caramel apples and can also be used for caramel sauce or candies.
What is the trick to making caramel?
The trick is controlling the heat and stirring consistently. Use a candy thermometer to keep the mixture between 235°F and 245°F. Don’t walk away—caramel can go from perfect to burned in seconds. Adding a bit of vanilla at the end enhances flavor, and a pinch of salt balances sweetness beautifully.
Should apples be cold when making caramel apples?
Yes! Cold apples help the caramel set quickly and evenly. After washing and drying, refrigerate apples for at least 20–30 minutes before dipping. This also prevents the caramel from pooling at the bottom and keeps your homemade caramel apples looking smooth and polished.
Why does my caramel melt off my apples?
Melting or sliding usually happens because of excess moisture, wax, or hot caramel. Let the caramel cool slightly after cooking, and ensure the apples are dry and cold. Store them in a cool room or fridge to keep the caramel firm. Avoid high humidity, which can soften or weep the coating.
Conclusion
Making homemade caramel apples is more than just a seasonal kitchen project—it’s a nostalgic, customizable treat that brings warmth and joy to any occasion. Whether you’re crafting them for a Halloween bash, a Thanksgiving dessert table, or a cozy weekend activity with the kids, these sticky-sweet delights are guaranteed to impress.
From prepping apples correctly to getting that golden, glossy caramel just right, this guide has walked you through everything you need to succeed. Plus, with creative variations, allergy-friendly options, and expert troubleshooting, you’re equipped to make a batch that’s both beautiful and delicious.
So roll up your sleeves, pick your favorite toppings, and start dipping. Your next fall tradition is just a pot of caramel away.
Don’t miss our Banana Cake Using Yellow Cake Mix—another comforting recipe that hits the sweet spot for family-friendly baking.
PrintHomemade Caramel Apples
Learn how to make the best homemade caramel apples with step-by-step instructions, caramel coating tips, and creative topping ideas. Perfect for fall parties, Halloween, or sweet holiday treats.
- Prep Time: 10 minutes
- Cook Time: 20 minutes
- Total Time: 30 minutes
- Yield: 6 caramel apples
- Category: Dessert, Snacks, Party Treats
- Method: Stovetop, Dipping
- Cuisine: American
- Diet: Vegetarian
Ingredients
- 6 medium apples (Granny Smith, Honeycrisp, or Fuji)
- 2 cups granulated sugar
- 1 cup light corn syrup
- 1 cup heavy cream
- ½ cup unsalted butter
- 1 tsp vanilla extract
- Optional toppings: crushed nuts, mini chocolate chips, sprinkles, sea salt, melted chocolate
- Optional: 1 tbsp white vinegar or lemon juice (for cleaning apples)
- Wooden sticks or candy sticks for skewering
Instructions
- Clean and Prep Apples: Wash apples in hot water with vinegar or lemon juice to remove wax. Dry thoroughly. Insert sticks into apple tops and refrigerate for 30 minutes.
- Make the Caramel: In a heavy-bottomed saucepan, combine sugar, corn syrup, and cream. Stir over medium heat until dissolved. Add butter and cook, stirring constantly, until the mixture reaches 240°F using a candy thermometer.
- Add Vanilla and Cool Slightly: Remove from heat, stir in vanilla, and let cool for 5–7 minutes to thicken slightly.
- Dip Apples: Tilt each apple into the caramel, spinning slowly to coat evenly. Let excess drip off and scrape the bottom on the pan’s edge. Place on parchment paper.
- Add Toppings: While still tacky, roll or sprinkle on toppings. Let cool completely at room temperature or in the fridge.
Notes
- For best caramel adhesion, ensure apples are cold and completely dry.
- Avoid waxy apples or roughen skin lightly for better caramel stick.
- Store individually wrapped in wax paper in a cool place for up to 3 days.
- Can be made dairy-free using coconut milk and vegan butter.