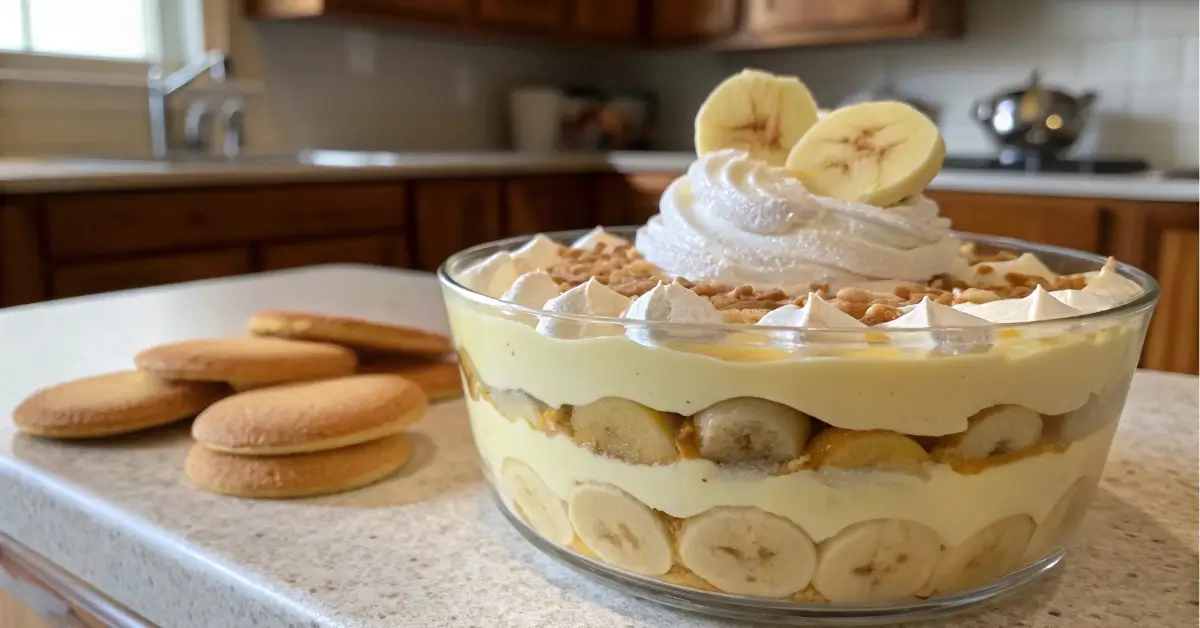
When it comes to nostalgic Southern desserts, banana pudding stands out as a sweet, creamy, and absolutely irresistible treat. But what if we told you that banana pudding with banana pudding—yes, a double layer of creamy banana bliss—takes this classic to the next level? In this guide, we’ll show you how to make this layered masterpiece, from choosing the perfect pudding to keeping your bananas fresh and yellow. Whether you’re prepping for a potluck or just want to treat yourself, this step-by-step breakdown has you covered. Don’t miss our banana dessert recipes for more sweet inspiration!
Jumo to:
Introduction to Banana Pudding with Banana Pudding
What Makes This Dessert So Iconic
Banana pudding has been a staple in Southern kitchens for decades. The traditional version involves layers of sliced bananas, vanilla wafers, and vanilla pudding, often topped with whipped cream or meringue. So, what’s new? The trend of banana pudding with banana pudding doubles the banana flavor by using both banana-flavored pudding and sliced bananas for an ultra-rich and fruit-forward taste.
This upgrade is more than just a twist—it’s a full-blown transformation. Adding banana-flavored pudding instead of plain vanilla boosts the aroma, intensifies the tropical notes, and creates a dessert that tastes like fresh bananas in every bite.
Why Double Banana Pudding is a Viral Hit
Social media has embraced this pudding-on-pudding trend for good reason. It’s visually impressive, simple to assemble, and totally customizable. Plus, the layers of banana pudding combined with fresh banana slices create an unbeatable texture contrast—creamy, soft, and just a little crunch from the wafers.
Another reason it’s a crowd favorite? It’s practically no-fail. Whether you’re a kitchen pro or a total beginner, this dessert is easy to master. And the best part? You can prep it the night before—perfect for holidays, BBQs, or cozy nights in.
Discover great ideas like make-ahead dessert tips.
Choosing the Right Pudding for Banana Pudding
Instant vs Cook-and-Serve Pudding: Which Works Best
One of the first choices you’ll make when crafting banana pudding with banana pudding is deciding between instant pudding and cook-and-serve pudding. Both can work, but each offers a unique texture and flavor experience.
- Instant pudding is the go-to for convenience. It sets quickly and has a smooth, creamy consistency. It’s ideal if you need your dessert ready in under an hour. For a double banana pudding twist, banana-flavored instant pudding gives you that rich taste right away without needing stovetop time.
- Cook-and-serve pudding, on the other hand, takes a bit more effort but rewards you with a silkier, slightly thicker texture. Heating allows starches to activate fully, which adds that comforting homemade pudding mouthfeel.
Pro Tip: If you’re aiming for the most intense banana flavor, go with banana-flavored instant pudding layered over banana slices—yes, banana pudding with banana pudding truly lives up to its name this way.
Check out dessert techniques using pudding for more fun dessert experiments.
Banana-Flavored vs Vanilla: Which One Wins?
Traditionally, banana pudding recipes call for vanilla pudding layered with bananas. While that’s delicious, it only hints at banana flavor through the fruit alone. For next-level results, banana-flavored pudding mix is your secret weapon. It brings depth and authenticity to every bite.
Here’s how they compare:
| Pudding Type | Flavor Profile | Best For |
|---|---|---|
| Vanilla Pudding | Mild, creamy, and neutral | Classic banana pudding |
| Banana-Flavored Pudding | Sweet, fruity, intense banana | Banana pudding with banana pudding |
For purists who enjoy the subtle sweetness of traditional pudding, vanilla works fine. But if you want banana in every spoonful, go all-in with banana-flavored pudding—or even better, layer both for flavor complexity.
Don’t miss our clever flavor hacks for desserts for other fun ways to upgrade your treats.
Best Ingredients for Banana Pudding with Banana Pudding
Fresh vs Ripe Bananas: The Taste Factor
The bananas you use can make or break your banana pudding. While any banana will technically “do the job,” choosing the right ripeness is key to building the best flavor and texture in your banana pudding with banana pudding.
- Fresh bananas (light yellow, no spots): These offer a firmer texture and milder banana flavor. They’re great if you plan to serve the pudding the same day since they hold up well without going mushy.
- Ripe bananas (spotted, soft): These deliver that strong banana sweetness and creamier mouthfeel. They melt into the pudding layers and enhance the overall banana intensity. But be careful—they brown quicker, so timing is everything.
Our recommendation? Go for medium-ripe bananas—yellow with just a few brown flecks. They’re soft enough to blend beautifully into the pudding but still firm enough to slice cleanly.
Looking for inspiration? Try this comfort-food dessert layering technique.
Milk Options: Dairy, Almond, or Oat?
While whole milk is the traditional choice for creamy pudding, it’s far from the only option. Whether you’re lactose-intolerant, vegan, or just experimenting, there are plenty of great milk alternatives that work perfectly with both instant and cook-and-serve pudding mixes.
Here’s a quick comparison:
| Milk Type | Creaminess | Flavor Impact | Works With |
|---|---|---|---|
| Whole Milk | High | Rich, classic | All pudding types |
| 2% or Skim Milk | Medium to Low | Slightly thinner | Instant pudding only |
| Almond Milk | Low | Nutty, subtle banana match | Instant only (may not set well when cooked) |
| Oat Milk | Medium | Naturally sweet, smooth | Best dairy-free option |
| Coconut Milk | High | Adds tropical notes | Great for banana pudding twists |
For best results, always check the back of the pudding mix box—some mixes won’t thicken properly with dairy-free milk unless you adjust the ratio or add a thickening agent like cornstarch.
Flavor Tip: Mixing half oat milk and half coconut milk delivers a rich, creamy base with subtle tropical vibes—perfect for enhancing that banana-forward experience in your banana pudding with banana pudding.
Don’t miss our creative milk substitutions to make your dessert dairy-free but still dreamy.
Layering Banana Pudding Like a Pro
What Order to Layer Banana Pudding for Best Texture
In the world of banana pudding with banana pudding, layering is everything. A great banana pudding isn’t just about flavor—it’s about structure. Get the order right, and every bite becomes a perfect combo of creamy pudding, fresh banana, and soft, sweet cookie.
Here’s the ideal layer order for a no-fail banana pudding experience:
- Pudding Base Layer: Start with a thin layer of banana pudding to anchor the rest.
- Wafers or Cookies: Add a layer of vanilla wafers, graham crackers, or buttery Chessmen cookies.
- Banana Slices: Add evenly sliced bananas (1/4-inch thick works best).
- More Banana Pudding: Pour a generous layer of banana pudding to cover everything.
- Repeat Layers: Keep stacking in this order until your container is full.
- Top with Whipped Cream or Meringue: Finish with a fluffy cloud topping and garnish with crushed cookies or banana slices.
Let it chill for at least 4 hours, preferably overnight. This gives the layers time to settle and the cookies to soak up flavor and soften just right.
Pro Tip: Use a glass dish to show off your beautiful layers—it’s dessert and decor in one.
Learn more about building perfect dessert textures to wow any crowd.
Nilla Wafers, Chessmen, or Homemade?
The cookie layer plays a surprisingly major role in the taste and texture of banana pudding with banana pudding. While Nilla Wafers are the traditional favorite, several other options can level up your dessert game:
| Cookie Type | Texture After Chilling | Flavor Profile | Best Use |
|---|---|---|---|
| Nilla Wafers | Soft and nostalgic | Light vanilla | Classic pudding |
| Chessmen Cookies | Buttery, richer flavor | Slightly crunchy at first | Luxe version |
| Shortbread | Crumbly and dense | Buttery, melt-in-mouth | Fancy layering |
| Graham Crackers | Soft and spiced | Mildly sweet | Base layer |
| Homemade Vanilla Cookies | Crisp, customizable | Totally unique | For baking pros |
If you like your cookies to retain a little bite, use Chessmen cookies or shortbread. For ultra-soft, melt-in-your-mouth texture, stick with Nilla Wafers. Want full control over ingredients? Go homemade.
Flavor Upgrade: Toast your cookies lightly before layering for added texture and flavor complexity.
Check out this cookie layering idea in a pudding dessert for inspiration.
Preventing Browning in Bananas
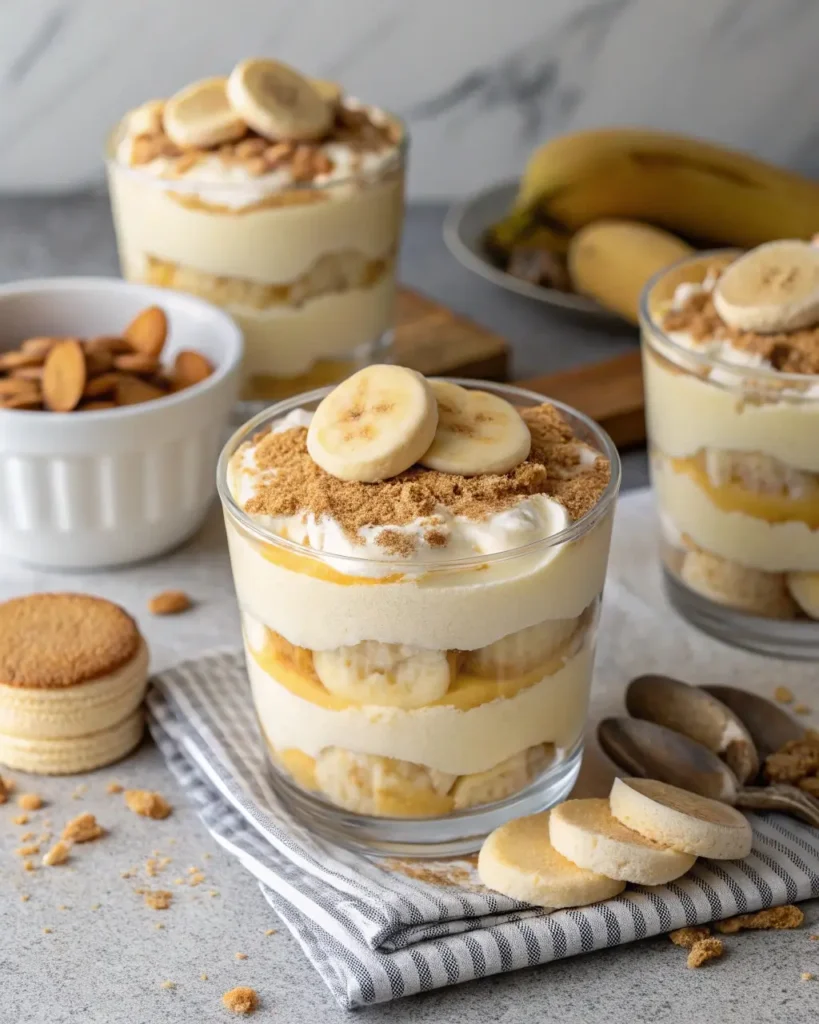
Why Bananas Turn Brown in Pudding
Bananas may be sweet, creamy, and delicious—but they’re also notorious for turning brown once sliced. The culprit? Oxidation. When banana flesh is exposed to air, enzymes called polyphenol oxidases react with oxygen, causing that unappetizing brown color.
In a dish like banana pudding with banana pudding, where the presentation and texture really matter, keeping your bananas from browning is a must. It’s not just about looks—browned bananas can become mushy and slightly bitter, too.
Here’s when bananas are most at risk in your pudding:
- During slicing and handling
- If left exposed before layering
- After chilling for 1+ days without protection
But don’t worry—there are some easy tricks to prevent that!
Smart Hacks to Keep Them Yellow and Fresh
Want your banana slices to stay golden and fresh even after hours in the fridge? Try these proven methods to slow oxidation without altering the flavor of your banana pudding with banana pudding.
1. Citrus Juice Dip (Lemon or Orange Juice)
Gently toss banana slices in a mix of water and citrus juice (1:1 ratio). The vitamin C and citric acid prevent oxidation. Don’t overdo it or your pudding might taste tangy.
2. Pineapple Juice Splash
A sweeter, subtler option that works like lemon juice but blends better with banana flavor. Bonus: It enhances the tropical notes in your dessert.
3. Use Banana-Flavored Pudding as a Sealant
Layer pudding directly over banana slices to minimize their contact with air. This works especially well in tightly sealed jars or covered dishes.
4. Ascorbic Acid Powder
Available in the vitamin aisle, ascorbic acid (pure vitamin C) mixed with water can be lightly brushed over banana slices.
5. Quick Assembly
Slice bananas last, layer quickly, and seal the pudding with plastic wrap pressed directly against the top layer to limit air exposure.
Bonus Tip: For banana cream pies or other open-faced desserts, brush the top banana layer with melted white chocolate to act as an edible seal.
Don’t miss our quick fruit freshness tips to keep your ingredients looking their best.
Banana Cream Pudding vs Banana Pudding
What’s the Real Difference in Flavor & Texture
Although they sound nearly identical, banana cream pudding and banana pudding aren’t quite the same thing. The difference is subtle, but when you’re making a double-layered dessert like banana pudding with banana pudding, the type of pudding you choose can seriously impact the final result.
| Type | Texture | Flavor Profile | Best For |
|---|---|---|---|
| Banana Pudding | Classic creamy | Balanced vanilla-banana | Traditional layered desserts |
| Banana Cream Pudding | Slightly richer | Strong banana, smooth custard | Banana-forward flavor bombs |
- Banana Pudding usually refers to a vanilla or banana-flavored base layered with fresh banana slices and cookies. It’s simple, nostalgic, and the focus is as much on texture as it is on flavor.
- Banana Cream Pudding, on the other hand, is thicker and more custard-like. It typically involves egg yolks or heavy cream for added richness. This makes it smoother and more luxurious—perfect if you want a silky, spoonable finish.
So, which one wins?
👉 If you want strong, obvious banana flavor: go for banana cream pudding.
👉 If you prefer a more classic, layered dessert vibe: stick with banana pudding.
Pro Layering Tip: Mix both puddings in alternating layers for the ultimate banana pudding with banana pudding combo—a blend of light and rich, mild and intense.
Check out our twist on mousse and pudding textures if you love creamy desserts.
When to Use Each Type in Recipes
Let’s break it down based on how you’re serving your dessert:
- Glass Trifle Bowl or Party Tray? Use banana pudding. It holds its shape well between cookies and bananas, and is easier to scoop.
- Mason Jars or Individual Cups? Go for banana cream pudding—it’s thicker, cleaner, and makes your dessert feel upscale.
- Frozen Banana Pudding Pie? Banana cream pudding is your best bet because it won’t get runny when thawed.
- Family Potluck or BBQ? Banana pudding wins—it’s traditional, fast to prepare, and crowd-pleasing.
No matter which you choose, both options are amazing when paired with ripe bananas, whipped topping, and those iconic cookie layers.
Discover more about creamy dessert customization to make any pudding your signature dish.
Delicious Banana Pudding Variations
Banana Pudding Cheesecake Hybrid
If you’ve ever wished banana pudding could be just a little more decadent, this is your dream come true. The banana pudding cheesecake hybrid layers banana pudding with a rich cheesecake filling, creating a lush, dense dessert with a tangy twist.
Here’s how to make it:
Ingredients:
- Banana-flavored pudding
- Cream cheese
- Sweetened condensed milk
- Whipped topping
- Nilla wafers or graham cracker crust
- Sliced bananas
Assembly Steps:
- Beat softened cream cheese with condensed milk until smooth.
- Fold in whipped topping and half the banana pudding.
- Layer onto crust, followed by bananas and more pudding.
- Chill at least 4 hours—or overnight.
The final product? A rich, creamy, banana-filled dessert with cheesecake vibes. It’s perfect for special occasions or when you just want something extra indulgent.
Looking for inspiration? Try a layered dessert hack like this one.
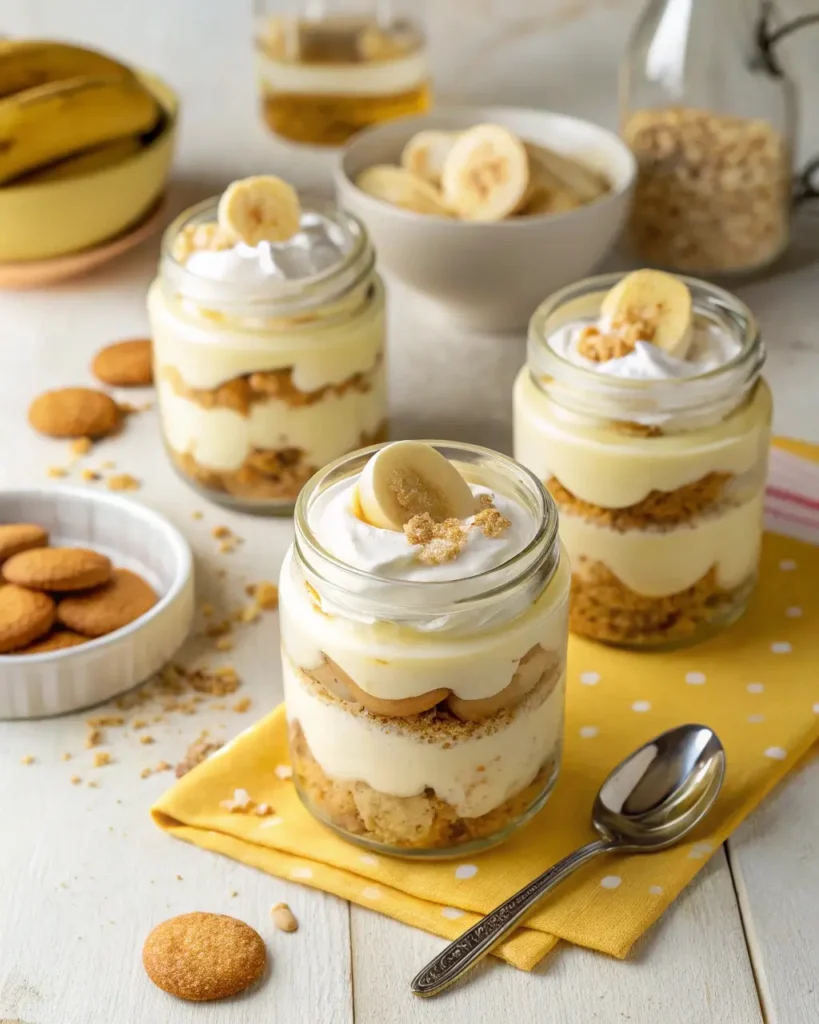
Mini Mason Jar Banana Pudding Treats
Want a dessert that travels well, looks adorable, and satisfies every sweet tooth? Mini banana pudding with banana pudding jars are your go-to. These individual servings are easy to make, fun to eat, and customizable for any crowd.
Why Mason Jars Rock:
- Perfect for meal prep or parties
- Built-in portion control
- Great for gifting or display at events
Layering Tip: Use crushed cookies at the bottom, followed by alternating layers of banana pudding and sliced bananas, then top with whipped cream. Garnish with a banana chip or wafer on top for a photo-ready finish.
Flavor Add-Ins You Can Try:
- Peanut butter drizzle
- Nutella swirls
- Coconut flakes
- Caramel sauce
- Chopped walnuts or pecans
Want a dairy-free option? Sub the pudding with plant-based mix and use coconut whipped cream for a vegan-friendly version that’s just as rich and satisfying.
Don’t miss our fun dessert prep techniques that make batching easy.
What You Can Make with Pudding Mix
Beyond Pudding: Cookies, Cakes, and Bars
Banana pudding mix isn’t just for banana pudding. It’s a game-changer ingredient for baked and no-bake desserts alike. When added to your favorite recipes, it gives everything a creamy, soft texture and a pop of banana flavor. Here are some genius ways to use it:
1. Banana Pudding Cookies
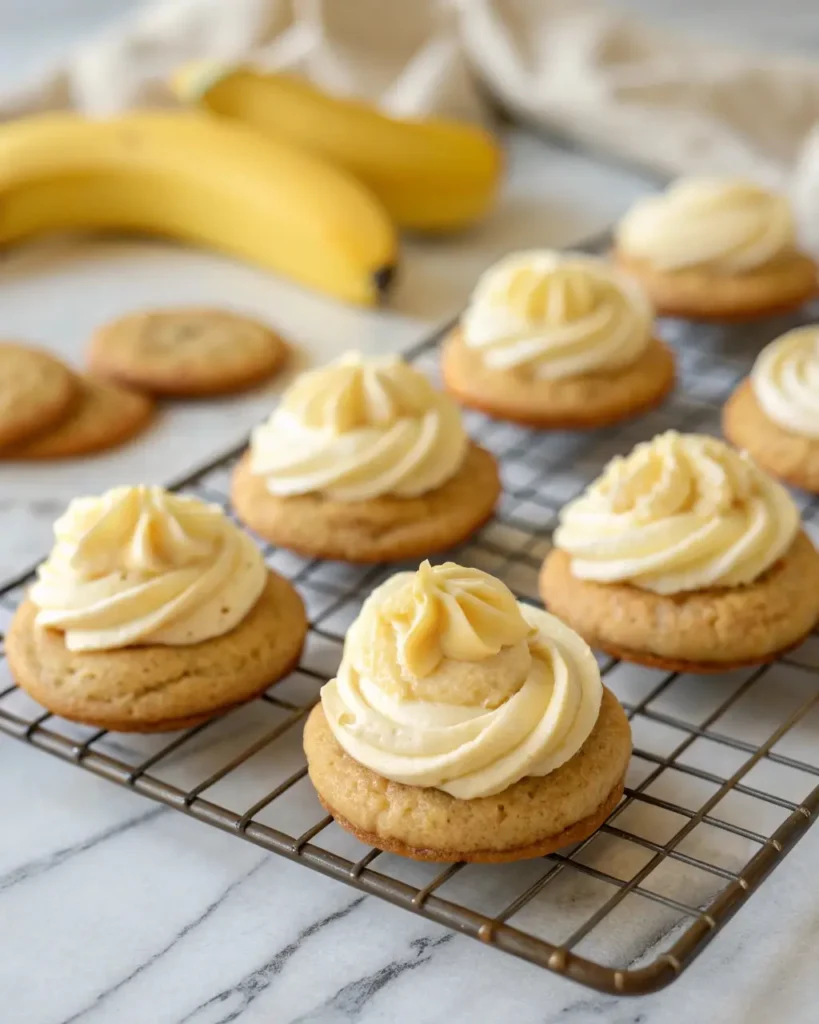
Soft, chewy cookies with pudding mix in the dough turn out moist and banana-flavored without needing mashed bananas. Add white chocolate chips and crushed vanilla wafers for a banana cream pie cookie experience.
2. Banana Pudding Cupcakes
Mix pudding powder into the batter or filling to create a banana-flavored core that stays moist for days. Top with whipped cream and a cookie for the full pudding vibe.
3. Banana Pudding Bars
Use banana pudding as the creamy layer between graham cracker crust and whipped topping. Chill until firm, then slice into squares.
4. Banana Pudding Bundt Cake
Add pudding mix to your cake batter to create a dense, flavorful cake with that unmistakable banana aroma. It’s perfect for brunch or potlucks.
5. Banana Bread Remix
Stir in pudding mix to give your banana bread a lighter texture and stronger banana flavor—without adding extra bananas.
Check out our soft dessert hacks for baking tips with pudding powder.
No-Bake Banana Pudding Icebox Cake
This no-bake dream dessert layers pudding, cookies, and whipped cream—just like a classic banana pudding—but uses a cake pan for a sliceable treat. No oven, no fuss, and it tastes better the longer it chills.
How to Make It:
- Line a baking dish with vanilla wafers.
- Spread banana pudding over the cookies.
- Add banana slices and whipped cream.
- Repeat until full, then top with crushed cookies.
- Chill overnight for best results.
Want to get extra? Add a drizzle of caramel between layers or fold in cream cheese to thicken the pudding layer.
Flavor Twists You Can Try:
- Swap Nilla wafers for shortbread or graham crackers
- Use chocolate pudding for a banana split vibe
- Layer with strawberries or pineapple for a tropical feel
Don’t miss our no-bake dessert ideas to beat the heat without turning on your oven.
Serving & Storing Banana Pudding
How Long Does Banana Pudding Last in the Fridge
Once your banana pudding with banana pudding is beautifully layered and chilled, you might be wondering—how long will it actually keep?
Here’s the good news: banana pudding can stay fresh for up to 4 days in the fridge, but there are a few tips to make sure it doesn’t turn into a soggy mess by day two.
Storage Tips:
- Use an airtight container: This keeps out fridge smells and prevents moisture loss.
- Cover with plastic wrap: Press the wrap directly onto the surface of the pudding to stop air exposure.
- Wait to garnish: Add banana slices and whipped cream topping just before serving to keep everything looking fresh.
Pro Tip: If you’re prepping for an event, assemble the pudding the night before and chill overnight for peak flavor and texture.
Learn more about meal prep desserts for make-ahead success.
Can You Freeze Banana Pudding Successfully?
Freezing banana pudding is a bit of a gamble. Technically, yes—you can freeze it—but the texture might suffer. The high water content in bananas and pudding can create a watery or grainy texture when thawed.
If you still want to give it a shot, follow these freezing tips:
How to Freeze Banana Pudding:
- Use freezer-safe containers or small mason jars.
- Skip the fresh banana slices—they don’t freeze well.
- Add extra whipped topping as a barrier layer.
- Label with the date and eat within 2–3 weeks.
To Thaw:
- Let it thaw overnight in the fridge.
- Give it a good stir to revive the texture before serving.
- Top with fresh banana slices right before serving.
Best Use for Thawed Banana Pudding: Banana pudding milkshakes, breakfast parfaits, or folding into banana bread batter.
Discover more creative leftovers ideas that turn yesterday’s dessert into today’s treat.
FAQs About Banana Pudding with Banana Pudding
What pudding to use for banana pudding?
For a classic flavor, vanilla pudding is often used. However, for a richer banana experience, banana-flavored pudding is the best choice. It enhances the overall flavor and complements the banana slices layered throughout. You can also use a mix of banana and vanilla puddings for a balanced taste.
What can I make with pudding mix?
Pudding mix is incredibly versatile. Beyond traditional pudding, you can use it to make cookies, cupcakes, cake fillings, mousse, parfaits, and no-bake desserts like icebox cakes and layered trifles. It adds flavor and moisture to baked goods while cutting prep time.
Is banana cream pudding the same as banana pudding?
Not exactly. Banana cream pudding tends to have a thicker, custard-like consistency and is richer, often including cream or egg yolks. Banana pudding is lighter and typically layered with cookies and fresh banana slices. Both are delicious, but the textures and intensity of banana flavor vary.
How do you keep bananas from turning brown in banana pudding?
To prevent browning, coat banana slices in lemon or pineapple juice, or layer pudding directly over the bananas to seal out air. Also, assemble your pudding shortly before chilling and serving, and store it in an airtight container to reduce oxidation.
How to keep bananas from turning brown in a banana cream pie?
The same methods apply. Toss bananas in citrus juice before layering, or brush them with melted white chocolate to create an edible barrier. Make sure to refrigerate the pie promptly and keep it tightly sealed.
What order do you layer banana pudding?
Start with pudding, followed by cookies, then banana slices. Repeat the layers, ending with pudding or whipped topping. This order ensures the cookies soften evenly and the bananas are protected from air exposure.
Conclusion
Making banana pudding with banana pudding isn’t just a fun recipe—it’s a full-on flavor celebration. By doubling down on banana flavor using both banana-flavored pudding and fresh banana slices, you elevate a classic dessert into something unforgettable. From picking the perfect pudding to layering like a pro and even getting creative with add-ins and variations, this guide has shown how easy it is to make the ultimate banana pudding dish.
Whether you’re hosting a potluck, prepping desserts for the week, or just treating yourself, banana pudding with banana pudding offers endless delicious potential. And with tips to keep it fresh, flavorful, and fabulous—your next pudding creation is sure to impress.
Don’t miss our dessert section for more easy, creamy, and crowd-pleasing recipes.
PrintBanana Pudding with Banana Pudding – The Ultimate Creamy Delight Recipe
Banana pudding is a nostalgic dessert combining creamy vanilla pudding, crunchy banana-flavored wafers, and sweet banana slices. Perfect for family gatherings, holidays, or simple indulgence, this guide walks you through the art of layering this classic treat for the perfect texture and flavor in every bite.
- Prep Time: 15 minutes
- Total Time: 15 minutes
- Yield: 8 servings
- Category: Dessert
- Method: No-Cook
- Cuisine: American
- Diet: Vegetarian
Ingredients
- 3 cups vanilla pudding (homemade or store-bought)
- 4 bananas, sliced (ripe but firm)
- 1 box banana-flavored wafers
- 2 cups whipped cream (optional, for topping or layers)
- 1 tsp vanilla extract (optional)
Instructions
- Prepare the Base: Spread a thin layer of vanilla pudding on the bottom of your serving dish.
- Add Wafers: Arrange banana-flavored wafers in a single layer over the pudding, breaking wafers if necessary to fit snugly.
- Layer Bananas: Add an even layer of banana slices over the wafers, ensuring slight overlap without overcrowding.
- Repeat Layers: Continue layering pudding, wafers, and bananas until the dish is filled, aiming for at least three complete layers.
- Final Touches: Top with whipped cream, crumbled wafers, or banana slices for garnish. Drizzle with caramel sauce for extra sweetness (optional).
- Chill and Serve: Chill the assembled dessert in the refrigerator for at least 30 minutes before serving to let the flavors meld together.
Notes
- To avoid soggy wafers, use chilled pudding and assemble closer to serving time.
- Variations: Try chocolate pudding, gluten-free wafers, or add tropical flavors like coconut cream.
- Store leftovers in an airtight container in the refrigerator for up to 2 days.

