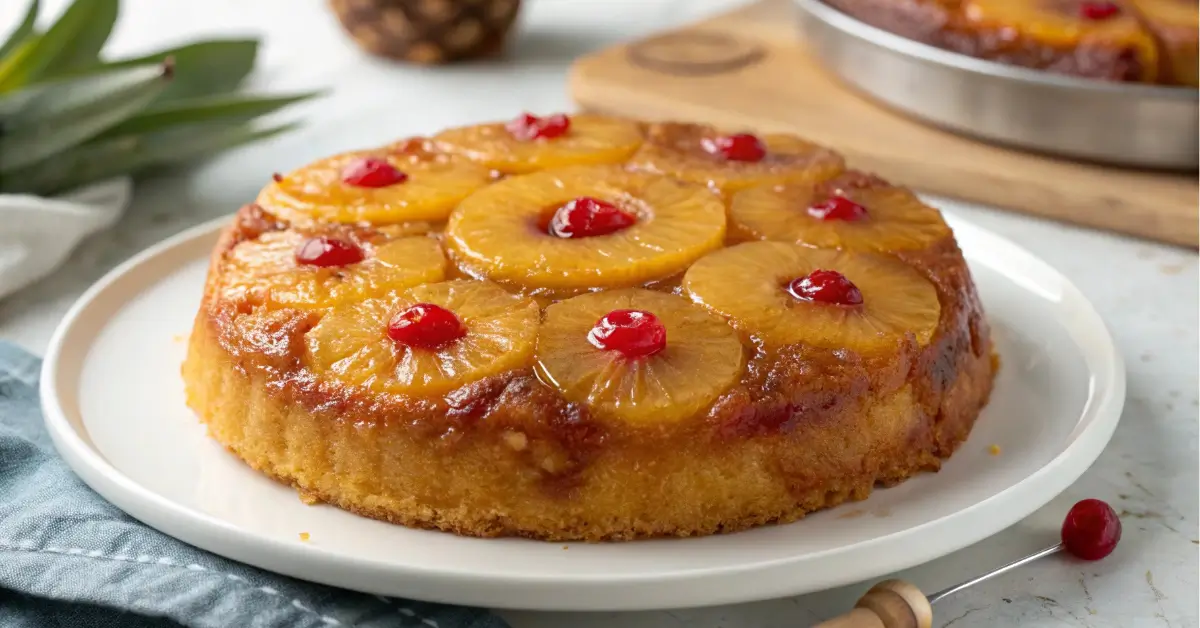
Pineapple upside down cake is more than just a dessert—it’s a slice of sweet nostalgia that continues to win hearts with every buttery, caramelized bite. This timeless treat, crowned with juicy pineapples and bright red cherries, has graced American tables for nearly a century. Whether you’re making it from scratch or using a shortcut with cake mix, the result is always stunning and satisfying.
In this comprehensive guide, you’ll learn everything from its fascinating origin to foolproof baking tips and creative modern twists. We’ll explore the best cake base options, how to flip it perfectly, why it sometimes turns soggy, and even whether parchment paper is necessary. Plus, you’ll get answers to top-searched questions in the FAQ section.
Looking for inspiration? Try Crispy Roasted Chickpeas: A Tasty Snack if you want a savory balance to this dessert.
Let’s begin with where it all started.
Jumo to:
The History and Charm of Pineapple Upside Down Cake
A nostalgic dessert that stood the test of time
Before boxed cake mixes and electric ovens, fruit-based upside-down cakes were a popular way to bake using cast iron skillets. Bakers would layer fruit at the bottom of the pan, pour batter on top, and then flip it over after baking. This method wasn’t just practical—it was beautiful, too.
But it wasn’t until Dole Pineapple Company launched a massive promotional campaign in the 1920s that the pineapple upside down cake became an iconic American dessert. Over 2,500 pineapple recipes were submitted to their national contest—proving this cake was more than just a trend. It became a staple.
Fast forward to today, and it still holds a warm place in many kitchens and hearts.
Why this retro treat is still a crowd-pleaser today
There’s just something magical about pineapple upside down cake. The combination of caramelized brown sugar, buttery richness, and the tangy sweetness of pineapple creates an irresistible flavor profile. And let’s not forget the eye-catching presentation. When flipped, the fruit topping becomes a glossy masterpiece that looks fancy—without being fussy.
It’s also super versatile. You can make it in a standard round pan, a cast-iron skillet, or even turn it into cupcakes for parties. Whether you’re baking for a summer BBQ or a cozy winter potluck, this cake fits right in.
And here’s the best part: it’s surprisingly easy to make.
Don’t miss our 25 Healthy Chicken Breast Recipes for lighter dinner ideas before indulging in dessert!
Essential Ingredients for the Perfect Pineapple Upside Down Cake
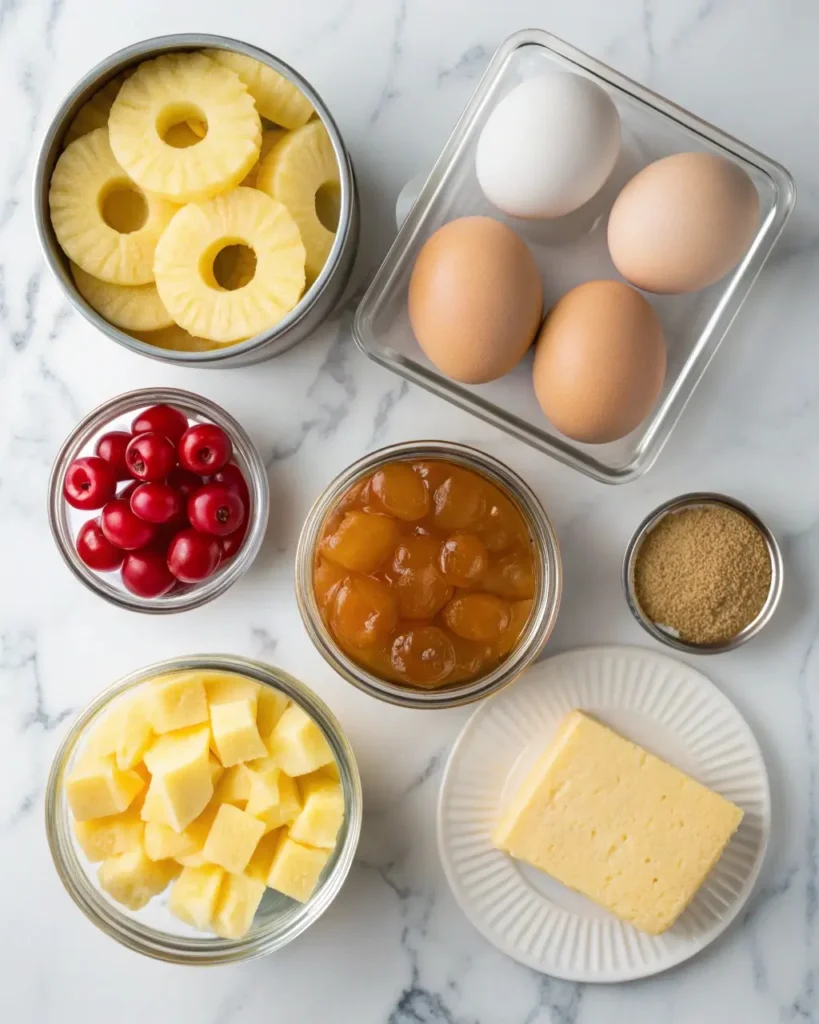
Must-have ingredients and substitutions
To master a pineapple upside down cake, you don’t need a pantry full of exotic items. In fact, part of the charm of this recipe lies in its simplicity. Below are the core ingredients you’ll want on hand, plus some smart substitutions if you’re in a pinch:
| Ingredient | Purpose | Substitutions (if needed) |
|---|---|---|
| Canned Pineapple Rings | Classic topping and moisture source | Fresh pineapple slices (thinly cut) |
| Maraschino Cherries | Adds color and sweet contrast | Fresh cherries, berries, or omit entirely |
| Brown Sugar | For caramelizing with butter | Coconut sugar or raw sugar |
| Unsalted Butter | Rich flavor, helps create the sticky topping | Margarine or vegan butter |
| Yellow Cake Mix | The base of the cake (if not making from scratch) | Vanilla cake mix or homemade base |
| Eggs | Binds and lifts the batter | Flax eggs (for vegan option) |
| Pineapple Juice or Water | Moisture for the cake mix | Orange juice for a citrus twist |
The combination of brown sugar and butter baked underneath the fruit is what creates the famous caramelized topping once flipped.
Pro tip: If you’re using a cake mix, swap the water in the box instructions for pineapple juice to enhance the flavor naturally.
Fresh vs. canned pineapple: Which is better?
This is a common debate, and the answer really depends on the texture and flavor you’re after. Here’s a quick comparison to help you decide:
| Type | Pros | Cons |
|---|---|---|
| Canned Pineapple | Soft, consistent texture; easy to slice | Can be overly sweet if not drained well |
| Fresh Pineapple | Brighter flavor; firmer bite | Requires peeling and slicing; may affect bake time |
Most traditional recipes stick with canned rings because they’re uniform and easy to work with. But if you’ve got a ripe pineapple on hand, feel free to slice it thin and go fresh. Just make sure it’s not too juicy—or you might end up with a soggy bottom.
If you’re curious about other healthy dessert options, Discover the Power of Ginger Shots for Wellness for a tangy boost to pair with your treat.
Choosing the Right Cake Base for Pineapple Upside Down Cake
Best cake mixes to use for pineapple upside down cake
If you’re in a time crunch or just want to keep things simple, using a cake mix is a game changer. But not all mixes are created equal when it comes to pineapple upside down cake. You want one that’s moist, not too airy, and has a rich flavor that complements the fruit.
Here are some top cake mixes that work beautifully with this dessert:
| Cake Mix Brand | Why It Works |
|---|---|
| Duncan Hines Yellow | Dense, moist crumb and holds the topping well |
| Betty Crocker Butter Yellow | Buttery richness enhances caramel topping |
| Pillsbury Golden Butter | Smooth texture and consistent rise |
| Trader Joe’s Vanilla Cake Mix | Subtle flavor lets the pineapple shine |
When using boxed mix, a smart trick is to replace the water with pineapple juice—this not only boosts the flavor but also ties everything together for a more cohesive taste.
And don’t worry, we’ll answer Can I use pineapple juice instead of water in a cake mix? later in our FAQ section—(spoiler alert: Yes, and you definitely should!).
Can you make it from scratch? Tips for a homemade base
While boxed cake mix is convenient, making your own cake batter from scratch gives you full control over flavor, moisture, and texture. Here’s a basic breakdown of what goes into a scratch-made cake for your pineapple upside down masterpiece:
Basic Ingredients for Homemade Base:
- 1 ½ cups all-purpose flour
- 1 cup granulated sugar
- ½ cup unsalted butter (softened)
- 2 large eggs
- 1 tsp vanilla extract
- 1 ½ tsp baking powder
- ½ tsp salt
- ¾ cup milk or buttermilk (for added richness)
Pro Tips:
- Don’t overmix the batter—this can make the cake rubbery.
- Use room-temperature eggs and butter for a smoother texture.
- Want extra fluff? Fold in a stiffly whipped egg white.
Whether you’re going with a cake mix or homemade, make sure the batter is thick enough to support the fruit topping but not so dense that it becomes heavy.
Don’t miss our classic comfort food guides like Make the Perfect Mango Mousse at Home for dessert variety that complements fruity cakes like this.
Step-by-Step Pineapple Upside Down Cake Instructions
Preparation and layering: Pineapple, cherries, and brown sugar magic
The beauty of a pineapple upside down cake lies in the preparation—it’s all about how you layer the bottom (which becomes the top!). Here’s a simple breakdown to get that signature caramelized crown.
Step-by-Step Prep:
- Preheat the oven to 350°F (175°C).
- Melt 1/2 cup butter and pour it into the bottom of your 9-inch round or square baking pan (cast iron skillets work great, too).
- Evenly sprinkle 1 cup of brown sugar over the melted butter.
- Arrange pineapple slices over the brown sugar. Most pans fit 7 full rings—one in the center and six around.
- Place maraschino cherries inside each ring and in any gaps. This gives the cake its iconic “pop” of red.
- Optional but amazing: sprinkle some shredded coconut or chopped pecans between the fruit for added flavor and texture.
This rich, buttery bottom layer caramelizes while baking, becoming the show-stopping topping once the cake is flipped.
Baking and flipping the cake the right way
Now it’s time for the batter. Whether you’re using a mix or your scratch-made version, pour it gently and evenly over the fruit layer without disturbing the pattern. A spatula helps spread the batter smoothly.
Baking Tips:
- Bake for 40–45 minutes until a toothpick inserted in the center comes out clean.
- Let it cool in the pan for no more than 10–15 minutes. Waiting too long increases the risk of the caramel sticking and ruining your flip.
Flipping Tips:
- Run a knife around the edges of the pan to loosen the cake.
- Place a flat serving plate over the top of the cake pan.
- Use both hands (with oven mitts!) and flip it quickly but steadily.
- Let it rest for 1 minute upside down before lifting the pan.
And voilà—you’ve got yourself a golden, glossy pineapple upside down cake ready to wow!
Discover great ideas like Air Fryer Taquitos: The Perfect Crowd-Pleasing Appetizer to pair with this cake for your next get-together.

Expert Tips to Avoid Common Pineapple Cake Mistakes
Preventing sogginess and overcooking
A soggy pineapple upside down cake can ruin the whole experience—no one wants a mushy base or dry top. Here’s how to avoid both ends of the disaster spectrum:
Avoiding Sogginess:
- Drain the pineapples and cherries thoroughly before placing them in the pan. Extra liquid leads to soggy results.
- Blot the fruit dry with a paper towel to soak up residual juice.
- Don’t go overboard with butter or sugar—too much caramel syrup can seep into the cake layer.
Avoiding Overbaking:
- Keep a close eye after the 35-minute mark. Use the toothpick test—insert it in the center and make sure it comes out clean.
- Avoid opening the oven repeatedly, which drops the temp and causes uneven baking.
- If the top browns too fast, tent it with foil for the final 10 minutes of baking.
Secrets to a clean flip and perfect presentation
There’s an art to flipping a pineapple upside down cake. Do it too early and it crumbles. Wait too long, and it sticks. Here’s how to get it right every single time:
Timing is Everything:
- Let the cake rest in the pan for 10–15 minutes max. Any longer and the caramelized topping begins to solidify.
The Flip Technique:
- Place a flat plate or serving tray over the cake pan.
- Use oven mitts and confidently flip the pan and plate together.
- Let the pan rest upside down for 1 minute to let gravity work.
- Gently lift the pan—don’t rush or shake.
For a Picture-Perfect Cake:
- Use a nonstick or well-greased pan.
- Avoid fruit overlap when arranging slices.
- Try adding a cherry in the center of each ring for a vibrant look.
- Wipe any drips around the edge for a clean finish.
If you’re wondering whether parchment paper can help with sticking, hang tight—we’ll dive into that in the FAQs!
Check out Homemade Oatmeal Chocolate Chip Bars for another sweet option to rotate with your cake cravings.
Creative Pineapple Upside Down Cake Variations
Mini versions, cupcakes, and skillet bakes
Pineapple upside down cake doesn’t have to be one big round showstopper. If you’re hosting a party, want individual servings, or just want to switch things up, there are several fun formats to try:
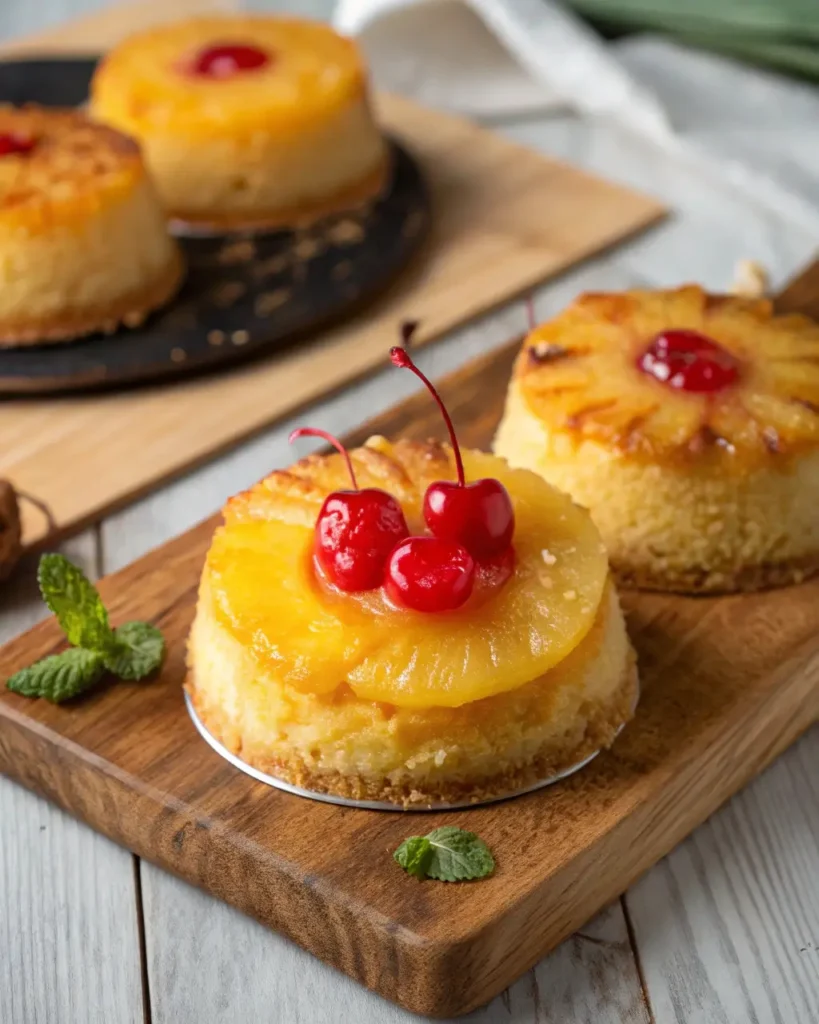
Mini Pineapple Upside Down Cakes
- Use a muffin tin or mini cake pans.
- Cut pineapple rings into halves or quarters to fit.
- Bake 20–25 minutes (shorter than full-size cakes).
These are perfect for events like baby showers or birthdays—each guest gets their own beautifully caramelized treat!
Pineapple Upside Down Cupcakes
- Similar to minis, but use cupcake liners.
- Add a small amount of brown sugar and butter to each cup.
- Top with a cherry and a pineapple chunk (not a full ring).
- Pipe a swirl of whipped cream for an elegant finish.
Cast Iron Skillet Bake
- A throwback to how this cake was originally made.
- The skillet retains heat evenly and gives the bottom a deep caramel crust.
- Make sure your skillet is well-seasoned or greased to prevent sticking.
Tropical twists: Coconut, rum, and beyond
Want to take your pineapple upside down cake to the next level? Add a little island flair with these tropical upgrades:
Coconut Pineapple Upside Down Cake
- Mix shredded coconut into the topping layer or the batter.
- Try coconut milk in place of regular milk or water for richness.
- Toasted coconut on top adds great crunch and flavor contrast.
Pineapple Rum Upside Down Cake
- Replace some of the pineapple juice in the batter with dark rum.
- Add a splash of rum to the brown sugar and butter layer for deeper flavor.
- Optional: Soak the cherries in rum for 30 minutes before assembling.
Pineapple Mango Fusion
- Swap half the pineapple slices with thin mango pieces.
- Adds a more tropical, citrusy depth to the dessert.
Spiced Pineapple Cake
- Add cinnamon, nutmeg, or even cardamom to the batter.
- These warm spices pair beautifully with brown sugar and fruit.
Don’t miss our Air Fry Salmon Bites: Crispy, Healthy & Fast Recipe Everyone Loves for a savory dish to balance your sweet indulgence.
Tools and Equipment You’ll Need for Pineapple Upside Down Cake
Pans, liners, and spatulas that make a difference
While you don’t need fancy gadgets to make pineapple upside down cake, the right tools can make the process smoother and the results prettier. Here’s your baking toolkit:
Cake Pan or Skillet
- 9-inch round cake pan – Classic choice for perfect ring arrangements.
- Square 9×9 pan – Works well if you want sharp, even slices.
- Cast iron skillet – Holds heat better, great for caramelizing the topping.
Tip: Make sure the pan is at least 2 inches deep so the batter doesn’t overflow.
Non-Stick Spray or Grease + Flour
- A well-greased pan is essential to prevent sticking, especially around the edges.
- You can also line the bottom with parchment paper cut to fit the pan (we’ll talk more about this in the FAQ!).
Offset Spatula
- Great for spreading batter evenly without disturbing the fruit layer.
Cooling Rack
- Allows air circulation underneath the pan to cool evenly before the flip.
Large Serving Plate or Cake Board
- Must be slightly larger than your cake pan for an easy, safe flip.
- Flat surface is better than a rimmed plate to prevent cracking the cake top.
Toothpicks
- A simple tool to test for doneness—insert in the center, and if it comes out clean, it’s done.
Should you use parchment paper when baking a pineapple upside down cake?
Ah yes, the great parchment paper debate. So, should you use it? The answer is: it depends on your pan and confidence level.
Reasons to Use Parchment Paper:
- Helps prevent sticking, especially in older or cheap pans.
- Makes the flip cleaner, especially if your caramel layer is extra thick.
- Provides a non-stick base for fruit-heavy toppings.
How to Use It Properly:
- Cut a circle (or square) to fit just the bottom of the pan.
- Grease the sides of the pan as usual.
- Lay the parchment on top of your butter/sugar layer, then add fruit and batter.
However, if you’re using a non-stick or well-seasoned cast iron skillet, parchment paper is usually unnecessary.
Looking for more baking techniques? How to Cook Air Fryer Frozen Pound of Ground Beef offers quick, no-fuss tips for everyday cooking.
Storage, Serving, and Make-Ahead Tips for Pineapple Upside Down Cake
How to keep your cake fresh and moist
One of the best things about pineapple upside down cake is that it stays moist naturally thanks to all that juicy fruit and buttery topping. But proper storage ensures it stays just as delicious the next day—or even longer.
Room Temperature Storage:
- Let the cake cool completely.
- Cover loosely with plastic wrap or foil.
- Store at room temp for up to 2 days.
- Avoid airtight containers—they trap moisture and make the topping too wet.
Refrigerating the Cake:
- Great option if you’re keeping it for 3–5 days.
- Wrap the cake with plastic or foil and refrigerate.
- Let it come to room temp or warm slightly before serving.
Tip: Place a paper towel under the cake in the container to soak up any extra syrup or moisture from the topping.
Freezing Pineapple Upside Down Cake:
- Freeze in slices or as a whole cake (after it cools fully).
- Wrap tightly in plastic, then foil, and store up to 2 months.
- Thaw in the fridge overnight or at room temp for a few hours.
Serving suggestions and toppings
Pineapple upside down cake is amazing on its own—but you can elevate it with simple additions that take it from homey to restaurant-worthy.
Toppings That Complement the Flavors:
- A scoop of vanilla ice cream (classic and creamy)
- Whipped cream with a splash of rum or coconut extract
- A drizzle of salted caramel sauce
- Toasted coconut flakes for texture and tropical flair
Pairing Ideas:
- Serve with a cup of bold coffee or chai latte
- Pair with light savory dishes like grilled chicken or fish for a sweet-savory balance
Make-Ahead Tips:
- Prepare the topping and batter separately up to 24 hours in advance and refrigerate them.
- When ready, assemble and bake as usual.
- Alternatively, bake the cake the night before and reheat in a 300°F oven for 10 minutes before serving.
This make-ahead flexibility makes it perfect for holidays, dinner parties, or meal prepping for the week ahead.
Don’t miss our Roll Alaska: The Ultimate Sushi Guide for Smoky Flavor & Style if you want to get inspired with more adventurous meals before dessert.
FAQ – Answering Your Top Questions About Pineapple Upside Down Cake
Do you flip a pineapple upside down cake when it’s hot or cold?
You should flip pineapple upside down cake while it’s still warm, ideally 10 to 15 minutes after taking it out of the oven. Flipping it too soon can cause it to fall apart, while waiting too long can cause the brown sugar topping to harden and stick to the pan. Warm is the sweet spot for a clean release and glossy fruit finish.
What cake mix do you use for pineapple upside down cake?
Yellow cake mix is the classic go-to because of its rich, buttery flavor that pairs beautifully with the sweet pineapple and caramel topping. Brands like Duncan Hines Butter Golden, Betty Crocker Yellow, and Pillsbury Golden Butter are all excellent choices. You can also use vanilla or white cake mix if you prefer a lighter base.
Can I use pineapple juice instead of water in a cake mix?
Absolutely! Replacing the water with pineapple juice in your boxed cake mix adds a deeper, fruitier flavor that complements the topping perfectly. It enhances the cake’s overall taste and ties everything together—this is a highly recommended pro tip for boxed cake success.
What is the trick to flipping pineapple upside down cake?
The key to a clean flip is timing and confidence:
Let the cake cool for 10–15 minutes.
Run a knife around the edge to loosen it.
Place a flat plate over the top, hold firmly, and flip swiftly.
Let it sit upside down for a minute before lifting the pan.
This allows the caramel and fruit to release naturally and stay intact on the top of the cake.
Should you use parchment paper when baking a pineapple upside down cake?
Using parchment paper is optional, but it can help prevent sticking—especially with older pans or extra syrupy toppings. Cut it to fit the bottom of the pan only, and still grease the sides as usual. It can make the flipping process more foolproof, but with a well-greased non-stick or cast iron pan, you often won’t need it.
Why is my pineapple upside down cake soggy?
Soggy pineapple upside down cake usually comes from excess liquid in the fruit or too much butter/sugar in the topping. Make sure to:
Thoroughly drain and blot the pineapple and cherries.
Don’t overdo the butter or brown sugar layer.
Avoid airtight containers during room temp storage, as they can trap steam and cause condensation.
If you’re freezing the cake, ensure it’s completely cooled before wrapping to avoid sogginess upon thawing.
Pineapple Upside Down Cake

A timeless dessert featuring caramelized pineapple rings and cherries atop a moist, buttery cake. This showstopper is as delicious as it is beautiful, perfect for any occasion from casual dinners to festive celebrations.
- Prep Time: 20 minutes
- Cook Time: 40 minutes
- Total Time: 1 hour
- Category: Dessert
- Method: Baking
- Cuisine: American
- Diet: Vegetarian
Ingredients
For the Topping:
- 1/4 cup unsalted butter (melted)
- 1/2 cup brown sugar
- 1 can pineapple rings (reserve juice for later)
- Maraschino cherries
For the Cake:
- 1 1/2 cups all-purpose flour
- 1/2 cup granulated sugar
- 1/2 cup unsalted butter (softened)
- 2 large eggs
- 1/2 cup milk (or pineapple juice for extra flavor)
- 2 tsp baking powder
- 1 tsp vanilla extract
- Pinch of salt
Instructions
Prepare the Topping:
- Melt the butter and stir in the brown sugar until dissolved. Pour into a 9-inch cake pan and spread evenly.
- Arrange pineapple rings over the caramel, placing a cherry in the center of each ring.
Make the Cake Batter:
- Cream softened butter and granulated sugar until light and fluffy. Add eggs one at a time, mixing well. Stir in vanilla extract.
- In a separate bowl, combine flour, baking powder, and salt. Gradually add the dry ingredients to the wet mixture, alternating with milk or pineapple juice. Mix until smooth.
Assemble and Bake:
- Pour the batter over the pineapple and caramel layer, spreading evenly.
- Bake at 350°F (175°C) for 35-40 minutes, or until a toothpick inserted in the center comes out clean.
- Let the cake rest for 10 minutes. Run a knife along the edges, place a serving plate on top, and invert the pan to release the cake.
Notes
- For a tropical twist, substitute milk with pineapple juice and add shredded coconut to the batter.
- The cake can be made a day in advance and stored in the refrigerator.
- To make mini versions, use a muffin tin and follow the same layering process.