Crepe cake is not just a dessert; it’s an edible masterpiece made from layers of ultra-thin crepes stacked with luscious cream or other fillings. Whether you’re a dessert connoisseur or just looking for something new to wow your guests, this treat offers elegance and flavor in every bite. In this guide, we’re diving into everything you need to know about this irresistible layered delight—from its history and ingredients to recipes, variations, storage tips, and even health comparisons.
You’ll also get answers to popular questions like “What is crepe cake made of?” and “Is it healthier than regular cake?” Plus, if you’ve been wondering whether pancake batter will cut it—spoiler alert—it won’t, and we’ll tell you why.
Don’t miss our ultimate chocolate crepe cake recipe to get hands-on with your first layer-stacked dessert!
Jump to:
What Is a Crepe Cake and Why Everyone’s Obsessed
The Origin and Rise in Popularity of the Crepe Cake
Crepe cake, traditionally known as “mille crepe,” traces its roots to France. The word “mille” means “a thousand” in French, symbolizing the many delicate layers of crepes used to create this elegant dessert. While classic French chefs crafted this as a sophisticated pâtisserie staple, the dessert saw a global rise thanks to Japanese patissiers who refined it with matcha, strawberries, and ultra-light creams.
In the 2000s, this cake gained viral popularity across social media, praised for its photo-worthy cross-section of paper-thin layers. Today, crepe cake is celebrated in gourmet bakeries, home kitchens, and food blogs alike. Its international appeal lies in its perfect blend of elegance, texture, and customizable flavor.
What Sets Crepe Cake Apart from Traditional Cakes
The most noticeable difference between a crepe cake and a standard cake is in the texture. Instead of a soft, fluffy crumb, crepe cake features dozens of smooth, tender layers. These layers alternate with flavored creams, chocolate ganache, whipped mascarpone, or fruit spreads.
Here’s a quick comparison:
| Feature | Crepe Cake | Traditional Cake |
|---|---|---|
| Base | Thin French-style crepes | Baked cake batter |
| Filling | Creams, custards, jams | Frosting, icing, buttercream |
| Texture | Soft, silky, layered | Spongy, airy |
| Assembly | No baking (after crepes are made) | Baked as one or multiple layers |
| Visual appeal | Elegant, multi-layered cross-section | Classic cake silhouette |
The unique thing about a crepe cake is its visual sophistication with minimal effort. Even a beginner can layer a stack of crepes and add a smear of whipped cream to build a crowd-pleasing dessert that tastes gourmet.
Plus, it’s perfect for those who dislike overly sweet or heavy cakes. With control over each ingredient, you can fine-tune the sweetness, texture, and flavor to suit your taste.
Looking for inspiration? Try this almond flour crepes recipe as a base for a gluten-free crepe cake.
Ingredients That Make Crepe Cake So Irresistible
Basic Ingredients for Classic Crepe Cake
At the heart of a great crepe cake are delicate, pliable crepes and a velvety filling that binds the layers together. Though it may look complex, the ingredient list is surprisingly simple. Below are the essentials you’ll need to craft a traditional crepe cake at home.
For the Crepes (Makes about 20-25 crepes):
- 2 cups all-purpose flour
- 4 large eggs
- 2 ½ cups whole milk
- ¼ cup melted butter (unsalted)
- 1 tablespoon sugar (optional for sweet flavor)
- 1 teaspoon vanilla extract
- Pinch of salt
Whisk these ingredients into a smooth, lump-free batter and let it rest for at least 30 minutes. This improves the texture of your crepes and helps reduce any rubberiness.
For the Filling:
The filling is what gives your crepe cake personality. Traditionally, pastry chefs use whipped pastry cream, but home bakers often opt for easier alternatives like:
- Sweetened whipped cream
- Cream cheese frosting
- Vanilla or chocolate custard
- Mascarpone and heavy cream blend
- Nutella or chocolate ganache
- Fruit compotes or jams
You can combine several fillings for a more decadent layer profile. For instance, alternating mascarpone cream with raspberry jam creates a balance between rich and tart flavors.
Check out this sugar-free caramel syrup to drizzle between your layers or on top as a finishing touch!
Optional Fillings and Toppings That Elevate the Experience
Once your crepes and filling are ready, the real fun begins: personalizing your crepe cake. Toppings and flavor infusions let you make your cake fit any theme, occasion, or craving.
Flavor Enhancers:
- Cocoa powder or matcha powder mixed into the crepe batter
- Espresso or rum added to the cream filling
- Fruit zest (lemon or orange) in whipped fillings
- Maple syrup or honey for natural sweetness
Decorative Toppings:
- Sifted powdered sugar
- Shaved dark chocolate or chocolate curls
- Caramelized nuts
- Fresh berries or sliced fruit
- Edible flowers for presentation
Unique Additions:
Want to level up your crepe cake? Try brushing espresso between the layers for a tiramisu-style twist, or use a protein cookie dough layer for a surprising protein-packed dessert.
Discover great ideas like this banana cake mix adaptation that can even inspire flavor variations in your crepe cake layers.
Here’s a quick ingredient checklist for reference:
| Category | Examples |
|---|---|
| Crepe Base | Flour, eggs, milk, butter |
| Filling Options | Whipped cream, custard, cream cheese |
| Flavor Boosters | Cocoa powder, coffee, citrus zest, liqueurs |
| Toppings | Berries, chocolate, powdered sugar, nuts |
Using high-quality, fresh ingredients always results in a better-tasting cake. Don’t be afraid to experiment—your next twist might become your signature recipe.
How to Make a Perfect Crepe Cake at Home
Step-by-Step Guide for Making Crepes
Building a stunning crepe-based dessert starts with mastering the art of making crepes. While they may seem intimidating at first, you’ll be surprised how easy it becomes with just a little practice. A good crepe should be thin, lightly browned, and flexible enough to layer without tearing.
Step 1: Prepare the Batter
In a large mixing bowl, combine:
- 2 cups of all-purpose flour
- 4 eggs
- 2½ cups of whole milk
- ¼ cup melted butter
- A pinch of salt
- 1 tablespoon of sugar (optional)
- 1 teaspoon of vanilla extract
Whisk until smooth or use a blender for extra convenience. Let the batter rest for 30 minutes to an hour. This relaxes the gluten and improves texture.
Step 2: Cook the Crepes
Use a non-stick skillet or crepe pan. Preheat it on medium heat and lightly coat with butter. Pour about ¼ cup of batter into the pan and swirl to spread evenly.
Cook for about 60–90 seconds per side until golden. Flip gently with a spatula or your fingers (once you’re confident!). Stack cooked crepes on a plate and cover with a towel to prevent drying out.
Step 3: Chill the Crepes
Let the stack cool completely before assembling. Warm crepes can melt your filling and make the cake unstable.
Assembling and Layering Your Crepe Cake
Once your crepes are cool and your filling is ready, the fun begins! Assembly is where you transform simple layers into a show-stopping dessert.
Step 1: Choose Your Base
Place the first crepe on a cake stand or serving plate. If you like, dab a bit of filling underneath to hold it in place.
Step 2: Layer Evenly
Spread a thin layer of filling over the crepe using an offset spatula. Avoid overloading it—about 2 to 3 tablespoons per layer is plenty. Repeat with the remaining crepes and filling, ending with a crepe on top.
If your crepes slide or shift, gently press the stack and refrigerate it for 10–15 minutes to firm up before continuing.
Step 3: Finishing Touches
Dust the top with powdered sugar, cocoa, or add a glossy ganache drizzle. Refrigerate for 1–2 hours before slicing for the cleanest cut.
Looking for inspiration? Try this protein donuts recipe and incorporate a donut-flavored filling layer into your next cake experiment.
Tips for Perfect Assembly:
- Use a turntable to make even spreading easier
- Keep your filling consistent to avoid lopsided cakes
- Chill the cake if it starts leaning
- Use a sharp knife dipped in warm water for clean slices
This method creates a dessert that’s not just delicious but downright impressive. Even beginners can pull it off by focusing on thin, even crepes and light, creamy layers.

Crepe Cake Variations That Will Blow Your Mind
Chocolate, Matcha, Nutella, and Fruit-Based Crepe Cakes
While the classic crepe cake is built from vanilla-flavored layers and pastry cream, modern takes have brought in bold flavors and colorful ingredients. If you want to break out of the vanilla zone, here are crowd-pleasing variations worth trying.
1. Chocolate Crepe Cake
Swap ¼ cup of flour with unsweetened cocoa powder in your crepe batter and use a rich chocolate ganache between layers. Top it off with dark chocolate curls for a bakery-worthy finish.
Flavor Pairing Ideas:
- Dark chocolate + raspberry compote
- Chocolate hazelnut spread + whipped cream
- Chocolate + espresso cream
Don’t miss our chocolate crepe cake tutorial for a deep dive into this decadent version.
2. Matcha Crepe Cake
For a fresh, earthy twist, add 1 to 2 tablespoons of matcha powder into the batter. Pair with lightly sweetened whipped cream or white chocolate filling. Matcha not only tastes amazing, but the bright green layers also look stunning.
3. Nutella-Inspired Crepe Stack
Nutella fans, this one’s for you. Spread a thin layer of the hazelnut spread between each crepe and sprinkle chopped hazelnuts for crunch. The result is indulgent, nutty, and absolutely addictive.
4. Berry and Fruit Crepe Cakes
Layer thinly sliced strawberries, blueberries, or bananas between crepes along with sweet cream. You can also create a berry compote by simmering fruits with a bit of sugar and lemon juice. It adds a burst of flavor and vibrant color.
Looking for inspiration? Try a base from our strawberry poke cake recipe and adapt the flavor for your next fruity crepe dessert.
Gluten-Free, Dairy-Free, and Vegan Crepe Cake Options
The beauty of this dessert lies in its flexibility. With a few smart swaps, you can make it suitable for just about any dietary preference—without sacrificing flavor or texture.
Gluten-Free Version
Use almond flour, oat flour, or certified gluten-free flour blends. Almond flour adds a nutty taste and pairs beautifully with honey-based fillings or lemon curd. Don’t miss our almond flour crepes recipe to start gluten-free.
Dairy-Free and Vegan Crepe Cake
Use almond milk or oat milk in your batter. Replace eggs with flax eggs (1 tbsp flaxseed + 3 tbsp water per egg) and use coconut cream for the filling.
Pro Tips:
- Add maple syrup or agave as a natural sweetener
- Chill coconut milk overnight and whip just the cream layer
- Use non-stick pans to avoid tearing delicate crepes
Keto-Friendly or Low-Carb Crepe Cake
Use a blend of almond flour and cream cheese in your batter, and fill it with sugar-free whipped cream. This creates a high-fat, low-carb treat perfect for those on keto.
Check out our keto pies apple article for more low-carb dessert inspiration you can adapt into your next crepe creation.
Visual Variation Table
| Flavor | Key Ingredients | Filling Suggestions |
|---|---|---|
| Chocolate | Cocoa powder, espresso | Ganache, chocolate mousse |
| Matcha | Matcha powder, vanilla | White chocolate cream, mascarpone |
| Nutella | Nutella, hazelnuts | Whipped cream, banana slices |
| Berry | Fresh fruit, berry compote | Sweet cream, yogurt filling |
| Vegan | Almond/oat milk, flax egg | Coconut cream, agave |
| Gluten-Free | Almond flour, gluten-free blend | Lemon curd, honey cream |
Whether you’re into chocolate-loaded desserts or light and fruity layers, the crepe cake is versatile enough to match your cravings. You’re only limited by your imagination.

Discover more ideas like these in our quesillo dessert guide, where layers and texture also play center stage.
Tools and Equipment You’ll Need for Flawless Layers
Pan Types, Spatulas, and Cooling Racks Explained
To create a beautiful crepe cake, the right tools make all the difference. Whether you’re a first-timer or a seasoned baker, investing in a few essentials ensures smoother prep, more even layers, and less frustration.
1. Crepe Pan or Non-Stick Skillet
A non-stick pan with low sides (around 8–10 inches wide) gives you control when swirling and flipping crepes. Specialty crepe pans are thin, heat evenly, and help achieve that perfect golden hue.
Quick Tip:
Heavy-bottomed pans help prevent hotspots, so your crepes cook evenly. Avoid cast iron for this task—it tends to overheat and burn delicate batter.
2. Offset Spatula
This is a game-changer when it comes to layering. A small offset spatula lets you spread fillings evenly from edge to edge without damaging the crepe.
Pair it with a cheesy chicken sloppy joe spatula (yes, the kind you use for savory dishes!) and you’ve got a multi-use tool in your kitchen arsenal.
3. Cooling Rack
Before you begin stacking, let each crepe cool completely. Cooling racks prevent condensation from forming at the bottom of your crepes and keep them soft but not soggy.
4. Mixing Bowls and Whisks
Use multiple bowls for prepping batter, filling, and whipped cream. Choose glass or stainless steel for a clean finish and quick cleanup.
5. Blender or Electric Mixer
While whisking by hand is doable, a blender ensures a silky-smooth batter with zero lumps. For cream fillings, a hand or stand mixer saves time and muscle power.
Looking to step up your kitchen game? Our guide to black pepper Angus steak also recommends top-tier kitchen gadgets for precision and heat control—skills that easily transfer to dessert crafting.
Time-Saving Gadgets for Beginners and Pros
Making a layered crepe cake can be time-intensive, but a few handy tools speed things up while enhancing the final result.
1. Batter Dispenser
Want uniform crepes every time? A batter dispenser ensures consistent pour sizes and reduces mess.
2. Cake Turntable
Perfect for layering and decorating, a rotating cake stand lets you smoothly spin the crepe cake while frosting or topping it.
3. Silicone Brush
Use it to lightly oil your pan between crepes. This tool gives you precise control and avoids greasy buildup.
4. Crepe Spreader
While not necessary, this wooden T-shaped tool helps evenly distribute batter in the pan—especially useful for beginners.
5. Cake Leveler (Optional)
While crepes don’t usually rise like baked layers, if your stack leans or bulges, a gentle press with a cake leveler or flat plate can smooth things out.
Pro Insight:
Save time by prepping your crepes a day in advance and storing them between parchment sheets. This cuts down your active work when assembling the cake.
Check out more meal-prep hacks in our steak pasta recipe, which also relies on great kitchen workflow and planning.
Suggested Tool Checklist for Beginners
| Tool | Purpose |
|---|---|
| Non-stick crepe pan | Even cooking, easy flipping |
| Offset spatula | Smooth filling between layers |
| Cooling rack | Prevents sogginess |
| Blender | Lump-free batter |
| Cake stand | Easy assembly and presentation |
| Silicone brush | Controlled pan greasing |
The more confident you become with these tools, the more refined your crepe cake will look and taste. Quality tools reduce errors, waste, and help you enjoy the process even more.
Discover great ideas like these and explore unique savory recipes in our churu chicken amarillo recipe.
Common Mistakes to Avoid When Making Crepe Cake
Why Your Crepes Might Be Rubbery or Dry
A perfectly made crepe should be soft, flexible, and slightly golden—not rubbery or stiff. However, one of the most common complaints among home bakers is ending up with tough crepes that ruin the texture of their crepe cake. Let’s dig into the causes.
1. Overmixing the Batter
Too much whisking develops gluten in the flour, leading to rubbery crepes. The best method is to mix just until smooth—no more. A blender helps, but don’t let it run too long.
2. Skipping the Resting Time
Let your batter rest for at least 30 minutes. This allows the flour to hydrate and the bubbles to settle, resulting in tender crepes that stack beautifully.
3. Using the Wrong Pan Temperature
Too hot, and your crepes cook unevenly or burn. Too cool, and they dry out before cooking through. Medium heat is your friend—adjust slightly if needed. Use a crispy shrimp snack pan for best results in small kitchens.
Tips to Prevent Sliding and Uneven Stacking
Once your crepes are cooked to perfection, stacking them into a cake can come with its own set of headaches. If the layers shift, lean, or slide apart, the final dessert won’t just look messy—it may also collapse.
Here’s how to build a stable crepe cake that holds its shape and slices cleanly:
1. Cool All Crepes Completely
Never stack warm crepes. The heat melts the filling, making the layers slippery. Use a cooling rack or chill them for 10–15 minutes before assembling.
2. Use a Thick Filling
Runny fillings cause the layers to slide. Opt for stiffer creams, such as whipped mascarpone, buttercream, or stabilized whipped cream. Add gelatin or cream cheese to thin fillings if needed.
3. Spread Evenly and Gently
Apply a thin, even layer of filling using an offset spatula. Don’t push hard—it can tear the crepe or shift the stack.
4. Press Lightly After Every Few Layers
Every 5–6 crepes, press gently with your palm or a flat plate. This compacts the stack and improves shape.
5. Chill Before Serving
Always chill the finished cake for at least 2 hours. This firms up the filling and makes slicing much cleaner.
Try these techniques when building your next layered dessert—and if you’re still unsure, explore the technique behind our summer sausage snack boards to learn about chilling and layering combos for better structure.
Looking for more dessert stacking tricks? Our Swiss chocolate chalet cake article also showcases precision layering for dramatic effect—ideal inspiration for your next bake.
Bonus Mistakes to Watch For
| Mistake | Fix |
|---|---|
| Batter too thick | Add a splash of milk to thin it out |
| Burned crepes | Lower the heat, wipe the pan between batches |
| Crepes sticking to pan | Use a non-stick pan and brush with butter |
| Cake leaning sideways | Assemble on a level surface, chill periodically |
| Too sweet overall flavor | Reduce sugar in filling or use tart fruits |
Avoiding these errors will save you time and ingredients—and your crepe cake will be more beautiful, balanced, and enjoyable to eat.
Don’t miss our recipe for shaved ribeye, where precision slicing also plays a crucial role—just like with dessert layering.
Is Crepe Cake Actually Healthier Than Regular Cake?
Nutrition Comparison: Crepe Cake vs Traditional Cake
Many dessert lovers wonder if crepe cake is a healthier option than the classic layer cake. The answer? It depends on how you make it. While both are indulgent, crepe-based desserts often use lighter fillings, fewer sweeteners, and less flour overall—making them a smarter choice for some.
Let’s break it down by the numbers (based on typical serving sizes):
| Component | Crepe Cake (1 slice) | Regular Layer Cake (1 slice) |
|---|---|---|
| Calories | ~250–350 | ~400–500 |
| Sugar | ~12g–20g | ~30g–45g |
| Carbs | ~25g–35g | ~45g–60g |
| Fat | ~10g–20g | ~18g–30g |
| Protein | ~5g–8g | ~3g–6g |
As you can see, a well-made crepe cake can be lower in sugar and carbs, especially if filled with whipped cream, Greek yogurt, or fruit instead of frosting or buttercream.
Looking to lighten it up even more? Check out our protein popcorn idea—great for snacking with fewer carbs and a touch of sweetness, similar to what you can achieve in a lightened crepe layer.
Healthier Ingredient Swaps to Try
If you’re craving dessert but watching your sugar or fat intake, the beauty of a crepe-based cake is how easily it can be adapted to meet your dietary needs. Here are some simple swaps to make your version healthier without sacrificing flavor:
Swap These Ingredients:
| Instead of… | Try This… |
|---|---|
| White flour | Whole wheat or almond flour |
| Granulated sugar | Coconut sugar or stevia |
| Heavy cream filling | Greek yogurt or coconut whipped cream |
| Sweetened jam | Fresh mashed fruit with lemon juice |
| Butter | Avocado oil or vegan margarine |
One of our favorite tricks? Swap out traditional filling for protein-rich alternatives like the one found in our protein cookies with milk powder. It gives your dessert a nutritional bump and keeps the texture velvety.
Portion Control with Power
Crepe cakes are naturally thinner and denser than fluffy cakes. That means even a small slice feels satisfying, helping with portion control. This isn’t always the case with sugar-packed layer cakes that leave you wanting more after every bite.
For even more balanced dessert inspiration, don’t miss our high-protein, low-sugar ghost protein balls, which use similar creamy textures in a snackable form.
Final Thoughts: Can Crepe Cake Fit Into a Healthy Lifestyle?
Absolutely. With mindful ingredient choices and sensible serving sizes, this elegant dessert can easily be part of a balanced diet. You’re in control of what goes into your layers—from the crepe base to the cream fillings to the toppings.
Whether you’re gluten-free, dairy-free, or keto, the flexibility of crepe cake recipes means you can make something both indulgent and aligned with your health goals.
Storing and Serving Crepe Cake Like a Pro
How to Store Crepe Cake for Freshness
After all the work that goes into making a beautiful crepe cake, the last thing you want is for it to dry out or collapse. Proper storage makes a huge difference in preserving the texture, flavor, and shape of your dessert—especially if you plan to make it ahead of time or save leftovers.
Refrigeration Best Practices
- Always chill before serving: Refrigerate the assembled cake for at least 2 hours so it firms up, especially if you’re using soft fillings like whipped cream or mascarpone.
- Wrap it well: Cover the cake tightly with plastic wrap or a cake dome to prevent air exposure. This keeps the crepes from hardening and the cream from absorbing fridge odors.
- Shelf life: A well-covered crepe cake can last up to 3 days in the refrigerator. After that, the texture may start to suffer.
Can You Freeze a Crepe Cake?
Yes, but only with specific fillings. Avoid freezing if you’ve used whipped cream or custard, which tend to separate and become watery after thawing.
If you plan to freeze:
- Use sturdier fillings like buttercream or chocolate ganache.
- Wrap the cake in plastic wrap, then aluminum foil.
- Freeze for up to 1 month.
- Thaw overnight in the fridge, not at room temperature.
Need a freeze-friendly dessert idea? Our earl grey cookies hold up beautifully and pair well with delicate slices of crepe cake at tea time.
Creative Serving and Slicing Tips for Perfect Presentation
Because of its many layers, a crepe cake naturally impresses when sliced. But even this stunning dessert benefits from a little extra finesse at the table. Here’s how to serve it like a true dessert connoisseur.
Slicing Like a Pro
- Use a sharp, serrated knife for clean cuts.
- Dip the knife in hot water and wipe clean between slices to keep layers neat.
- Cut straight down instead of dragging to prevent shifting.
Serving Style Enhancements
- Plate slices with a dusting of powdered sugar or cocoa.
- Add a fresh fruit garnish—raspberries or strawberries add color and acidity.
- Drizzle with syrup, like this sugar-free caramel syrup, for a low-guilt touch.
- Serve with a side of apple honey-glazed chicken tenders for a sweet-savory brunch pairing!
Portion Control for Guests
A standard 8-inch crepe cake serves 10–12 people. Because it’s rich and satisfying, thinner slices go a long way.
You can even pre-slice the cake and chill the slices individually—great for events or when storing leftovers.
Quick Storage & Serving Chart
| Action | Tip |
|---|---|
| Short-term storage | Fridge, 2–3 days max |
| Long-term storage | Freeze (but only with firm fillings) |
| Prevent drying | Wrap tightly in plastic or use a cake dome |
| Serve best at | Slightly chilled (not room temp or frozen) |
| Best slicing tool | Sharp, hot knife (cleaned between cuts) |
Proper storage and thoughtful serving can elevate even a simple crepe cake into a showstopper. A few smart steps will keep it as beautiful and flavorful as the moment it was made.

Don’t miss our how to smoke salmon in a smoker guide if you want to pair your dessert with gourmet main dishes for an unforgettable dinner party.
FAQs About Crepe Cake (Expert Answers)
What is crepe cake made of?
A crepe cake is made by layering thin French-style crepes with sweet fillings like whipped cream, custard, or mascarpone cheese. The crepes are typically made from a simple batter of flour, eggs, milk, and butter. Depending on the variation, fillings may include fruit compote, chocolate ganache, or flavored creams, making each version slightly unique.
What is the real name for crepe cake?
The traditional French name for crepe cake is “Mille Crêpes”, which translates to “a thousand crepes.” Of course, the actual number of layers is usually around 20–30, but the name reflects its many thin layers. In Japan and other parts of the world, this dessert is also known simply as a mille cake or crepe layer cake.
If you’re interested in globally inspired variations, explore our Japanese matcha cake adaptations coming soon.
Is crepe cake healthier than cake?
In many cases, yes. While both desserts are indulgent, crepe cakes can be made with less sugar, less fat, and fewer carbs—especially when you use lighter fillings like Greek yogurt or fresh fruit. Plus, the crepe layers themselves are thin and use less flour than traditional sponge cake layers.
To keep it even healthier, check out low-sugar ideas like our coconut clusters, which offer crunchy texture with minimal ingredients.
Is crepe cake hard to make?
Not really. While it may look complicated, a crepe cake is quite beginner-friendly. The process is mostly repetitive: make crepes, spread filling, and stack. With the right tools and some patience, anyone can pull off a beautiful cake—even without baking experience.
Our previous section on tools for flawless layering offers everything you need to succeed from the first try.
Why is crepe cake so good?
It’s all about the texture. A well-made crepe cake is tender, creamy, and layered with flavor. The delicate crepes soak up just enough moisture from the filling, making every bite soft, rich, and melt-in-your-mouth. Unlike heavier layer cakes, this dessert feels light and refined—perfect for celebrations or a weekend treat.
Looking for inspiration? Try pairing a slice with a cup of earl grey from our earl grey cookies article for an elegant afternoon tea experience.
Is pancake batter the same as crepe?
No, pancake and crepe batters are quite different. Pancake batter includes more flour and leavening agents (like baking powder), making it thick and fluffy. Crepe batter, on the other hand, is thinner, egg-rich, and designed to spread into delicate, flat layers. That’s why you can’t substitute pancake batter in a crepe cake—it won’t deliver the right texture or flexibility.
Conclusion
Crepe cake isn’t just a dessert—it’s an experience layered with creativity, elegance, and rich flavor. Whether you’re crafting a classic mille crêpes with vanilla cream or experimenting with bold twists like chocolate, matcha, or berry-infused fillings, the possibilities are endless.
With the right tools, a few insider tips, and a pinch of patience, anyone can master this sophisticated dessert at home. Plus, with simple ingredient swaps, it can even be made healthier than traditional cakes. From storing it like a pro to slicing it for maximum impact, you’ve now got everything you need to become a crepe cake champion.
Don’t miss our unicorn cookies recipe for another visually stunning dessert your guests will remember!
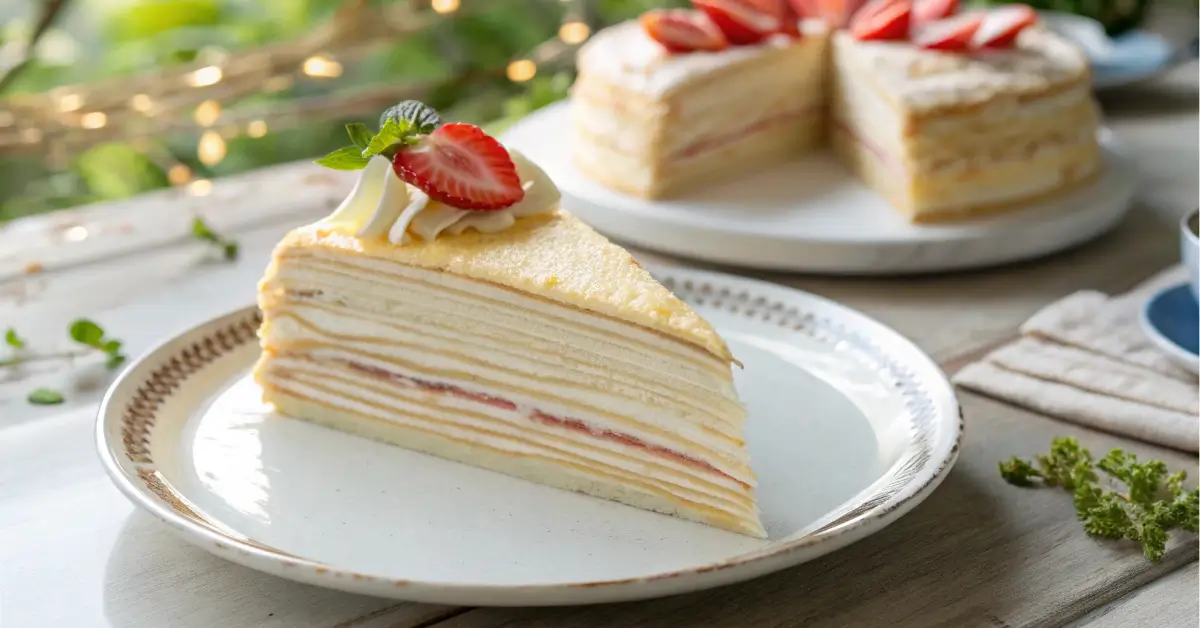
PrintCrepe Cake (Mille Crêpes)

This elegant crepe cake features layers of delicate crepes and fluffy cream filling, perfect for birthdays, brunch, or impressing guests with a no-bake dessert.
- Prep Time: 30 minutes
- Cook Time: 20 minutes
- Total Time: 50 minutes
- Yield: 10–12 slices
- Category: Dessert
- Method: No-Bake, Stovetop
- Cuisine: French, Japanese-Inspired
- Diet: Vegetarian
Ingredients
For the Crepes:
- 2 cups all-purpose flour
- 4 large eggs
- 2½ cups whole milk
- ¼ cup unsalted butter, melted
- 1 tablespoon sugar (optional)
- 1 teaspoon vanilla extract
- Pinch of salt
For the Filling (choose one or mix):
- 2 cups heavy whipping cream
- ¼ cup powdered sugar
- ½ teaspoon vanilla extract
- (OR)
- 1½ cups pastry cream or custard
(Optional Add-ins)
- ½ cup fruit compote (e.g., raspberry, strawberry)
- ¼ cup Nutella or chocolate ganache
For Toppings:
- Powdered sugar, cocoa powder, or chocolate shavings
- Fresh fruit (berries, banana slices)
Instructions
- Prepare the Crepe Batter: In a mixing bowl, whisk flour, eggs, milk, butter, sugar, vanilla, and salt until smooth. Let rest for 30–60 minutes.
- Cook the Crepes: Heat a non-stick pan over medium heat. Grease lightly with butter. Pour in ¼ cup of batter, swirl evenly, and cook 1–2 minutes per side. Stack cooked crepes and let them cool.
- Make the Filling: Whip cream with sugar and vanilla until soft peaks form. Chill until ready to use.
- Assemble the Cake: Place a crepe on a plate. Spread 2–3 tablespoons of filling over it. Repeat with remaining crepes and cream, ending with a crepe on top.
- Chill and Serve: Refrigerate for at least 2 hours. Slice with a hot knife for clean layers. Garnish as desired.
Notes
- You can make the crepes up to 2 days in advance and store in the fridge between parchment sheets.
- For extra flavor, mix cocoa powder or matcha into the crepe batter.
- This dessert pairs wonderfully with tea, coffee, or even champagne for special occasions.