If you’ve ever bitten into a chewy sourdough crust only to wish it had a softer, more sandwich-friendly texture, you’re not alone. Enter: sourdough sandwich bread. This style combines the beloved tangy taste of traditional sourdough with the structure and softness ideal for layered deli meats, fresh veggies, or melty grilled cheese. Whether you’re a sourdough beginner or a long-time baker seeking the perfect sliceable loaf, this guide walks you through every step—starter care, baking techniques, sandwich fillings, storage tips, and health benefits.
Check out our 25 Healthy Chicken Breast Recipes for sandwich filling ideas that pair perfectly with sourdough sandwich bread.
Let’s dig in and explore what makes this bread style so satisfying—and how you can make your best loaf yet.
Jumo to:
Understanding Sourdough Sandwich Bread
What Is Sourdough Sandwich Bread?
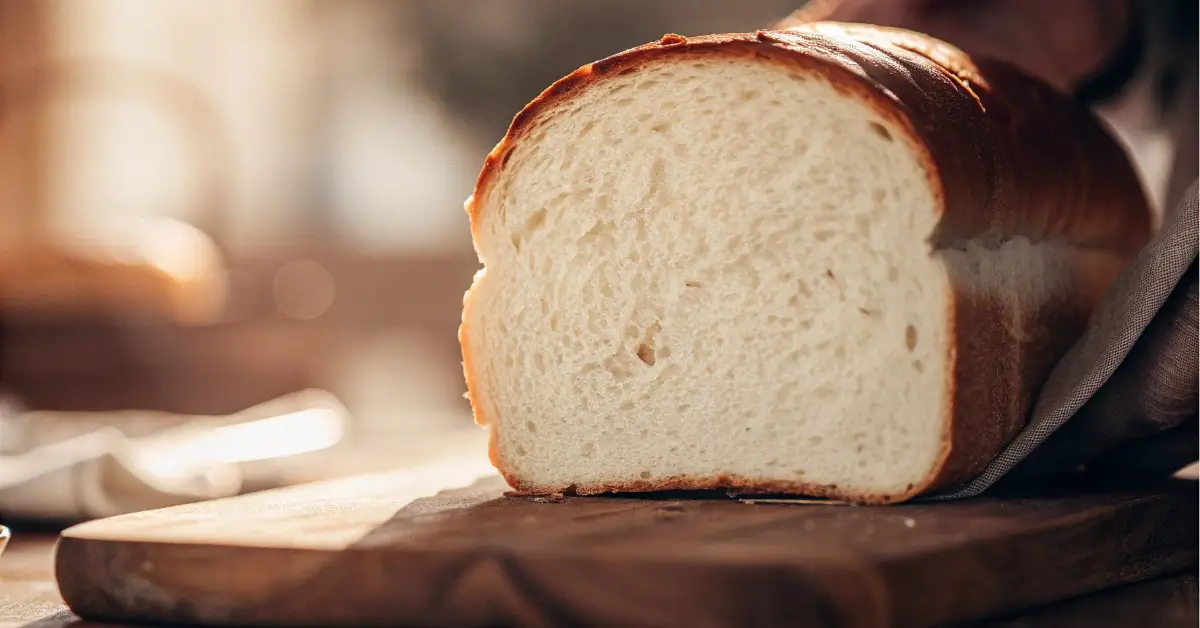
At its core, sourdough sandwich bread is a naturally leavened bread made with a sourdough starter instead of commercial yeast. What makes it different from crusty artisan sourdough? It’s baked in a loaf pan for a uniform shape and is often enriched with ingredients like milk, oil, or honey for softness. The result? A loaf that’s tender inside, with a slight chew, a mild tang, and a soft crust—ideal for toasting, stacking, and slicing.
This bread strikes a balance between flavor and function. While rustic sourdough is great with soup, sandwich sourdough shines with turkey, cheese, or even PB&J. Its texture holds up under pressure, resisting sogginess and staying tender even when grilled or pressed.
History and Popularity of Sourdough in Sandwiches
Sourdough dates back thousands of years, but its journey as a sandwich bread is more recent. Traditionally, sourdough loaves were round or oval with crackly crusts—not exactly sandwich-ready. As demand for healthier, fermented foods grew, bakers began adapting sourdough into softer, more versatile loaves. This shift allowed home cooks and pros alike to enjoy the probiotic benefits of sourdough without sacrificing sandwich structure.
In recent years, especially post-pandemic, sourdough baking has exploded in popularity. And sandwich-style loaves are now topping the charts for those who love homemade bread but want it to fit neatly in a lunchbox or toast evenly in the morning.
How Sourdough Sandwich Bread Differs from Regular Sourdough
Texture and Shape Comparison
While both traditional and sandwich sourdough breads are made with the same foundational elements—flour, water, salt, and a live starter—their texture and shape tell two very different stories.
Regular sourdough is often shaped by hand into round boules or oblong batards, with a thick, crunchy crust and open crumb. It’s beautiful, rustic, and packed with sour tang, but not always ideal for layering or toasting.
Sourdough sandwich bread, on the other hand, is intentionally crafted for structure and softness. Baked in loaf pans, these loaves rise taller and more uniformly. The crumb is tighter, thanks to gentle kneading and often a touch of fat like butter or olive oil. The crust? Thin and tender, making it easier to bite into without breaking apart your sandwich.
Here’s a side-by-side breakdown:
| Feature | Regular Sourdough | Sourdough Sandwich Bread |
|---|---|---|
| Shape | Freeform round or oval | Rectangular loaf pan shape |
| Crumb | Open, airy, irregular holes | Tight, soft, uniform slices |
| Crust | Thick and chewy | Thin and soft |
| Flavor | Strong sour tang | Milder sour taste |
| Best Use | Dipping, toasting, soups | Sandwiches, toast, grilled |
So if you’re tired of fillings falling through holes in artisan loaves or crusts that overpower the flavors inside, sourdough sandwich bread offers the best of both worlds—real sourdough taste with soft, sliceable convenience.
Why It’s Better for Sandwiches
Sourdough sandwich bread was made for sandwiches—literally. Its tender crumb holds spreads without soaking through. The soft crust doesn’t compete with fillings like roasted veggies, turkey, or even egg salad. Plus, slices are uniform and easy to stack, toast, or grill.
The subtle sour flavor also enhances savory fillings while balancing sweeter ones like jam or peanut butter. That complexity adds depth to even the simplest sandwich, making every bite more satisfying.
And when you’re making things like grilled cheese, BLTs, or paninis? That softer crust and sturdy slice create a golden, crispy exterior without being too hard to chew.
Learn more about Salmon Patties Recipe that pair beautifully with sourdough sandwich bread for an elevated lunch.
Choosing the Right Starter for Sourdough Sandwich Bread
Types of Starters and How to Feed Them
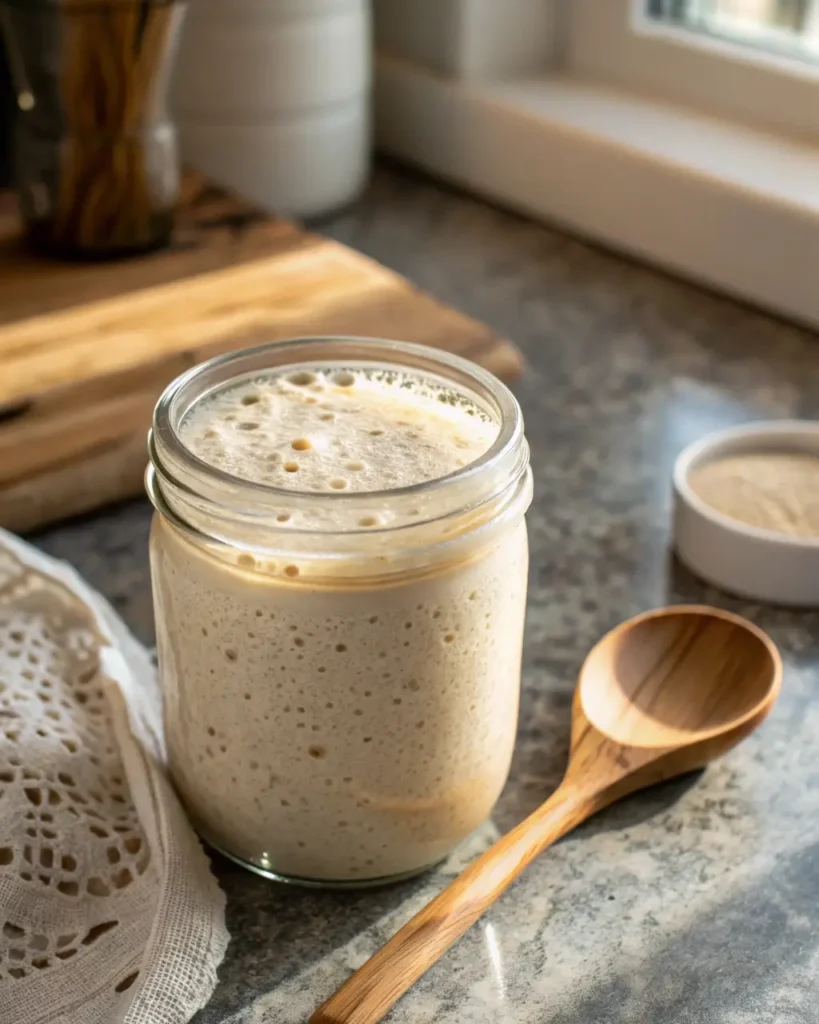
At the heart of every great sourdough sandwich loaf is a healthy, active starter. This wild yeast culture is what gives sourdough its rise and signature tang. But not all starters are created equal—and choosing the right one can shape the flavor, rise, and crumb of your sandwich bread.
There are two primary types of sourdough starters:
- White flour starter (all-purpose or bread flour)
- Most common type
- Mild flavor, consistent rise
- Ideal for soft-textured sandwich breads
- Whole wheat or rye starter
- Stronger flavor profile
- More enzymatic activity = faster fermentation
- Great for rustic loaves, but can be too dense for sandwich-style breads unless used in small amounts
For sandwich sourdough, many bakers prefer a 100% hydration white flour starter—meaning equal parts water and flour by weight. It’s predictable, easy to work with, and contributes a subtle tang without overpowering the softness you want in sandwich slices.
How to Feed Your Starter
Keeping your starter happy is essential. Feed it daily if left at room temperature, or once a week if stored in the fridge.
Here’s a simple feeding schedule:
| Ingredient | Amount |
|---|---|
| Mature starter | 25g |
| Filtered water | 50g |
| Bread flour | 50g |
Mix until smooth, cover loosely, and let it ferment at room temperature until bubbly (4–6 hours).
Want a milder flavor in your loaf? Feed it twice before baking. Want more tang? Let it ferment longer or use a bit of whole wheat in your feed.
Signs of a Healthy Sourdough Starter
Before diving into dough-making, you need to be sure your starter is strong enough to leaven the loaf. Here’s what to look for:
- Doubles in size within 4–6 hours after feeding
- Bubbly and airy with a light, sponge-like texture
- Smells pleasantly sour or yeasty, never sharp or foul
- Passes the float test—drop a spoonful in water and it floats
If your starter doesn’t rise or smells off, give it a few days of regular feeding to bring it back to life. A sluggish starter leads to flat, dense loaves—not ideal for sandwich slicing.
Want to pair your soft sourdough with a perfect side dish? Don’t miss our Pineapple Upside Down Cake for dessert after a hearty sandwich meal.
Step-by-Step Guide to Make Sourdough Sandwich Bread
Ingredients You’ll Need
Making sourdough sandwich bread at home is surprisingly simple once you’ve got a strong starter ready. Below is a basic ingredient list for one standard loaf (9×5 pan):
| Ingredient | Amount |
|---|---|
| Active sourdough starter | 100g |
| Bread flour | 400g |
| Milk (or water) | 250ml (warm) |
| Honey (or sugar) | 1 tbsp |
| Salt | 8g |
| Butter (softened) | 30g |
Optional add-ins: olive oil for richer crumb, whole wheat flour for nutty flavor, seeds for texture.
Pro Tip: Milk and butter make the crumb more tender, ideal for sandwich use. You can swap them for non-dairy options to keep it vegan.
Full Instructions for a Soft, Sliceable Loaf
This is a no-knead, overnight process perfect for a soft yet sturdy sourdough loaf. It takes time—but it’s worth every minute.
1. Mix the Dough (Night Before Baking)
- In a large bowl, mix flour, milk, honey, and starter until shaggy.
- Let rest for 30 minutes (autolyse phase).
- Add salt and softened butter, then stretch and fold the dough in the bowl to incorporate.
2. Bulk Fermentation (3–4 hours at room temp)
- Perform stretch and folds every 30 minutes for the first 2 hours to build gluten.
- Cover and let rest at room temperature until dough has puffed up (but not doubled).
3. Cold Ferment Overnight
- Shape dough into a log and place it into a lightly greased 9×5 loaf pan.
- Cover tightly and refrigerate overnight (8–12 hours). This enhances flavor and makes shaping easier.
4. Final Proof and Bake (Next Day)
- Remove from fridge and let sit at room temperature for 1–2 hours until it crowns slightly above the rim of the pan.
- Preheat oven to 375°F (190°C).
- Score lightly down the center, brush with milk or melted butter for color.
- Bake for 35–40 minutes until golden and internal temp hits 200°F (93°C).
5. Cool and Slice
- Let cool in pan for 10 minutes, then remove and cool completely on a rack.
- Slice when fully cool with a sharp serrated knife.
Your sourdough sandwich bread is now ready—perfectly soft, sturdy, and slightly tangy. Ideal for grilled cheese, breakfast toast, or stacked deli sandwiches.
Discover great ideas like Beef Short Ribs Oven Baked to serve alongside your fresh sourdough loaf.
Tips to Bake the Perfect Sourdough Sandwich Bread
Controlling Fermentation Time
Fermentation is where the magic happens—and where most bakers stumble. Timing is key to ensure your sourdough sandwich bread turns out fluffy, flavorful, and perfectly risen.
Here’s how to keep it on track:
- Watch the dough, not the clock. Your dough should rise noticeably but not necessarily double. Overproofed dough leads to a deflated loaf. Underproofed dough won’t have enough lift.
- Use the finger dent test. Gently press a floured finger into your dough before baking. If it springs back slowly and leaves a slight indent, it’s ready.
- Room temperature matters. Fermentation happens faster in warm kitchens (75–78°F). Cooler temps slow it down, which can work in your favor for deeper flavor during overnight proofing.
- Retard fermentation in the fridge. Placing your dough in the fridge overnight slows fermentation, enhances flavor, and makes scoring easier before baking.
Timing Reference:
| Stage | Time Range |
|---|---|
| Bulk Fermentation | 3–4 hours (room temp) |
| Cold Ferment | 8–12 hours (fridge) |
| Final Proof | 1–2 hours (room temp) |
Best Baking Tools for Even Rise and Crust
Using the right tools can take your sourdough sandwich loaf from “good” to bakery-quality.
Here are some essentials:
- Loaf pan (9×5) – For tall, sandwich-ready slices.
- Dough scraper – Helps with clean shaping and folding.
- Kitchen scale – For precise measurements. Consistency matters in baking.
- Thermometer – To check that your loaf hits the golden 200°F (93°C) inside.
- Lame or sharp blade – For clean scoring and controlled oven spring.
- Bench knife – Ideal for clean cuts and dough shaping.
- Steam – Place a pan of hot water on the bottom rack of your oven or spritz the loaf with water before baking for a softer crust.
Need something sweet after all that baking? Looking for inspiration? Try our Cookies and Cream Protein Cookies as a post-lunch treat.
With patience and the right gear, you’ll be slicing into picture-perfect sourdough sandwich loaves in no time.
Delicious Sourdough Sandwich Ideas
Best Fillings to Use on Sourdough
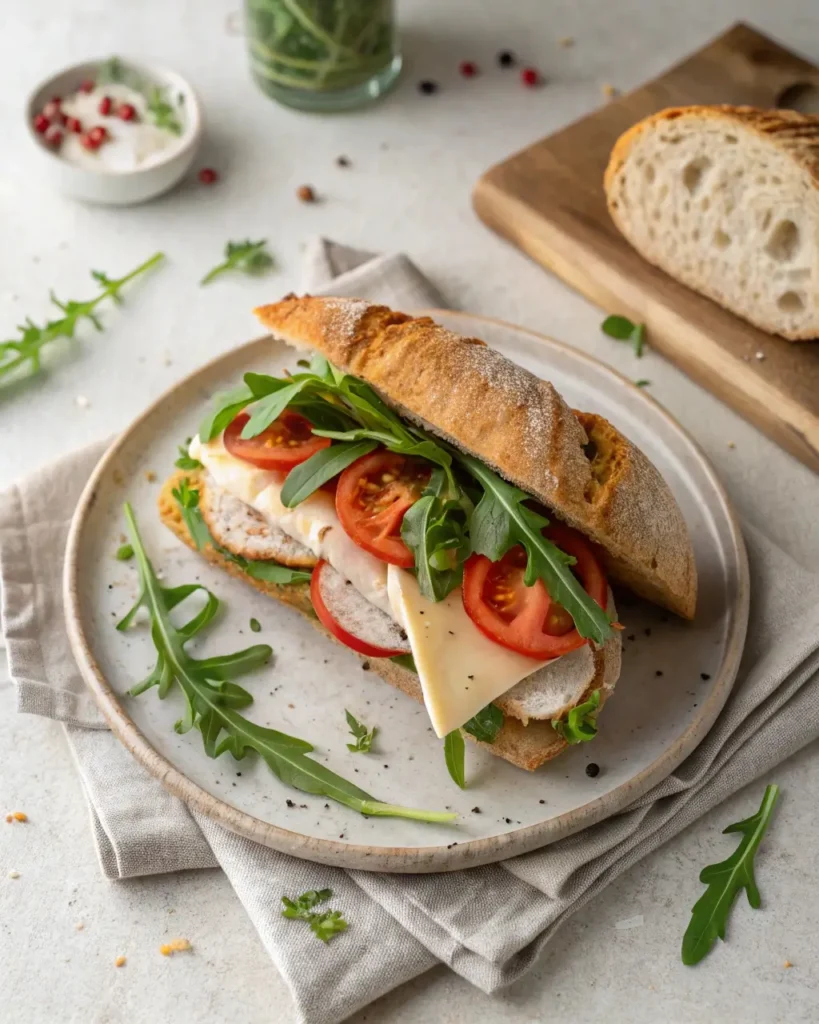
So, you’ve baked the perfect soft, tangy sourdough sandwich bread. Now the real fun begins: building sandwiches that are both mouthwatering and satisfying.
Thanks to its mild sour flavor and tender crumb, sourdough sandwich bread pairs beautifully with a wide variety of fillings. Whether you’re going classic or gourmet, the texture and flavor will hold up under layers of ingredients.
Here are a few timeless combos:
| Sandwich Idea | Key Ingredients |
|---|---|
| Turkey Avocado Melt | Roasted turkey, avocado, cheddar, tomato, arugula |
| Tuna Salad Crunch | Tuna, celery, pickles, mayo, romaine |
| Smoky Ham & Swiss | Black forest ham, Swiss cheese, Dijon mustard |
| Grilled Veggie Stack | Zucchini, eggplant, red pepper, hummus |
| Egg Salad Delight | Creamy egg salad, fresh dill, baby spinach |
| Caprese Twist | Mozzarella, tomato, basil, balsamic drizzle |
Pro Tip: Toast the bread lightly to lock in moisture and create a perfect base for toppings.
Vegetarian, Vegan, and Protein-Packed Combos
If you’re plant-based or just craving something meatless, sourdough sandwich bread still shines. Its strong structure supports hearty vegetables, spreads, and even warm fillings like roasted tofu or tempeh.
Here are some great combos across the board:
Vegetarian Favorites:
- Mushroom & Goat Cheese Melt – Roasted mushrooms, goat cheese, caramelized onions
- Chickpea Salad Sandwich – Mashed chickpeas, lemon, celery, tahini
- PB&B (Peanut Butter & Banana) – With a drizzle of honey and sprinkle of chia seeds
Vegan Power Plays:
- Avocado Smash with Sprouts – Avocado, lemon, sunflower sprouts, olive oil
- BBQ Tofu Delight – Sliced tofu, BBQ sauce, slaw, pickles
- Vegan Club – Vegan deli slices, lettuce, tomato, plant-based mayo
Protein-Packed Options:
- Grilled Chicken and Pesto – Chicken breast, pesto, spinach, provolone
- Roast Beef Kick – Thin roast beef, horseradish cream, arugula
- Salmon Patty Sandwich – Use our Salmon Patties Recipe for a bold, omega-rich lunch
Don’t forget the sides. Fresh fruit, pickles, or homemade chips round out the meal and make your sandwich experience truly satisfying.
Health Benefits of Eating Sourdough Sandwich Bread
Digestive Perks of Fermented Dough
One of the biggest reasons people are switching to sourdough—even in sandwich form—is its gut-friendly edge. Thanks to natural fermentation, sourdough sandwich bread offers more than just great flavor.
Here’s how sourdough helps digestion:
- Breaks down gluten: During the slow rise, wild yeast and bacteria start digesting gluten, making it easier for your body to tolerate—especially for those sensitive (but not allergic) to gluten.
- Reduces phytic acid: Fermentation lowers phytic acid, an antinutrient that blocks mineral absorption. That means your body absorbs more iron, zinc, and magnesium.
- Promotes better gut health: The prebiotics formed during fermentation feed good gut bacteria, supporting digestion and immunity.
- Lower glycemic impact: Sourdough’s fermentation slows sugar absorption, helping stabilize blood sugar levels compared to commercial white bread.
People who often feel bloated or heavy after eating standard bread often find sourdough sandwich bread easier on the stomach and more satisfying long term.
Comparing Nutritional Value with Regular Bread
Let’s compare sourdough sandwich bread to standard white or wheat sandwich bread. The difference might surprise you:
| Nutrient Benefit | Sourdough Sandwich Bread | Regular Sandwich Bread |
|---|---|---|
| Gluten Content | Lower due to fermentation | Higher, unfermented |
| Blood Sugar Response | Slower (low glycemic index) | Fast spike |
| Mineral Absorption | Higher (due to reduced phytates) | Lower |
| Flavor | Mildly tangy, complex | Often sweet or neutral |
| Shelf Life | Naturally longer (less mold) | Short unless preservatives |
| Artificial Additives | None (homemade) | Often includes additives |
Discover more recipes on our blog page to help you make better, healthier choices every day.
While sourdough bread may not be “calorie-free,” it packs more nutritional bang for every bite—especially when used in a smart, balanced sandwich. Plus, its hearty texture can leave you fuller longer, making it a wise choice for meal prepping or lunchboxes.
Cutting, Storing, and Freezing Sourdough Sandwich Bread
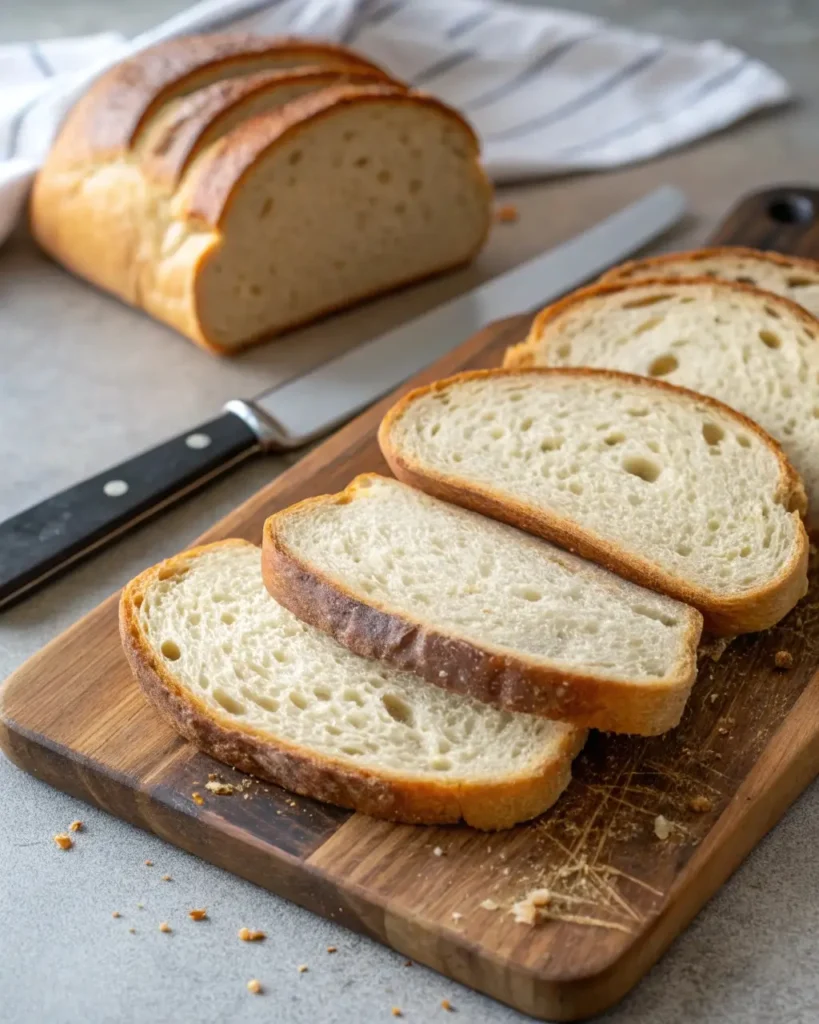
Best Way to Slice Without Crumbs
You just pulled your golden, soft sourdough sandwich bread from the oven. It smells amazing. But if you slice it too soon—or the wrong way—you might crush it or end up with crumb chaos.
Here’s how to get clean, even slices every time:
- Let it cool completely. It’s tempting, but cutting warm bread lets moisture escape and compresses the crumb. Cool on a wire rack for at least 1–2 hours.
- Use a serrated bread knife. This is your best tool for slicing sourdough without shredding the crust.
- Cut with a gentle sawing motion. No pressure—let the knife do the work.
- Flip the loaf upside down. If your crust is still firm, slicing from the bottom side helps get cleaner cuts.
If you plan to use slices for sandwiches all week, pre-slice the whole loaf and store it properly to maintain that soft texture.
Keeping Your Bread Fresh for Days
Homemade sourdough sandwich bread has no preservatives—so how do you keep it fresh without sacrificing flavor or structure?
Short-Term Storage (1–3 Days):
- Store in a bread bag, linen wrap, or beeswax wrap on the counter
- Avoid plastic unless it’s loosely sealed—traps moisture and can make the crust soggy
- Keep it away from direct sunlight and heat
Medium-Term (4–6 Days):
- Slice the loaf and store slices in a sealed freezer bag in the fridge
- Toast slices before eating to bring back flavor and texture
Long-Term (Up to 3 Months):
- Freeze slices with parchment between them in an airtight bag
- Toast or reheat straight from frozen—no need to thaw
Want to turn leftovers into something amazing? Cube stale slices for croutons or soak in eggs and milk for a killer sourdough French toast casserole.
Common Mistakes to Avoid in Sourdough Sandwich Bread
Flat Loaf? Here’s What Went Wrong
Few things are more disappointing than spending hours on your sourdough sandwich bread—only to have it come out flat, dense, or gummy. Don’t worry; most problems come from a few predictable missteps.
Here are some common causes of a flat loaf:
- Underdeveloped gluten: Not enough stretch and folds during bulk fermentation leads to poor structure. Your dough needs strength to rise tall.
- Weak or inactive starter: If your starter doesn’t double in size after feeding or fails the float test, it won’t lift your loaf.
- Overproofed dough: Dough that rises too long becomes too weak to hold its shape. It’ll spread out instead of rising up.
- Shaping mistakes: Not creating enough surface tension during shaping causes dough to collapse in the oven.
Fix it: Use a healthy, bubbly starter, handle your dough gently but firmly, and watch the rise closely—don’t go strictly by time.
Overproofing, Underproofing, and Other Pitfalls
Finding that “just right” proofing window is the most technical part of sourdough baking—and even experienced bakers mess it up sometimes.
Signs of Overproofing:
- Dough is overly puffy and full of air
- Feels fragile and sticky to handle
- Collapses when you score or bake it
- Loaf bakes up wide and flat, with no oven spring
Signs of Underproofing:
- Dough feels tight and resists shaping
- Crumb turns out gummy or overly dense
- Crust cracks in unpredictable places
- Tastes overly sour due to slow fermentation
Other common pitfalls:
- Baking too early: If your dough hasn’t risen enough in the final proof, you’ll get a compact loaf.
- Wrong hydration: Too much water in your dough makes shaping a nightmare and can lead to collapsed loaves. Too little, and your bread turns dry.
Final tip? Document your bakes. Keep track of timing, temp, hydration, and flour brands. One tiny change can transform your sourdough sandwich bread from decent to truly delicious.
FAQs About Sourdough Sandwich Bread
Can you use sourdough bread for sandwiches?
Yes, absolutely! Sourdough sandwich bread is specifically designed for that purpose. Unlike rustic sourdough with a thick crust and airy crumb, sandwich-style sourdough has a soft, sliceable texture and a mild tang—perfect for layering fillings like meats, cheeses, veggies, and spreads without falling apart.
What is the difference between sourdough bread and sourdough sandwich bread?
The main difference is in texture, shape, and usability. Traditional sourdough is often baked into crusty, artisan-style rounds, while sourdough sandwich bread is baked in a loaf pan with a softer crust and tighter crumb. This makes it easier to slice and ideal for sandwiches, toast, and packed lunches.
What to put on a sourdough sandwich?
The sky’s the limit. You can top your sourdough sandwich bread with classic combos like turkey and cheddar, tuna salad, or ham and Swiss. For plant-based options, try smashed avocado, roasted vegetables, hummus, or chickpea salad. The slightly tangy flavor of sourdough pairs beautifully with both savory and sweet ingredients.
Are sourdough sandwiches healthy?
Yes—especially when made with homemade or whole grain sourdough sandwich bread. The fermentation process reduces gluten and phytic acid, making nutrients more bioavailable. It also has a lower glycemic index than many commercial breads, helping stabilize blood sugar and keep you fuller longer.
When should you not eat sourdough bread?
Avoid eating sourdough bread if it shows signs of mold (green or white fuzzy spots), has a foul smell, or has been stored improperly. Also, while sourdough is more digestible than many breads, those with celiac disease should not consume it unless it’s made with certified gluten-free flours.
How do you cut sourdough bread for sandwiches?
To get clean, even slices of sourdough sandwich bread, let it cool completely first. Then, use a long serrated bread knife and a gentle sawing motion. Flip the loaf upside down for easier slicing, especially if the crust is firm. For consistent thickness, use a bread slicing guide.
Conclusion
Whether you’re a seasoned sourdough baker or just starting out, making your own sourdough sandwich bread is one of the most rewarding kitchen projects you can tackle. This soft, flavorful, and sliceable loaf strikes the perfect balance between taste and function—holding up to all your favorite fillings while offering real nutritional benefits.
From understanding the subtle differences between rustic and sandwich-style loaves, to choosing the right starter, mastering fermentation, and creating jaw-dropping sandwich combos—this guide has everything you need to bake confidently and deliciously.
So grab your starter, roll up your sleeves, and let the aroma of freshly baked sourdough fill your kitchen. Once you taste that first sandwich made with your own homemade sourdough bread, you’ll never go back.
PrintSourdough Sandwich Bread: The Best Guide for Soft, Flavorful Homemade Loaves
This soft sourdough sandwich bread is mildly tangy, easy to slice, and perfect for stacking your favorite fillings. Naturally leavened and baked in a loaf pan, it’s ideal for toast, sandwiches, or a healthy homemade lunch.
- Prep Time: 30 minutes (mixing + shaping)
- Cook Time: 40 minutes
- Total Time: 16–18 hours (includes overnight fermentation)
- Yield: 1 loaf (12–14 slices)
- Category: Bread
- Method: Baking, Fermentation
- Cuisine: American, European
- Diet: Vegetarian
Ingredients
- 100g active sourdough starter (fed and bubbly)
- 400g bread flour
- 250ml warm milk (or water for dairy-free)
- 1 tbsp honey (or sugar)
- 8g salt
- 30g softened butter (or olive oil for dairy-free)
Optional:
- 1 tbsp olive oil (for softer crumb)
- Whole wheat flour (swap up to 20%)
- Seeds for topping (sunflower, sesame, flax)
Instructions
Mix the Dough (Night Before):
Combine flour, milk, honey, and sourdough starter in a large bowl. Let rest 30 minutes. Add salt and softened butter, then mix well and perform several stretch-and-folds to build structure.
Bulk Fermentation:
Let dough rest at room temperature for 3–4 hours, performing a stretch and fold every 30 minutes for the first 2 hours. Dough should puff slightly.
Cold Proof:
Shape dough into a log and transfer to a greased 9×5-inch loaf pan. Cover and refrigerate overnight (8–12 hours).
Final Proof (Next Day):
Remove loaf from fridge and let sit at room temp 1–2 hours until dough crowns above the rim of the pan.
Bake:
Preheat oven to 375°F (190°C). Lightly score the top of the loaf and bake for 35–40 minutes or until golden brown and the internal temperature reaches 200°F (93°C).
Cool and Slice:
Let loaf cool in pan for 10 minutes, then transfer to wire rack. Slice when fully cool using a serrated knife.
Notes
- For stronger flavor: Let starter ferment longer or increase cold proof to 16 hours.
- Dairy-Free: Use water and olive oil instead of milk and butter.
- Freezing: Slice and store in airtight freezer bag. Toast straight from frozen.
- Serving Ideas: Pairs well with turkey, avocado, hummus, or grilled veggies.