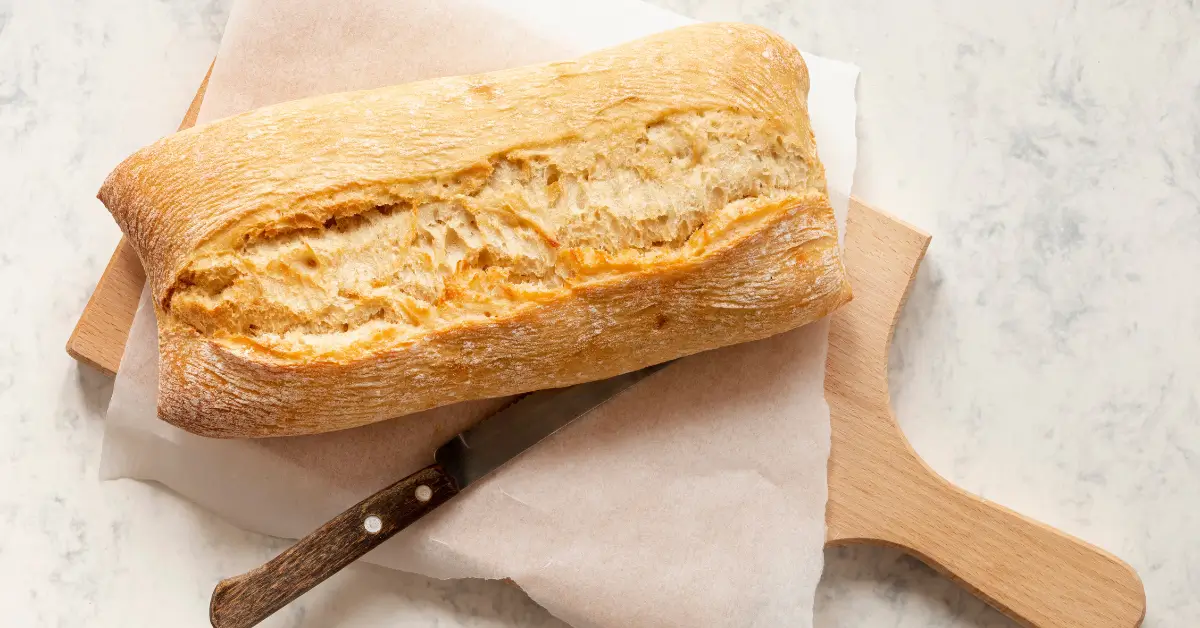
Nothing beats the aroma of freshly baked sourdough wafting through your kitchen—but even the best sourdough recipe can fall flat without the right pan. Choosing the ideal sourdough loaf pan isn’t just about looks or convenience. It directly impacts your crust, crumb, and overall baking success.
In this ultimate guide, we’ll break down the types of pans best suited for sourdough, how to adjust baking times and temperatures, and what common mistakes to avoid. You’ll learn the science behind baking sourdough in metal versus glass pans, and even discover the best storage containers to keep your homemade bread fresh and crusty.
Don’t miss our tips on soft & chewy cookies that might surprise you if you’re into baking sweet treats too!
Why the Right Sourdough Loaf Pan Matters
What Makes a Pan Ideal for Sourdough Baking?
Not all pans are created equal—especially when it comes to baking sourdough. The best sourdough loaf pan distributes heat evenly, supports oven spring (that dramatic rise during the first 10 minutes of baking), and creates a crust that’s golden, crisp, and just the right thickness.
Key factors that make a pan ideal for sourdough:
- Material: Cast iron retains heat well, glass offers visibility, metal conducts heat fast.
- Shape: Straight sides offer better rise, while rounded corners can reduce loaf volume.
- Depth: A deeper pan prevents overflowing and supports taller loaves.
A poor-quality pan or one made with thin aluminum may lead to uneven baking, soggy bottoms, or collapsed tops—issues no sourdough baker wants to face.
Impact of Pan Shape and Material on Crust and Crumb
The shape and material of your loaf pan can dramatically change the outcome of your bread. Want a chewy interior with a bold crust? Or are you going for a softer bite and a more uniform shape? Here’s how pan elements affect your final result:
| Pan Feature | Effect on Bread |
|---|---|
| Heavy cast iron | Excellent crust, deep oven spring |
| Light aluminum | Quick baking, light crust |
| Glass pan | Softer crust, slower heat-up |
| Tall, narrow | Taller loaf, less spread |
| Wide, shallow | Flatter loaf, more crust surface |
If you’re aiming for rustic, bakery-style sourdough, a cast iron loaf pan or enamel-coated steel is your best bet. But if you’re baking for sandwiches or daily slicing, a non-stick metal pan might give you better uniformity.
Discover great ideas like making mango mousse effortlessly at home while waiting for your sourdough to bake.
Types of Loaf Pans for Sourdough
Metal, Glass, Ceramic, and Cast Iron Compared
Choosing the right sourdough loaf pan depends heavily on the material it’s made from. Each material comes with unique benefits and drawbacks, especially when it comes to baking sourdough—which needs stable heat, consistent structure, and room for steam.
Here’s a breakdown of the most common loaf pan materials:
1. Metal Pans
- Pros: Quick heat conduction, crisp crust, light loaf color
- Cons: Can overbrown if not monitored closely, thinner metal may warp
Ideal for bakers who want fast and consistent bakes. Aluminum and carbon steel are the most common.
2. Glass Pans
- Pros: Easy to monitor browning, doesn’t react with acidic dough
- Cons: Slower to heat up, soft crust, may require longer bake time
Great for those who like to visually track their bake—but expect a slightly softer crust compared to metal or cast iron.
3. Ceramic Pans
- Pros: Holds heat well, beautiful presentation, evenly bakes
- Cons: Fragile, heavy, may crack with thermal shock
These are perfect for serving and aesthetics, though they require careful handling and longer preheating.
4. Cast Iron Loaf Pans
- Pros: Incredible heat retention, deep oven spring, artisan crust
- Cons: Heavy, requires seasoning (unless enameled), slow to cool
Cast iron is a favorite among serious sourdough bakers looking for that bakery-style finish. Enamel-coated cast iron adds beauty without the need to season.
Pros and Cons of Each Material for Sourdough
To help you decide, here’s a simple comparison table to guide your choice based on your baking goals:
| Material | Heat Conductivity | Crust Texture | Ease of Use | Durability | Best For |
|---|---|---|---|---|---|
| Metal | Fast | Crisp | Easy | Medium | Everyday sourdough |
| Glass | Slow | Soft | Moderate | Medium | Beginners, visual baking |
| Ceramic | Moderate | Even | Moderate | Low | Stylish presentation |
| Cast Iron | Excellent | Artisan-quality | Advanced | Very High | Serious sourdough bakers |
Check out how to make Chick-fil-A sauce at home for a dipping side while your sourdough bakes!
Best Sourdough Loaf Pan Sizes & Dimensions
Standard Loaf Pan Sizes for Sourdough
Getting the right pan size for your sourdough loaf is just as crucial as choosing the right flour or hydration level. Using a pan that’s too small can cause overflow and a dense texture. Too large? Your loaf might spread flat instead of rising tall.
Here are the standard loaf pan sizes and their sourdough suitability:
| Pan Size | Volume | Ideal Dough Weight | Best For |
|---|---|---|---|
| 8.5″ x 4.5″ (Small) | ~6 cups | 400–500g | Smaller loaves, sandwich bread |
| 9″ x 5″ (Medium) | ~8 cups | 500–700g | Standard sourdough loaves |
| 10″ x 5″ (Large) | ~10 cups | 750–900g | High hydration or large loaves |
Most home bakers go for the 9″ x 5″ pan, as it offers the perfect balance between crust and crumb for a classic artisan-style sourdough.
How Size Impacts Rise, Crust, and Baking Time
Size isn’t just a matter of how much dough you can fit in—it directly affects the bake time, structure, and final flavor of your sourdough bread.
Here’s how:
- Smaller pans: Promote vertical rise, resulting in a taller, tighter crumb. May require slightly shorter baking time.
- Wider pans: Lead to flatter loaves with more surface area for crust development. More airflow, more crunch.
- Deeper pans: Ideal for wetter doughs or enriched sourdough that need side support during oven spring.
Pro Tip: Always weigh your dough before shaping. If you’re working with 750g of dough, aim for a pan that holds 9–10 cups. This ensures even rise and prevents overflow.
Looking for inspiration? Try our lesser-known page about Oatmeal Brownies at this delicious chewy treat for your next baking challenge.
Top-Rated Sourdough Loaf Pans in 2025
Review of Best Loaf Pans for Sourdough Available Now
Here are some of the best loaf pans currently favored by sourdough bakers across the web in 2025. We selected them based on durability, crust results, heat distribution, customer satisfaction, and of course, their popularity among real sourdough enthusiasts.
1. USA Pan Bakeware Aluminized Steel Loaf Pan (9″ x 5″)
- Material: Heavy-gauge aluminized steel
- Coating: Americoat non-stick silicone
- Why Bakers Love It: Even browning, no sticking, and warp-resistant
- Great For: Beginner to intermediate sourdough bakers
2. Lodge Cast Iron Loaf Pan
- Material: Pre-seasoned cast iron
- Crust Results: Exceptional artisan-style crust
- Durability: Practically indestructible
- Great For: Advanced bakers wanting professional results
3. Emile Henry Ceramic Loaf Pan
- Material: High-fired Burgundy clay
- Baking Style: Gentle, even baking
- Pros: Beautiful design, great heat retention
- Great For: Soft sourdough loaves, enriched doughs
4. OXO Good Grips Non-Stick Pro Loaf Pan
- Material: Commercial-grade aluminized steel
- Bonus Features: Micro-textured surface for airflow
- Great For: Clean release, consistent browning
5. Pyrex Glass Loaf Dish
- Material: Tempered glass
- Baking Style: Slower, softer bake
- Watch Outs: Requires longer preheat and cool-down times
All of these pans are highly rated on platforms like Amazon and Sur La Table, and they’re ideal for specific styles of sourdough, from rustic to sandwich-style.
Customer Favorites and Amazon Bestsellers
If you’re curious what other bakers are loving, here are the top 3 Amazon bestsellers in the sourdough loaf category:
| Pan Name | Avg. Rating | Standout Feature |
|---|---|---|
| USA Pan Aluminized Steel | ★★★★★ 4.9 | Silicone non-stick & commercial build |
| Lodge Cast Iron Pan | ★★★★★ 4.8 | Unmatched heat retention & crust |
| Emile Henry Ceramic Pan | ★★★★☆ 4.7 | Elegant design + even heat |
Don’t miss our Creamy Cottage Cheese Cookies if you’re looking for a soft snack to contrast that crunchy sourdough crust.
How to Bake Sourdough in a Loaf Pan
Step-by-Step Sourdough Loaf Pan Baking Instructions
Baking sourdough in a loaf pan isn’t that different from using a Dutch oven—but the techniques shift slightly to help the dough rise evenly and get a good crust. Here’s your step-by-step guide:
Step 1: Prepare Your Dough
Use your favorite sourdough recipe with 65–75% hydration. Higher hydration works best in pans with deeper sides to support the dough during oven spring.
Step 2: Bulk Fermentation & Shaping
Once your dough has doubled during bulk fermentation, gently shape it into a log to match your loaf pan. Avoid deflating the dough.
Step 3: Proof in the Pan
Place your shaped dough into a greased or parchment-lined loaf pan. Cover loosely and let it rise until it passes the “poke test”—an indent should spring back slowly.
Step 4: Score the Top
Use a sharp blade or lame to create a shallow slash along the top. This helps control the rise and prevents tearing in awkward places.
Step 5: Bake with Steam
Preheat your oven to 450°F (or 475°F for crustier results). Place a tray of boiling water on the bottom rack to create steam, or mist the inside of the oven before closing the door.
Bake Time:
- 450°F → ~35–40 minutes
- 475°F → ~30–35 minutes
Remove from the pan during the last 5–10 minutes and bake directly on the rack for a crispier bottom.
Step 6: Cool Completely
Let your sourdough cool on a wire rack for at least 1 hour before slicing. This sets the crumb and prevents gummy texture.
Adjusting Your Recipe for a Pan Instead of a Dutch Oven
Switching from Dutch oven to loaf pan? Here’s what you need to tweak:
| Element | Dutch Oven | Loaf Pan |
|---|---|---|
| Steam control | Self-contained lid | Use water tray or spray |
| Shape | Round or boule | Rectangular loaf |
| Oven spring | Strong from sealed heat | Moderate; needs scoring |
| Crust development | Thick & rustic | Crisp to medium, depending on temp |
Looking for more creativity? Try our orphan internal link: Creamy Cottage Cheese Brownies at this unexpected but tasty twist while your sourdough is cooling.
Tips for Better Sourdough Baking in Loaf Pans
Common Mistakes to Avoid When Using Loaf Pans
Even experienced bakers can run into problems with sourdough. Here are the most common loaf pan blunders—and how to fix them.
1. Overproofing the Dough in the Pan
- What Happens: Dough collapses or bakes flat.
- Solution: Use the poke test or watch for dough rising just ½ inch above the pan rim.
2. Not Greasing or Lining the Pan
- What Happens: Your beautiful loaf sticks and tears when you try to remove it.
- Solution: Use parchment paper or apply a light oil coating—even for non-stick pans.
3. Wrong Pan Size
- What Happens: Dough spills over or turns into a flat pancake.
- Solution: Match your dough weight to the pan’s volume (see Part 3 sizing chart).
4. Skipping the Steam
- What Happens: Dry crust forms too early, blocking proper oven spring.
- Solution: Add a tray of boiling water to the oven bottom or mist the sides after closing the door.
5. Baking Too Cold or Too Hot
- What Happens: Underbaked center or burnt crust.
- Solution: Stick with 450°F–475°F and adjust based on pan material.
Preheating, Lining, and Steam Techniques for Perfect Crust
Want a crisp, golden crust with a soft interior? Here’s how to master the three key elements: preheat, line, and steam.
1. Preheating
Always preheat your oven for at least 30 minutes, especially if you’re using ceramic or cast iron pans. This ensures even baking from the get-go.
2. Lining the Pan
Use parchment paper for:
- Easy release
- Even heat exposure
- Reduced cleanup
Cut a strip slightly longer than the pan so you can lift the bread out easily.
3. Adding Steam
Steam slows crust formation in the first 10 minutes, allowing full oven spring. Here are 3 easy ways to add steam:
- Boiling water tray: Place a cast iron or metal tray on the lower rack and pour in boiling water as you put the bread in.
- Oven misting: Use a spray bottle to mist the oven walls quickly before closing the door.
- Ice cubes in a hot tray: Quick and easy—drop 3–5 ice cubes in a hot tray for instant steam.
Discover more cozy ideas like Over Medium Eggs for breakfast to pair with your fresh sourdough slice.
Glass vs. Metal – Which Is Better for Sourdough?
Heat Distribution and Texture Comparison
When it comes to baking sourdough in a loaf pan, the material matters just as much as the recipe. Metal and glass are two of the most common pan options—but they behave very differently in the oven.
Let’s break down how each affects the final texture of your sourdough bread:
Metal Loaf Pans
- Heat Conductivity: Fast and consistent. Heats up quickly and bakes evenly.
- Crust Result: Crisp, golden crust with good structure.
- Browning: Stronger browning on sides and bottom.
- Great For: Bakers who like bold, crunchy crusts and a quicker bake.
Glass Loaf Pans
- Heat Conductivity: Slower than metal. Takes longer to preheat and cool.
- Crust Result: Softer and lighter-colored crust.
- Browning: Less bottom crust development; sides may be paler.
- Great For: Beginners or those preferring a tender loaf with a soft edge.
Important Note: If you’re using a glass pan, reduce your baking temperature by about 25°F to avoid over-browning the outside before the center is done.
When to Choose Glass and When to Choose Metal
So, which pan should you use?
Here’s a quick guide to help you decide:
| Use This If… | Choose Metal | Choose Glass |
|---|---|---|
| You want a crusty, golden exterior | ✅ Yes | ❌ |
| You’re baking high-hydration sourdough | ✅ Yes | ❌ |
| You prefer a softer, sandwich-style loaf | ❌ | ✅ Yes |
| You like to see your loaf baking in real time | ❌ | ✅ Yes |
| You want a faster bake time | ✅ Yes | ❌ |
| You’re using enriched or sweet sourdough (e.g., cinnamon) | ✅ Optional | ✅ Yes |
Still unsure? Many bakers keep both types of pans around. Use metal when you want that crunchy artisan edge and glass when you’re baking soft, enriched loaves or trying a new recipe and want to monitor the rise and browning.
How Temperature Affects Sourdough Bread in Loaf Pans
Ideal Baking Temperature: 450°F vs. 475°F
One of the most common sourdough questions is:
“Should I bake at 450 or 475 degrees?”
The answer depends on what type of pan you’re using—and the results you’re looking for.
Here’s how both temperatures play out in a loaf pan setting:
🔹 Baking at 450°F:
- Best For: Glass or ceramic pans, enriched doughs
- Bake Time: 35–45 minutes
- Crust: Softer, thinner, even browning
- Interior: Moist and tender crumb
🔹 Baking at 475°F:
- Best For: Cast iron or metal pans, high hydration doughs
- Bake Time: 30–35 minutes
- Crust: Bold, deep-golden, blistered finish
- Interior: More open crumb, rustic feel
Pro Tip: Always preheat your oven for at least 30 minutes. Consistent heat is key to achieving that bakery-style oven spring.
How Pan Material Affects Heat Retention
Different pans respond to heat in unique ways. If you use the same temperature for a glass and cast iron pan, your bread will bake very differently.
Here’s a side-by-side of how heat retention changes based on pan material:
| Pan Type | Heat-Up Time | Heat Retention | Best Bake Temp | Crust Result |
|---|---|---|---|---|
| Metal | Fast | Medium | 450–475°F | Crispy and caramelized |
| Glass | Slow | Low | 425–450°F | Pale, tender, soft crust |
| Cast Iron | Slow | High | 475°F | Deep-brown, artisan crust |
| Ceramic | Moderate | Medium-High | 450°F | Even, softer edge crust |
Baking Tip: If you’re switching pan materials, always adjust your bake time or temp by ± 10–15% to prevent undercooked centers or burned bottoms.
Don’t miss our Almond Extract Cookie Tips if you’re craving a sweet bite after your sourdough session.
Best Storage Containers for Sourdough Loaves
Storing Baked Bread for Freshness and Crust
After baking the perfect loaf in your favorite sourdough loaf pan, the next big step is storage. Leave it out too long, and it dries. Seal it wrong, and that lovely crust turns chewy.
Here’s how to keep your sourdough fresher for longer:
✅ Day 1–2: Room Temperature Storage
- Best Method: Wrap loosely in a clean tea towel or linen bag
- Why It Works: Allows moisture to escape, keeping the crust crisp
- Avoid: Plastic bags—they trap steam and soften the crust
✅ Day 3–4: Partial Loaf Storage
- Best Method: Cut-side down on a wooden cutting board, covered with a cloth
- Why It Works: The exposed crust stays crisp; interior stays moist
✅ After Day 4: Freezing
- Best Method: Slice the bread, wrap tightly in plastic wrap + foil, and freeze
- To Use: Toast directly from frozen or let slices come to room temp
Recommended Bread Boxes, Linen Bags, and Airtight Options
Looking to upgrade your sourdough storage? Here are some pro-recommended tools to help:
| Storage Tool | Best For | Pros | Where to Find It |
|---|---|---|---|
| Linen Bread Bag | Daily storage | Breathable, keeps crust crisp | Bakeries, Etsy, Amazon |
| Wooden Bread Box | Countertop, 2–4 day storage | Maintains airflow, shields from light | Home goods stores |
| Glass Airtight Box | Freezer or long-term storage | Prevents freezer burn, reusable | IKEA, Target, online |
| Beeswax Wrap | Eco-friendly short-term wrap | Moldable, reusable, crust-safe | Whole Foods, Amazon |
Looking for inspiration? Try our orphan-style internal link about How Many Quesadillas Should a Preadolescent Eat if you’re planning meals beyond bread.
FAQs: Sourdough Loaf Pan Baking Questions Answered
What is the best pan to bake a sourdough loaf in?
The best pan to bake sourdough in depends on the crust you want. Cast iron loaf pans are ideal for a bakery-style crust thanks to superior heat retention. For easy handling and even results, aluminized steel pans like USA Pan are a top choice among home bakers. Glass pans work, too, but they tend to produce a softer crust and longer bake time.
Can I bake my sourdough in a loaf pan?
Absolutely. You can bake sourdough in a loaf pan instead of a Dutch oven. It gives the bread a uniform shape—great for slicing—and requires only a few small adjustments to recipe timing and steam. Just be sure your dough weight matches the pan size to prevent overflow or flattening.
Do you bake sourdough at 450 or 475?
Both are valid, depending on your pan material and desired crust. Bake at 450°F if you’re using glass, ceramic, or want a softer finish. Use 475°F for metal or cast iron pans and if you prefer a bold, crisp crust. Always preheat and watch closely during the final 10 minutes.
Is glass or metal better for sourdough bread?
Metal pans generally give better results for sourdough. They heat up faster, produce a crispier crust, and bake more evenly. Glass pans are slower to heat, which leads to a softer, lighter crust—fine for tender loaves or beginners, but less ideal for artisan-style results.
What not to do when making sourdough bread?
Avoid these common sourdough mistakes:
Overproofing your dough in the pan
Using the wrong size pan
Skipping steam during the first 10 minutes of baking
Slicing too soon after baking
Not weighing ingredients properly
These missteps can affect everything from the crust to crumb structure.
What is the best container for sourdough?
For proofing, the best container is a Banneton basket or a bowl lined with a floured towel. For storing baked sourdough, use a linen bag, wooden bread box, or beeswax wrap. Avoid plastic unless freezing, as it softens the crust and traps unwanted moisture.
Sourdough Loaf Pan: The Key to Achieving a Perfect Sandwich Loaf

Learn how to bake the perfect sourdough sandwich loaf with this detailed guide. From choosing the right loaf pan to step-by-step instructions, this recipe ensures a soft, airy crumb and a beautifully domed crust. Perfect for beginners and seasoned bakers alike!
- Prep Time: 30 minutes
- Cook Time: 35 minutes
- Total Time: 1 hour 5 minutes
- Yield: 1 loaf
- Category: Bread
- Method: Baking
- Cuisine: American
- Diet: Vegetarian
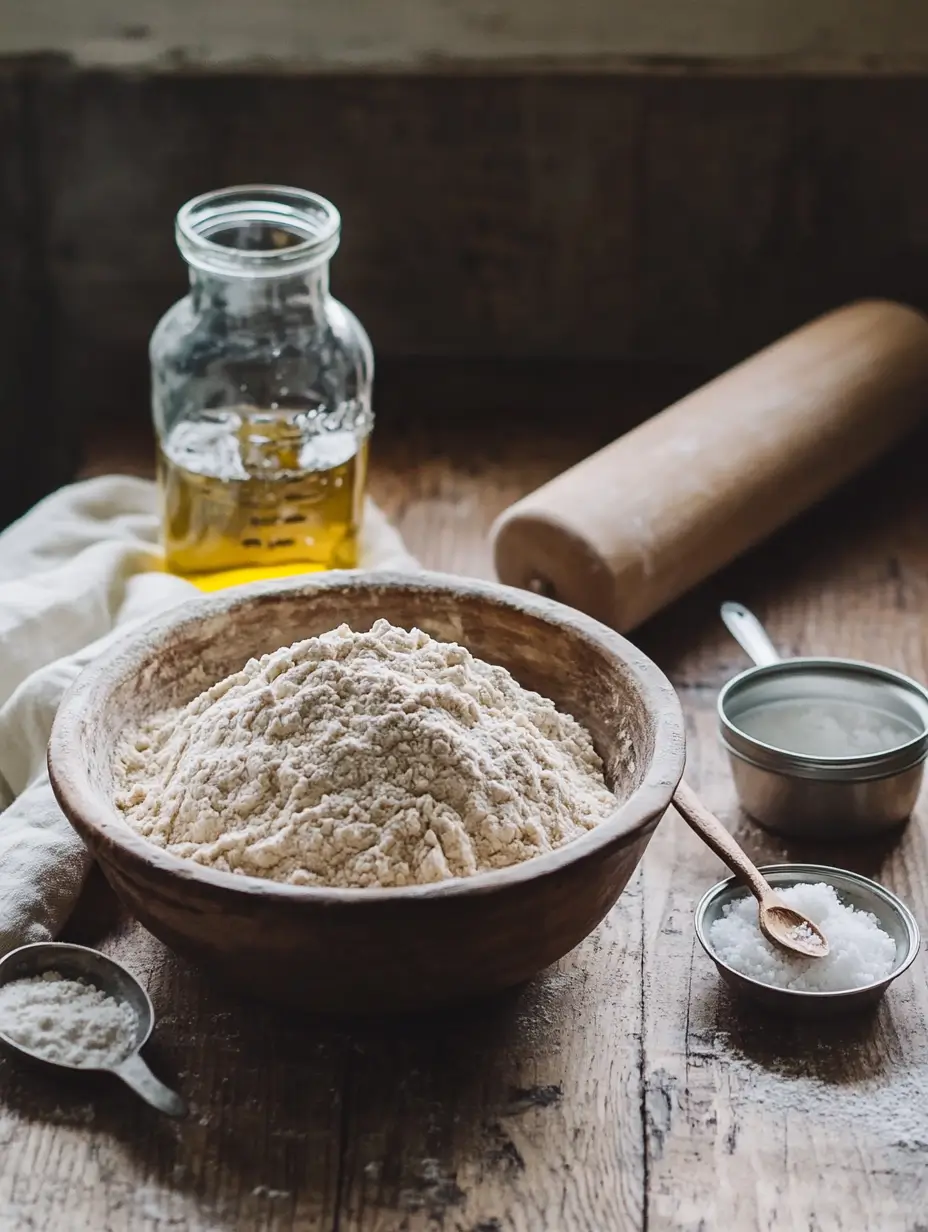
Ingredients
- 500g bread flour
- 100g active sourdough starter
- 300ml water
- 10g salt
- 1 tbsp olive oil
Instructions
- Mix the Dough: Combine the flour, water, and starter in a large bowl. Mix until no dry spots remain, then let it rest for 30 minutes (autolyse).
- Add Salt and Knead: Sprinkle salt over the dough and knead until smooth and elastic. Use the stretch-and-fold method if preferred.
- First Rise: Cover and let the dough rise in a warm place until it doubles in size (4-6 hours).
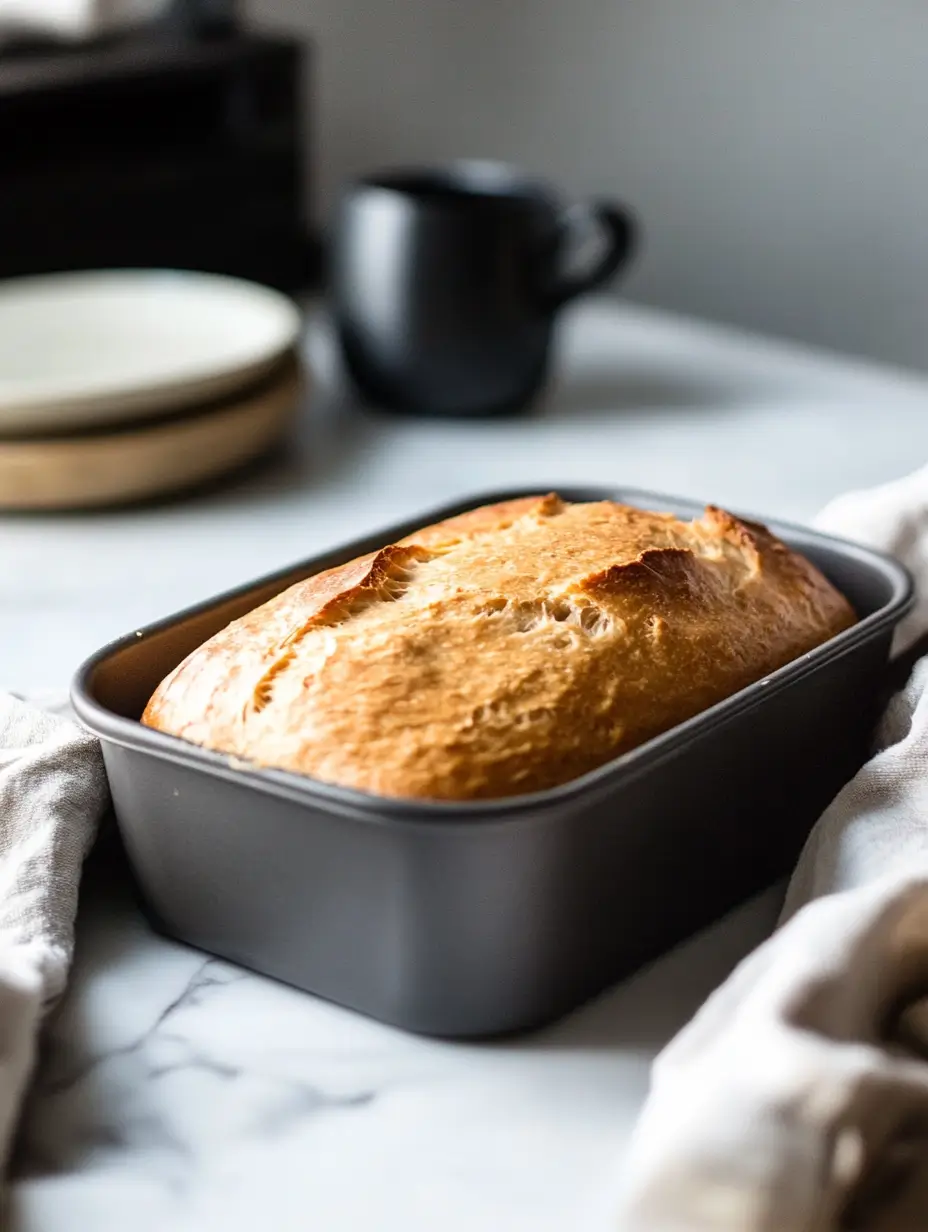
- Shape the Dough: Gently shape the dough into a rectangle and place it into a greased or lined sourdough loaf pan.
- Second Rise: Let the dough rise again until it reaches just below the rim of the pan.
- Bake: Preheat the oven to 375°F (190°C). Bake for 30-35 minutes, removing the lid halfway through if using a lidded pan.
Notes
- Choosing the Pan: Use a high-quality cast iron, ceramic, or non-stick pan for the best results.
- Troubleshooting: If your loaf is dense, ensure your starter is active and the dough is properly kneaded. Use parchment paper or thorough greasing to prevent sticking.
- Steam: Lidded pans help trap steam, crucial for a tender crumb and a smooth, golden crust.